First steps
User Data
- Responsive Email Editor Review
- Designing your email
- Creating Synchronized Modules
- Setting Up Responsive Email Design
- Setting Up Smart Containers
- Creating a Gmail Promotions Annotation
- Adding The Rollover Effect
- Adding Anchor Links
- Module Library
- Adding a Table to an Email
- Adding Custom Fonts
- Creating CTA Button
- Working with Images
- Creating Timer
- Using AI in the Email Editor
- Messenger Protocol Support in Email Clients and Platforms
Omnichannel
- SDK for Mobile Apps
- Managing Mobile SDK Access Keys
- Connecting Mobile App
- Creating and Uploading a Firebase Key
- Creating Mobile Push Messages
- Setting Up Delivery and Clicks Analytics
- Deep Link Types
- Scheduled Mobile Push Message
- Sending Test Messages from the Event Debug View
- Error Codes for Mob Push Notifications
- Setting Up Widgets for Your Site
- Widgets Gamification
- Widget Calling
- Setting Up Locations for the Widget Calling Rules
- Storing data from widgets to contact fields
- Using Annoyance Safeguard
- Actions After Subscription
- Replacing Double Opt-In System Workflow
- Creating Pop-ups via Google Tag Manager or WordPress
- Sending Yespo Widget Events to Google Analytics
- Using A/B Tests for Widgets
- Collecting Contact Information Using Request Forms
Automation
- Building and Editing Workflows
- Configuring Workflow Start/Stop Conditions
- Start Block
- Popular Blocks
- Message Blocks
- Using One from Many Message Block
- Contact Blocks
- Conditions Blocks
- Other Blocks
- Message to Segment Blocks
- Time Blocks
- Advanced Workflow Block Parameters
- Setting Up Allowed Send Time
- Using Workflow Launch History
- Webhook Workflows
- Workflow Troubleshooting
- Double Opt-In
- Welcome Сampaign
- Welcome Series Segmented by Category
- Launching a Workflow After a Contact Import
- Regular Workflow for a Segment
- Birthday Campaign
- Linking Workflow to the Button
- Using Variables from Order in Workflow
- Collecting Order Feedback
- Customer Reactivation
- Using A/B Tests In Workflows
- Sending Extra Campaigns
- Sending Reminders at the Time Specified by the User
- Sending Campaign to Those Who Did Not Open the Previous One
Personalization
Analytics
- Email Campaign Report
- Web Push Campaign Report
- Viber Campaign Report
- Mobile Push Campaign Report
- App Inbox Campaign Report
- Telegram Campaign Report
- In-App Report
- Widget Report
- Triggered Campaign Report
- AMP Campaign Report
- SMS Campaign Report
- Multilingual Campaign Report
- Setting up UTM Tags
- Revenue from Campaigns
- Tracking Campaign Performance in Google Analytics 4
- Message Analytics
Multilanguage Campaigns
Events and Behaviour Tracking
Recommendations
API
Security and Compliance
Domain Warm-up
After changing the DNS record, warm up the domain. This is the next step in improving sender reputation.
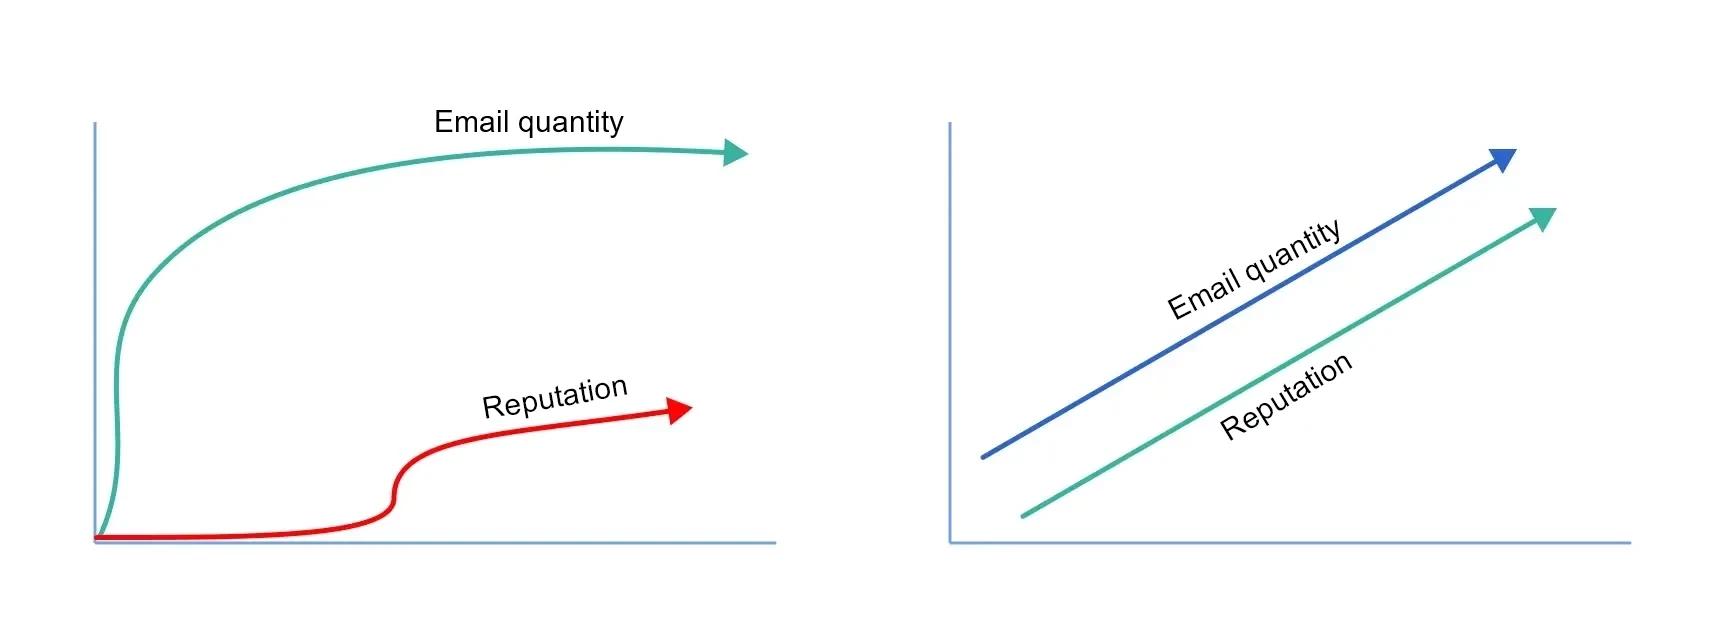
Domain warm-up is the gradual increase in the number of emails sent from a new domain to establish trust with email service providers (such as Gmail, Outlook, etc.) and avoid being flagged as spam.

Yespo automatically warms up the domain for clients who have verified it.
Domain Warm-up
Let's consider how the process is organized and how many days are required for domain warm-up. For example, let's take sending 100,000 messages per day.
Create an email and launch a campaign:
-
First day campaign. On the first day with a new domain, you can send up to 1000 emails; otherwise, the campaign may raise suspicions on email servers. Yespo will send the first 1000 emails, signing them with your DKIM, and the remaining 99,000 emails with the Yespo domain signature.
-
Second day campaign. On the second day, Yespo will send 2000 emails with your DKIM and 98,000 with the Yespo domain signature, and so on.
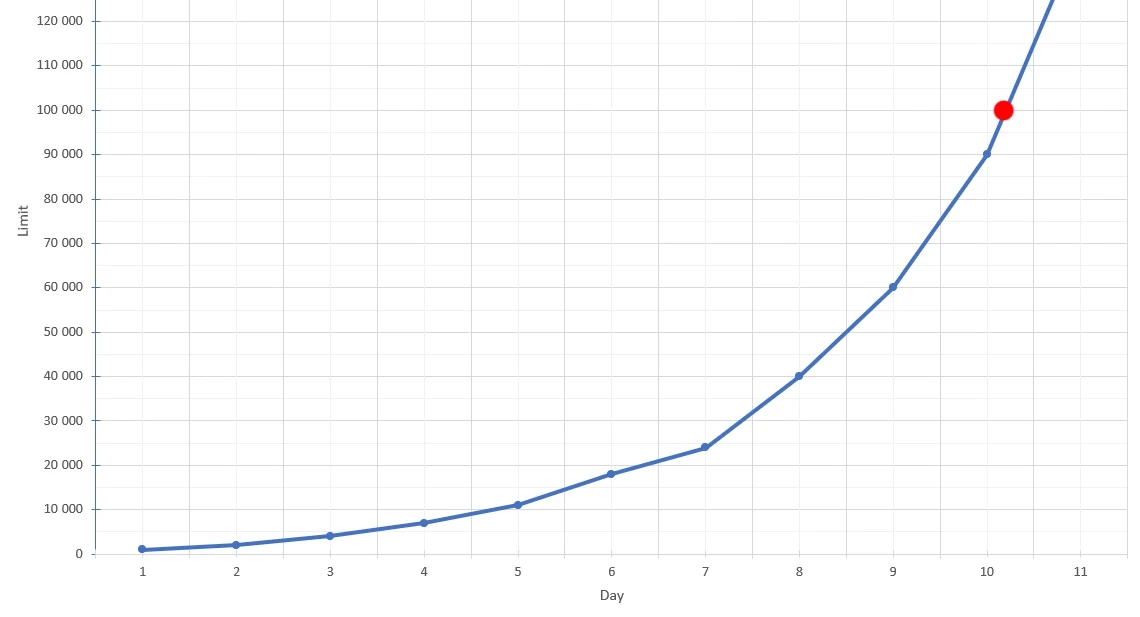
Below is a table calculated for 25 days with a daily sending limit.
| Day | Sending limit |
|---|---|
| 1 | 1000 |
| 2 | 2000 |
| 3 | 4000 |
| 4 | 7000 |
| 5 | 11000 |
| 6 | 18000 |
| 7 | 24000 |
| 8 | 40000 |
| 9 | 60000 |
| 10 | 90000 |
| 11 | 140000 |
| 12 | 180000 |
| 13 | 220000 |
| 14 | 300000 |
| 15 | 500000 |
| 16 | 650000 |
| 17 | 800000 |
| 18 | 1000000 |
| 19 | 12000000 |
| 20 | 15000000 |
| 21 | 17000000 |
| 22 | 19000000 |
| 23 | 21000000 |
| 24 | 23000000 |
| 25 | 25000000 |
| 26 | unlimited |
Note
The limits are the same for all campaigns, including trigger-based ones.
Yespo's DKIM will sign each campaign regardless of the customer's domain. Initially, most emails will be sent with the Yespo signature, and then the number of emails sent with your domain signature will gradually increase.
When the new domain's warm-up reaches the required level, all emails will be sent with two DKIM signatures—yours and Yespo's.
In our example, with a daily sending limit of 100,000, it takes 11 days to warm up the domain.

Checking the Sending Limit
There are two statuses of the daily sending limit:
-
Not reached
-
Has been reached/Has been reached for some domains
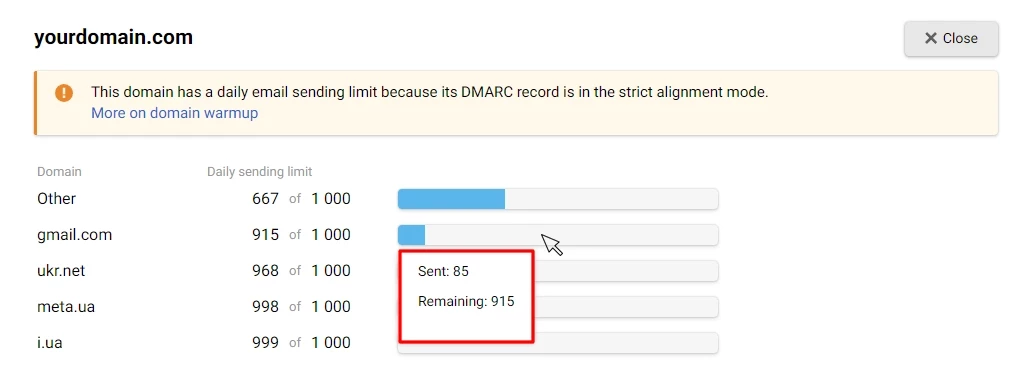
Go to Settings → Domain verification and click Daily sending limit to view your daily sending limits.

The Sending Limit Has Not Been Reached

Hover over the progress bar next to the domain name, and a tooltip will appear showing the number of messages sent and the remaining messages.

The Sending Limit Has Been Reached

Domains that have reached daily limits are displayed in a separate list.

Note
Warm-up data is refreshed every day at 00:00
If your domain has no strict DMARC policy, sending limit restrictions will not be displayed in your account. In that case, please contact our technical support to get information about warm-up.
Sending Limit
A separate case worth noting is when a strict DMARC policy is enforced — a limit on the number of emails the domain owner sends.
In DMARC settings, one of the following values may be specified:
-
none — takes no action on the email,
-
quarantine — places the email in spam,
-
reject — rejects the email.
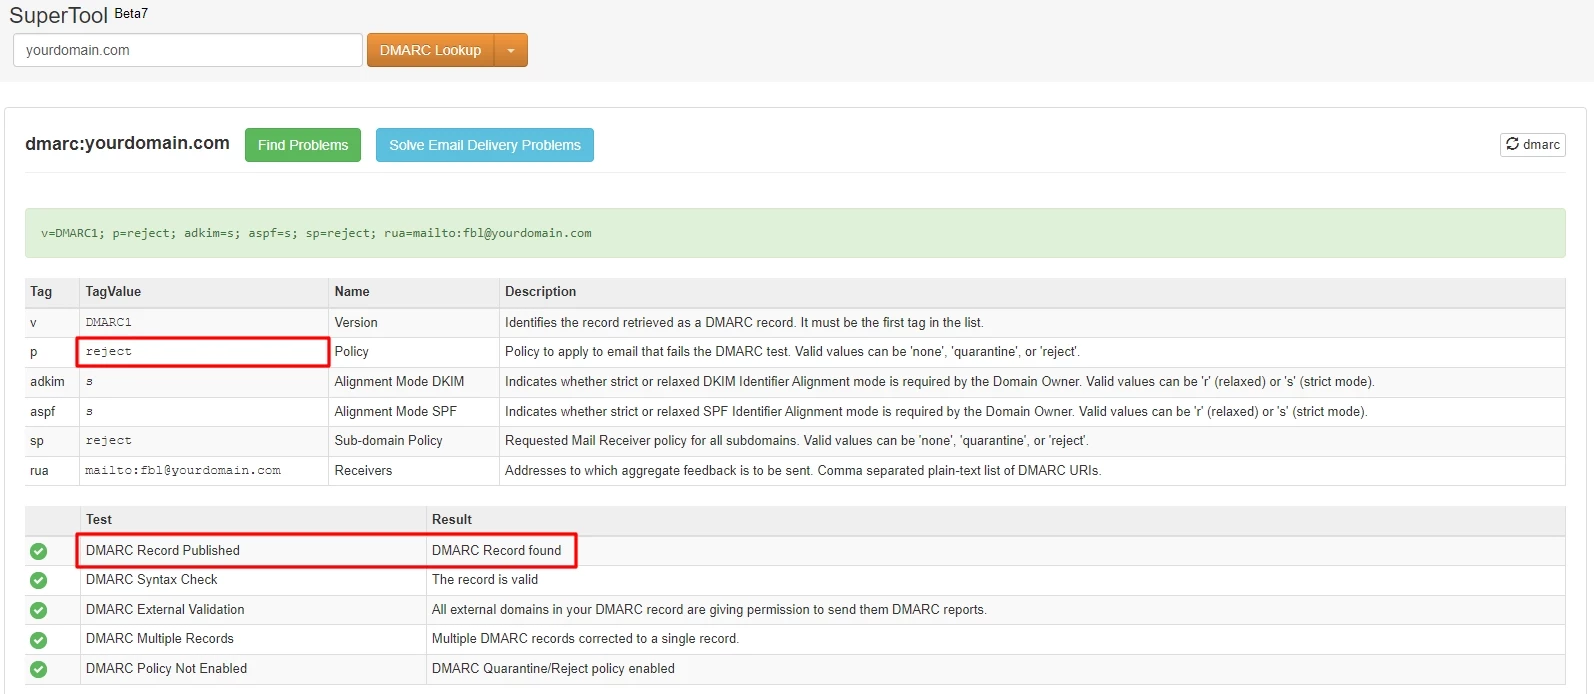
If the value is set to none, the warm-up proceeds as described above. However, if DMARC is set to quarantine or reject, when the daily limit is reached during the warm-up period, no further emails are sent. Even if the emails are signed using the DKIM signature of the Yespo domain, they may still end up in spam or be rejected.
Under a strict DMARC policy, it's advisable to manually limit the number of daily sends or set the value to none during the warm-up period.
Use the MxToolbox service to check DMARC domain settings.

When manually limiting the number of daily sends, use the following recommendations:
-
Begin the campaign with 10-20 emails per send, spaced a few hours apart. This way, approximately a hundred emails will be sent throughout the day.
-
Send the most engaged users. Users should open, read, and take the desired action.
-
Plan the warm-up phase for 4-6 weeks. Typically, the process occurs within this timeframe.
-
Use the Postmaster tools to check domain settings and reputation.
The next step in improving the sender's reputation will be setting up double opt-in.