
Creating Pop-ups via Google Tag Manager or WordPress
You can simplify the process of creating popups in Yespo using Google Tag Manager or WordPress. See the instructions for using these systems below.
Placing a Popup via GTM
Add the Yespo script to your site using GTM. For this:
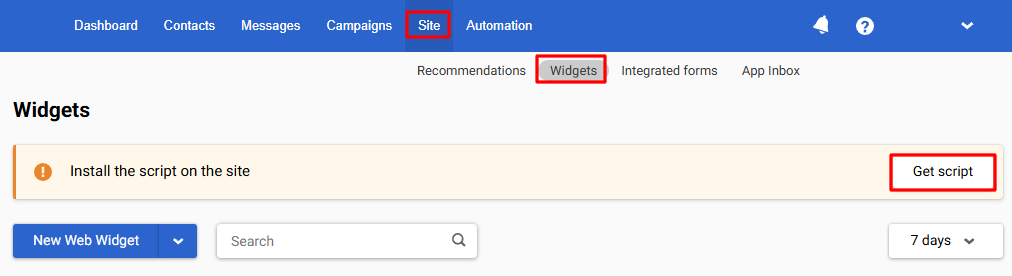
- In your Yespo account, go to Site → Widgets. Get the script and copy it.
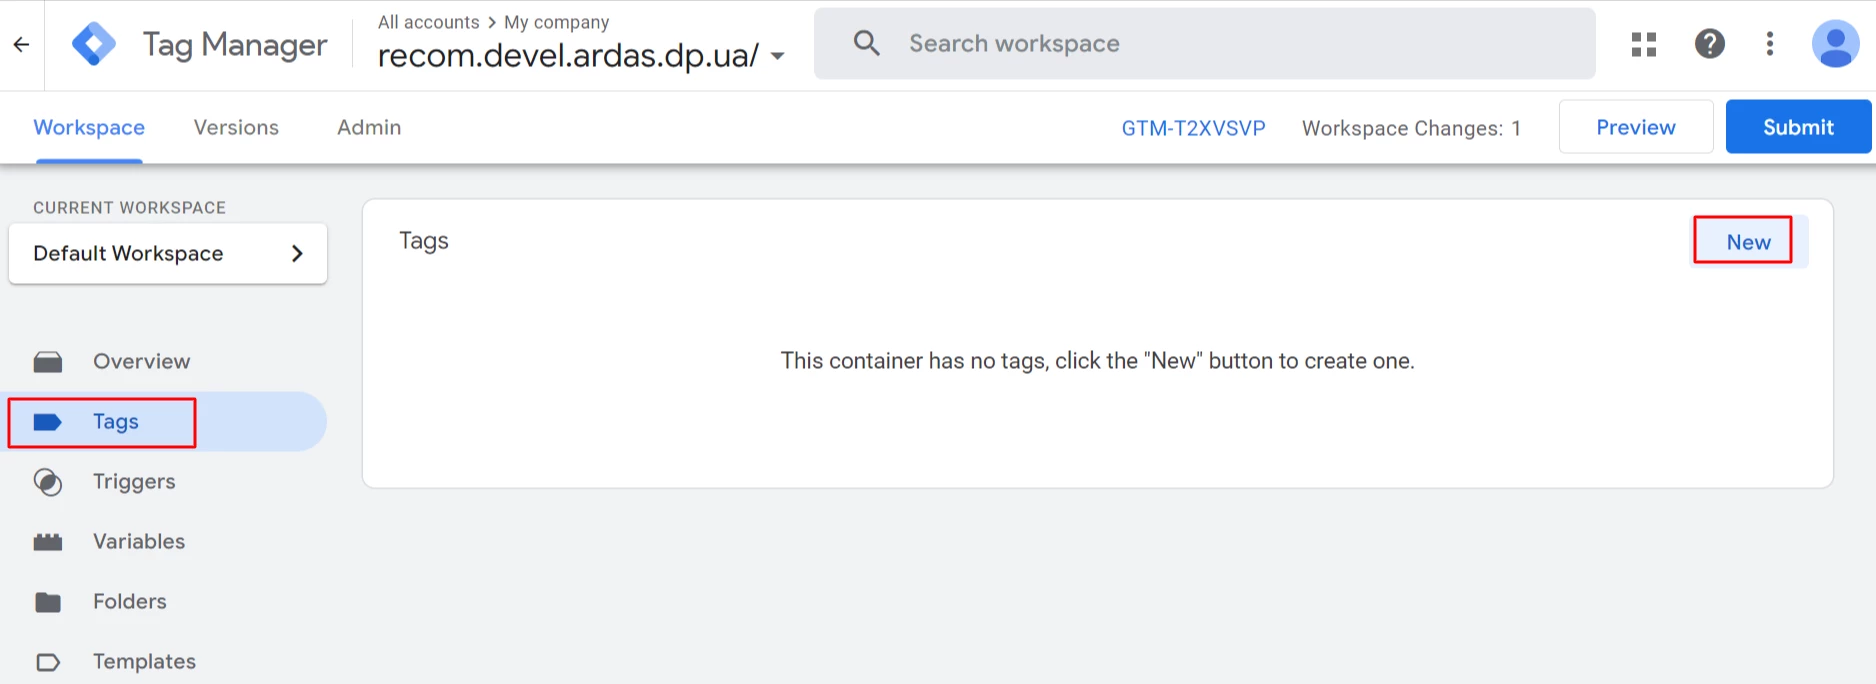
- Click the New button in the Tags section of your GTM account.
- Name the tag and click on the Tag Configuration field.
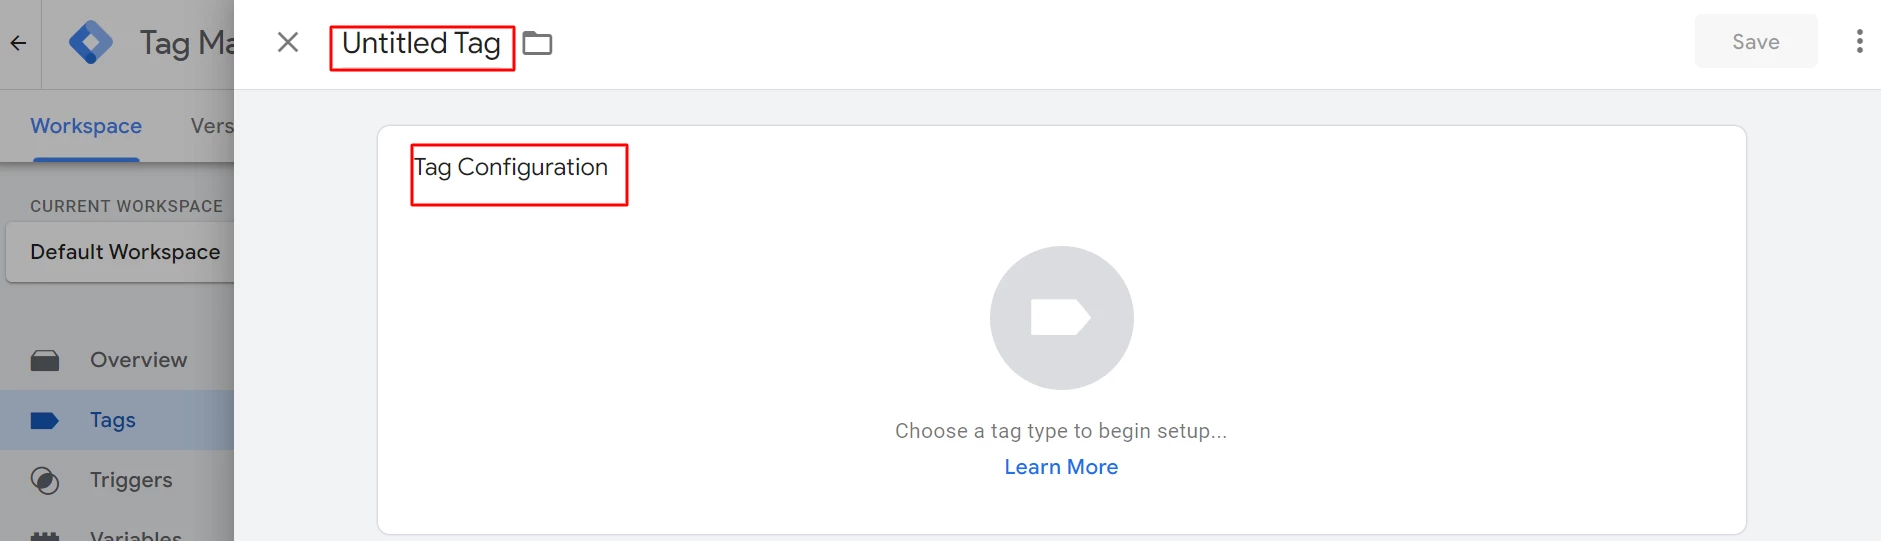
- Select the tag type Custom HTML.

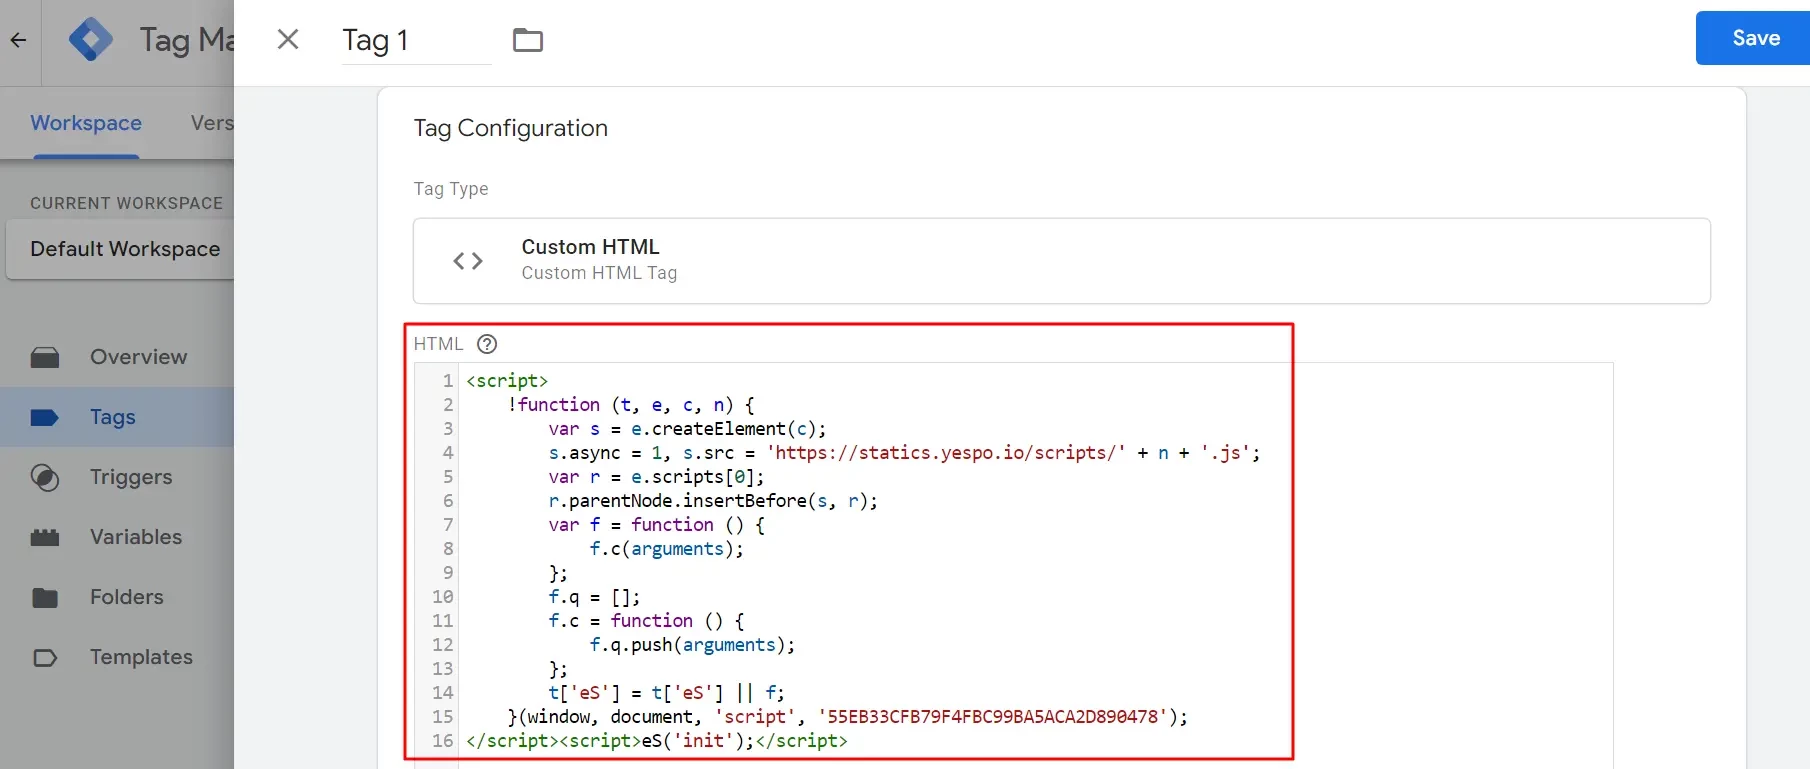
- Paste the script obtained in Yespo into the HTML field. Save changes.
- A dialog box will appear. Click Add Trigger. You can also click Activate in the tag settings window.
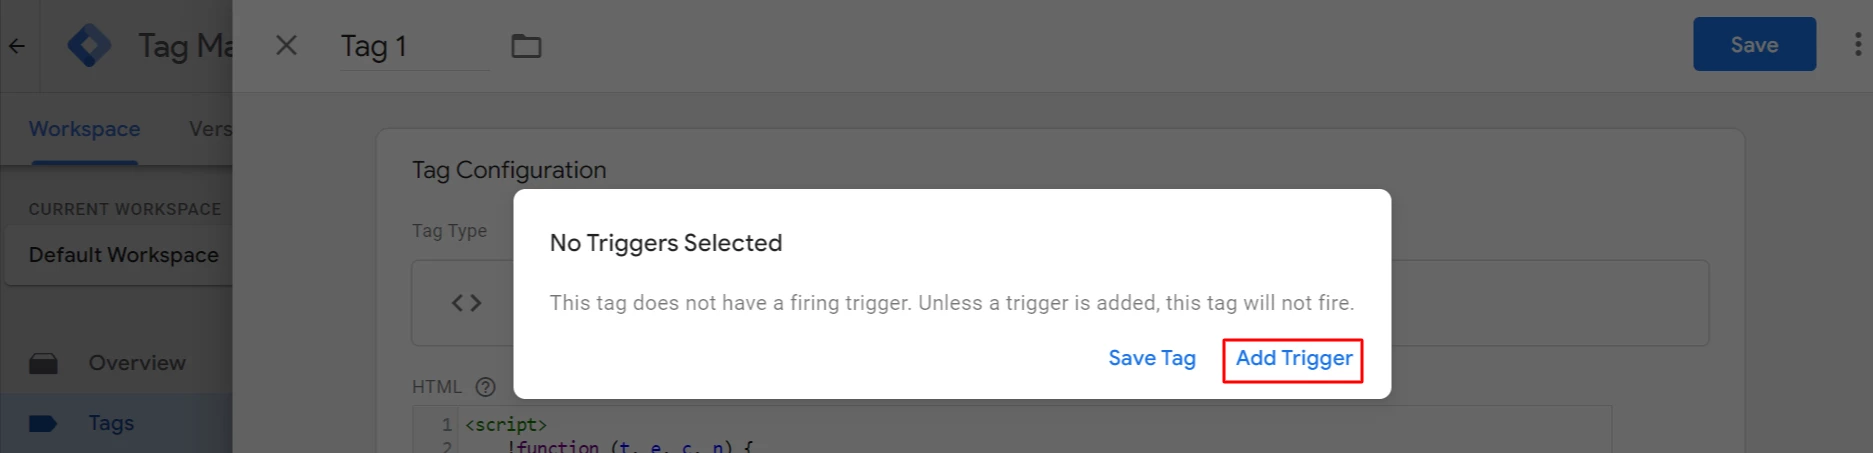
- Select the type of trigger, for example — All Pages, to place a popup on all site pages.

The tag and activator you created are ready to publish.
Placing a Popup via WordPress
Use one of the three ways to add a script to a WordPress site (getting the script is described in the first step of the instructions for placing a popup window with GTM).
1. Using Insert Headers and Footers Plugin
This plugin allows you to install the Yespo script on the entire WordPress site. For this:
- Follow the link and download the plugin.
- Activate the downloaded file and install the plugin according to the instructions.
- To activate the plugin, go to Insert Headers and Footers → Settings and insert the Yespo script in one of the fields:
- Script in Header (recommended)
- Script in Footer
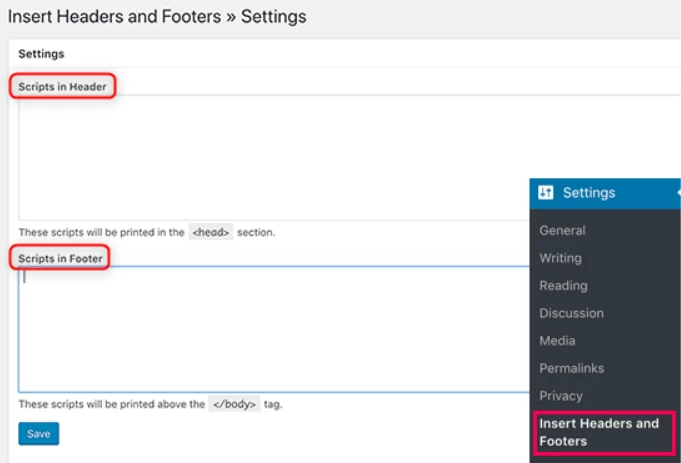
- Click Save.
The plugin will automatically upload the code to each page of your site.
2. Add the Script via Code Manually
You can add the script to WordPress files yourself (see instructions).
The script can be placed in the following site locations:
- Header
- A certain post
- A certain page
- Footer
Add a script to the site header
Paste the script into the functions.php file in the plugin for the site, or use the plugin for code snippets.
An example:
function wpb_hook_javascript() {
   ?>
       <script>
         // insert your javascript code here
       </script>
   <?php
}
add_action('wp_head', 'wpb_hook_javascript');
Add a script to a specific post
To add a plugin to one of the posts on WordPress, insert conditional logic into the code.
An example:
function wpb_hook_javascript() {
if (is_single ('5')) {
?>
<script type="text/javascript">
// insert your javascript code here
</script>
<?php
}
}
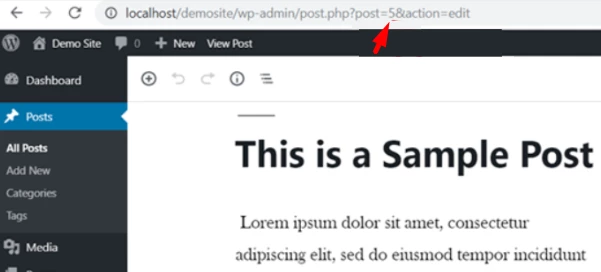
add_action('wp_head', 'wpb_hook_javascript');This code executes the script only if the post has the identifier 5. You must insert 5 as your post ID.
The post ID is the number after post =.
Add a script to a specific page
To add a script to a WordPress page, add conditional logic to the code.
An example:
function wpb_hook_javascript() {
 if (is_page ('10')) {
   ?>
       <script type="text/javascript">
         // insert your javascript code here
       </script>
   <?php
 }
}
add_action('wp_head', 'wpb_hook_javascript');
This code executes the script only if the page has the ID 10.
Add a script to the site footer
Add the following code snippet to your website, so the script runs in the footer.
An example:
function wpb_hook_javascript_footer() {
 ?>
    <script>
         // insert your javascript code here
       </script>
   <?php
}
add_action('wp_footer', 'wpb_hook_javascript_footer');
This code is attached to wp_footer instead of wp_head.
3. Adding a Script Inside Posts or Pages Using a Plugin
Use the plugin to select a place to embed the script in the site content.
- Download the Code Embed plugin.
- Install and activate the plugin in the plugin menu in WordPress controls. See the instructions for details.
- In the WordPress Post Editor, click on the context menu icon (three vertical dots) in the upper right corner of the screen and select Options.
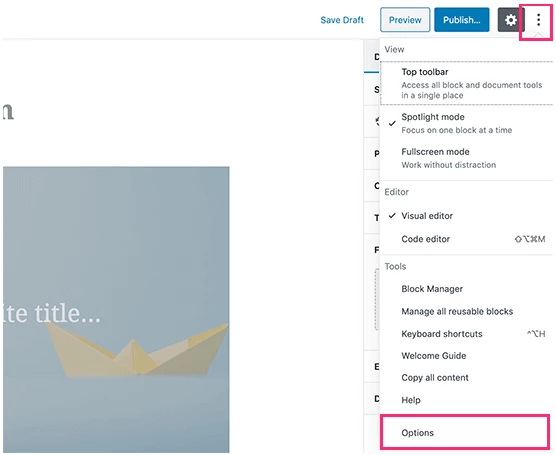
- In the dialog box, check the Custom fields option in the Advanced panel's section.
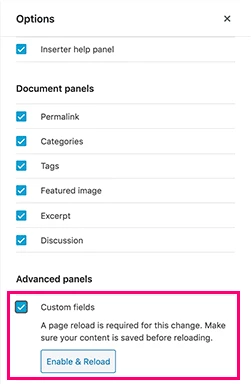
- Click Enter new In the Custom Fields window under the content editor.
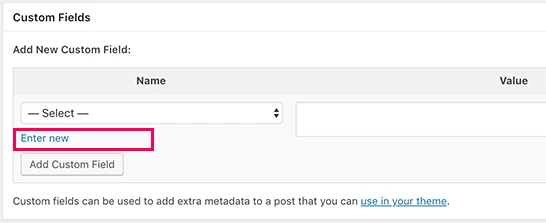
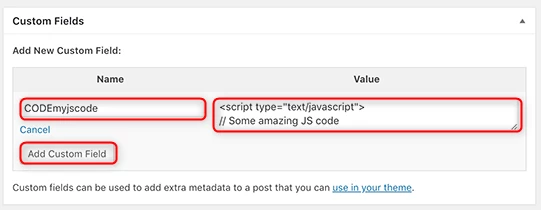
- Enter the name of the custom field, which should start with the prefix CODE, and insert the script in the Value field.
- Click Add Custom Field.
Use this custom field to embed script code in any post or page position. To do this, add the following embed code anywhere on your content:

Then click Update or Publish to run the script code on the page or post.
Updated 3 days ago