
Using Annoyance Safeguard
When you show floating widgets on your site, they may show simultaneously or immediately one after the other. This may cause annoyance to the site visitors, and they may leave your site in a short time.
You can use our Annoyance Safeguard to avoid such situations when setting the displaying rules for the following floating widgets:
- Floating box
- Floating bar
- Popup
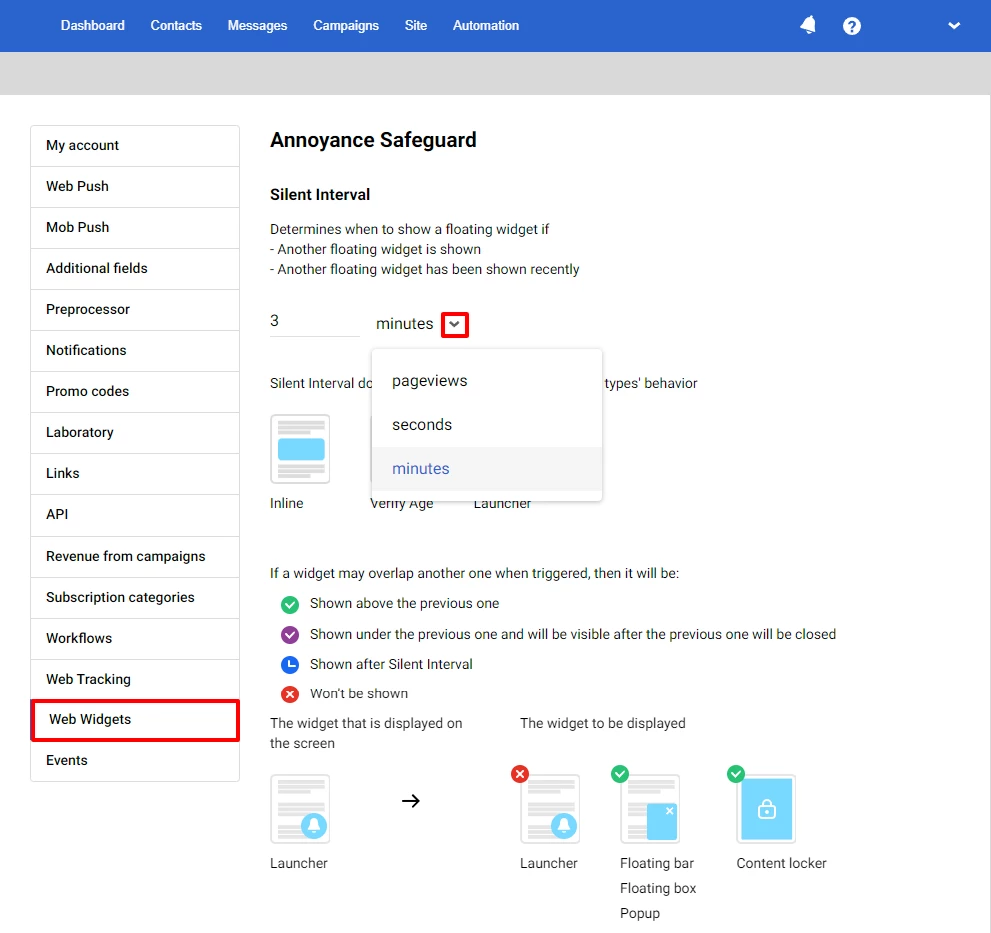
Setting Silent Interval
To set the value of the silence interval for all widgets:
- Expand your account menu and select Settings from the dropdown list.

- Select Web Widgets, and enter the Silent Interval value into the field.
- Click the down arrow beside the silent interval value, and select one of the following units from the list:
- pageviews
- seconds
- minutes
Note
The default value of Silent Interval in Annoyance Safeguard is 3 minutes.
Setting Annoyance Safeguard
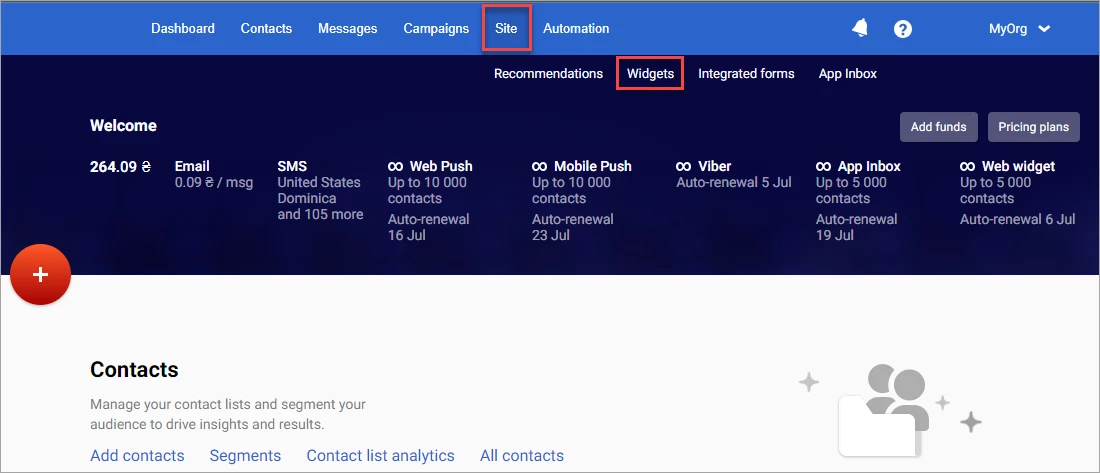
To set Annoyance Safeguard for your widgets:
- Go to Site → Widgets and create a new floating widget or select a floating widget from the list.
- Select the Parameters tab and click the Edit button in the Widget calling section.
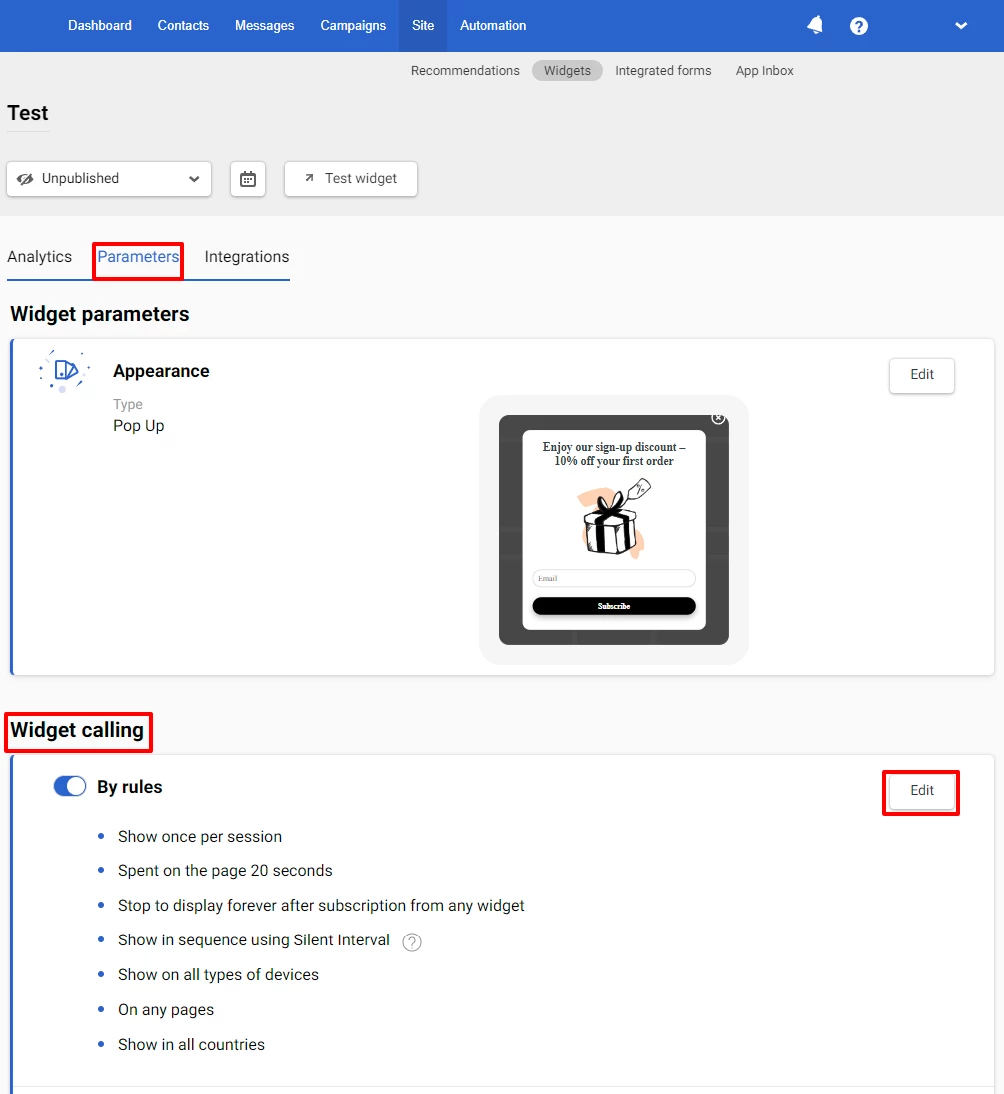
- Select one of the rules in the Annoyance Safeguard section, then click Save on the top panel.
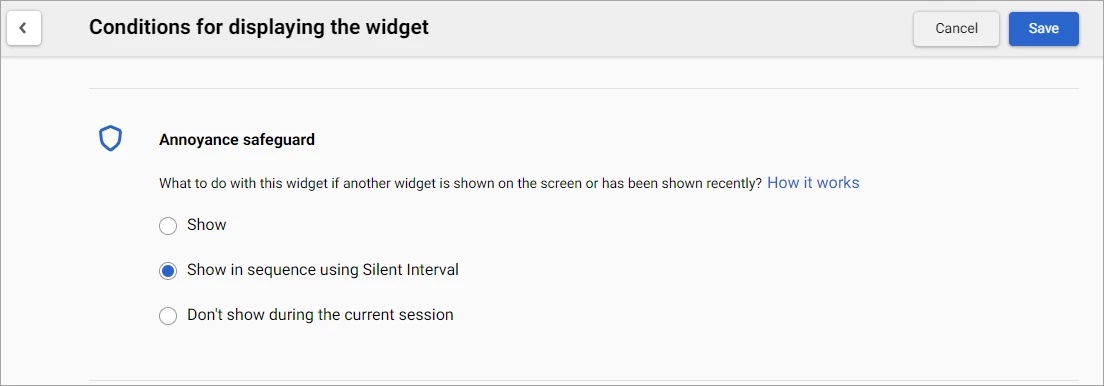
There are 3 rules for displaying floating widgets you can select from:
- Show: The widget is displayed on the site, even if another one is being displayed at the same time. You can apply this rule to the widgets that must be shown on your site, such as information about site maintenance.
- Show in sequence using Silent interval: If another widget is being displayed, the widget will be displayed after that widget with a holding time set in Silent Interval. You can apply this rule to the widgets you want to show in sequence, without causing annoyance to site visitors.
- Do not show during the current session: The widget is displayed on the site if no other widget is displayed at the same time. The widget is not displayed on the site if another widget is currently on the screen, or when the silent interval is active.
Note
- By default, the Show in sequence using Silent interval rule applies to all new and unpublished widgets.
- When the Show in sequence using Silent interval rule is applied, the widgets with more precise settings are shown earlier.
- The Show rule applies if you have 2 or more published widgets.
Updated 3 months ago