
Setting Up SMS Processing
You can send SMS messages through your service provider using processing in our system. For that, you have to configure the sender settings in your profile.
Configuring the Sender Settings
To configure SMS processing for registered senders:
- Go to your profile → Settings → Senders.
- Select the SMS tab and click the New sender button.

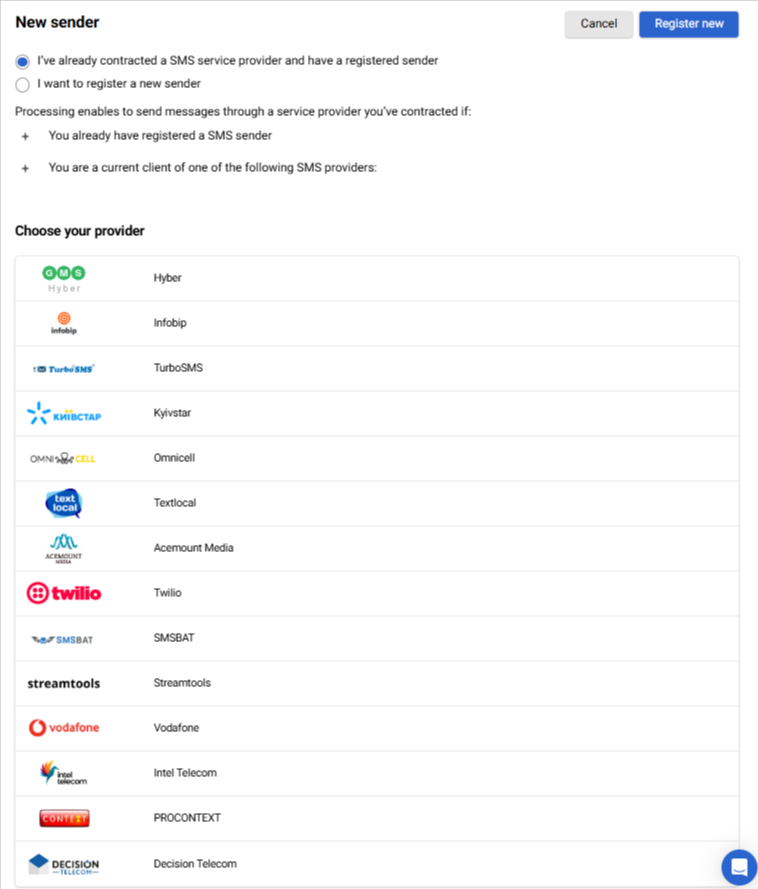
- In the slide-out window, select the I’ve already contracted an SMS service provider and have a registered sender option and select your service provider from the list:
- GMS Hyber
- Infobip
- TurboSMS
- Kyivstar
- Omnicell
- Textlocal
- Acemount Media
- Twilio
- SMSBAT
- Streamtools
- Vodafone
- Intel Telecom
- PROCONTEXT
- Decision Telecom
- Enter the required technical parameters of your provider, as listed below:
GMS Hyber
- Sender name
- Login
- Password
- URL
- Timeout
Use Yespo tags so that when uploading reports from GMS Hyber, you can quickly analyze how many messages of a specific type were sent: collecting feedback, installing an application, etc. If you use more than one tag in a message, they are substituted in the report separated by commas: tag=tag1,tag2,tag3.
Note
Ask GMS Hyber to add the 52.210.222.17 and 52.16.166.210 IP addresses to the allowed list.
Infobip
- Sender name
- Login
- Password
- Alpha-name
TurboSMS
- Sender name
- Authorization token
Note
To receive the message status, add the following link in your TurboSMS cabinet:
https://esputnik.com/dlr/v2/turbosms/status
Kyivstar
- Sender name
- Client ID
- Client Secret
Note
To receive the message status, add the following link in your Kyivstar cabinet:
https://esputnik.com/dlr/v1/kyivstar/status
Omnicell
- Sender name
- Login
- Password
Note
To receive the message status, add the following link in your Omnicell cabinet:
https://esputnik.com/dlr/v1/omnicell/status
Textlocal
- Sender name
- API key
Note
To receive the message status, add the next parameters in your Textlocal cabinet:
- https:// filed: esputnik.com/dlr/v1/textlocal/status
- Port field: 443
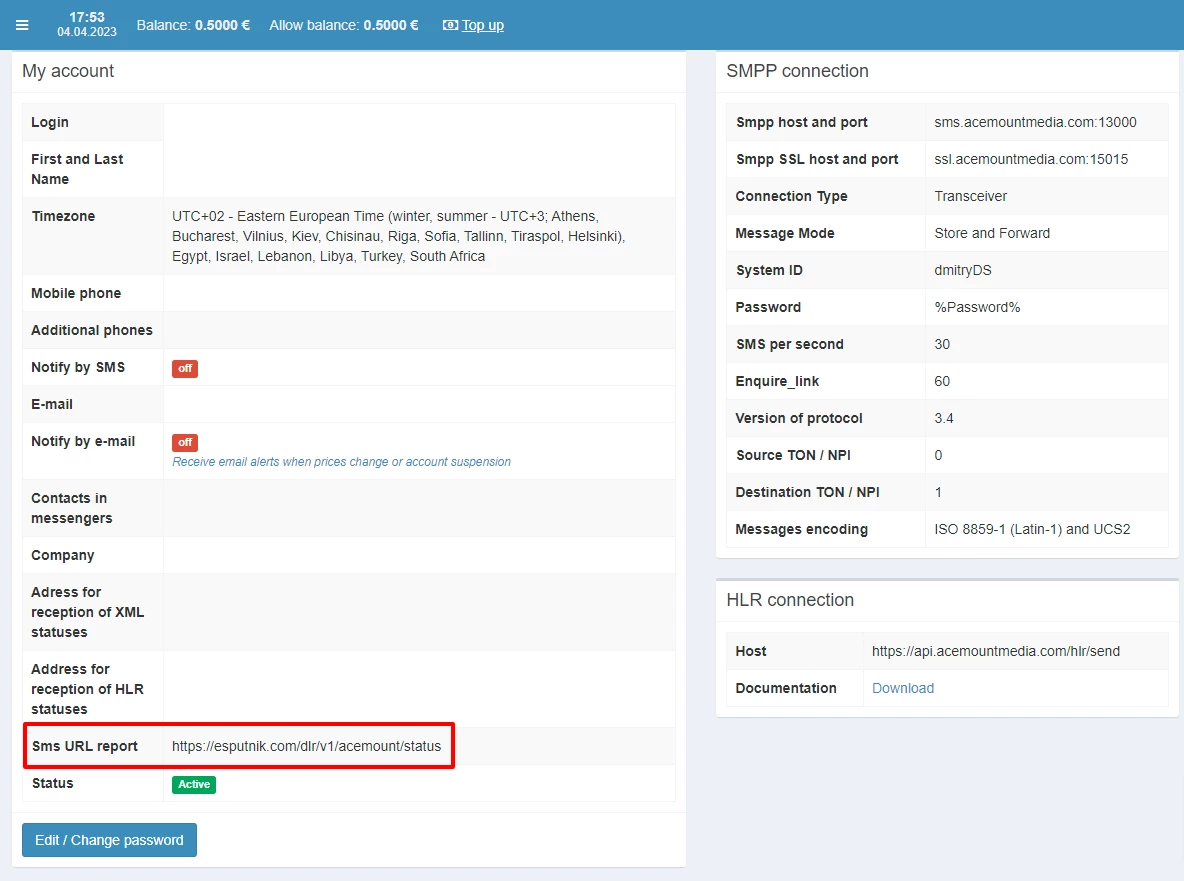
Acemount Media
- Sender name
- Authorization token
Note
To receive the message status, add the next parameter for Sms URL report field in Acemount Media user account:
https://esputnik.com/dlr/v1/acemount/status
Twilio
- Sender name
- Account SID
- Authorization token
Note
To receive the message status, add the next parameters in your Twilio account:
https://esputnik.com/dlr/v1/twilio/status
SMSBAT
- Sender name
- Login
- Password
- Timeout
Streamtools
- Sender name
- Login
- Password
Vodafone
- Sender name (can be any, as it is displayed only in the Yespo account).
- Login
- Password
- Distribution ID — Sender ID from your Vodafone account. Message recipients will see the sender name corresponding to this ID. Please note: Distribution IDs for SMS and Viber are different.
Intel Telecom
Sender name: You can find this name in the Senders menu in Intel Telecom.User name: Your login name to the Intel Telecom account.API key: You can create API keys in Intel Telecom in Developers → API key.
PROCONTEXT
The provider supports message delivery only to Moldovan phone numbers. There are two types of messages:
- Notifications — important triggers that are sent around the clock and as quickly as possible. The content of notifications must be approved by the provider.
- Marketing — promotional messages sent only during business hours. Approval from the provider is not required.
Parameters for sender setup:
- Alias — alpha name;
- Partner’s ID — login;
- Password.
To connect PROCONTEXT, submit a request at support@yespo.io.
Decision Telecom
Parameters for sender setup:
- Sender name
- Authorization token — key from Decision Telecom account in BASE64 format
- Alpha-name
To connect Decision Telecom, submit a request at support@yespo.io.
- Click Done.
Now, you can proceed with creating and sending SMS messages. Read this article to learn more about it.
Deleting a Sender
To delete a sender:
- Go to your profile → Settings → Senders.
- Select the SMS tab and click the Delete icon at the right-hand side of the sender name you wish to delete.
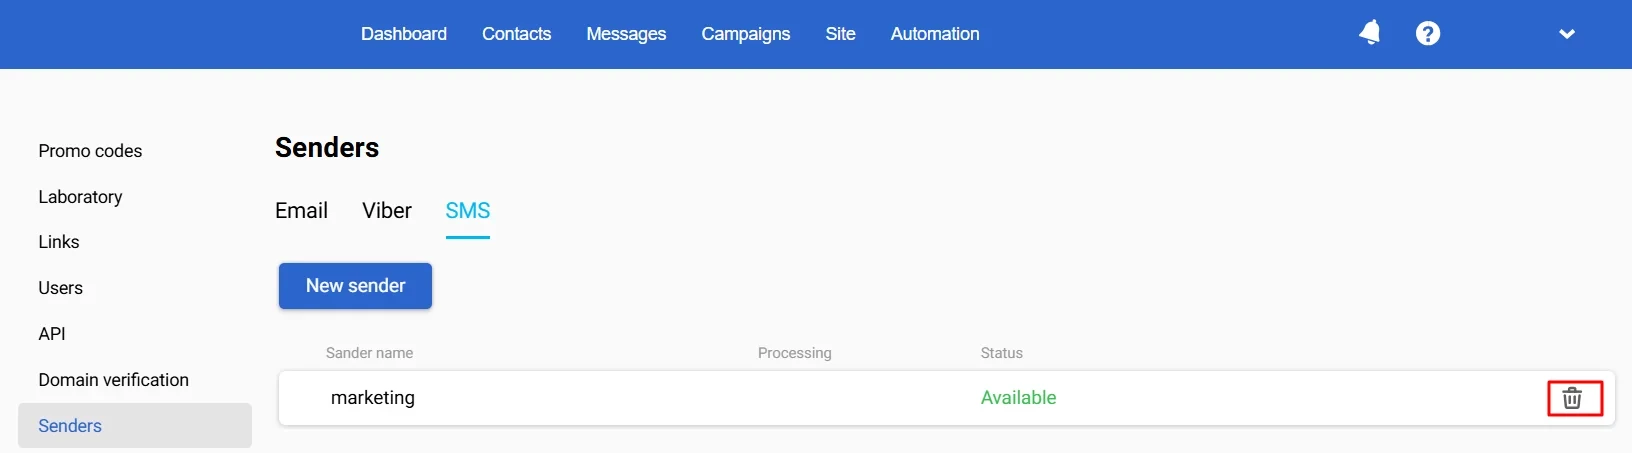
- On the dialog window, select Delete. The confirmation message appears for a short while.
Important
Before deleting a sender, you need to create or select another one, otherwise, you will be unable to send messages.
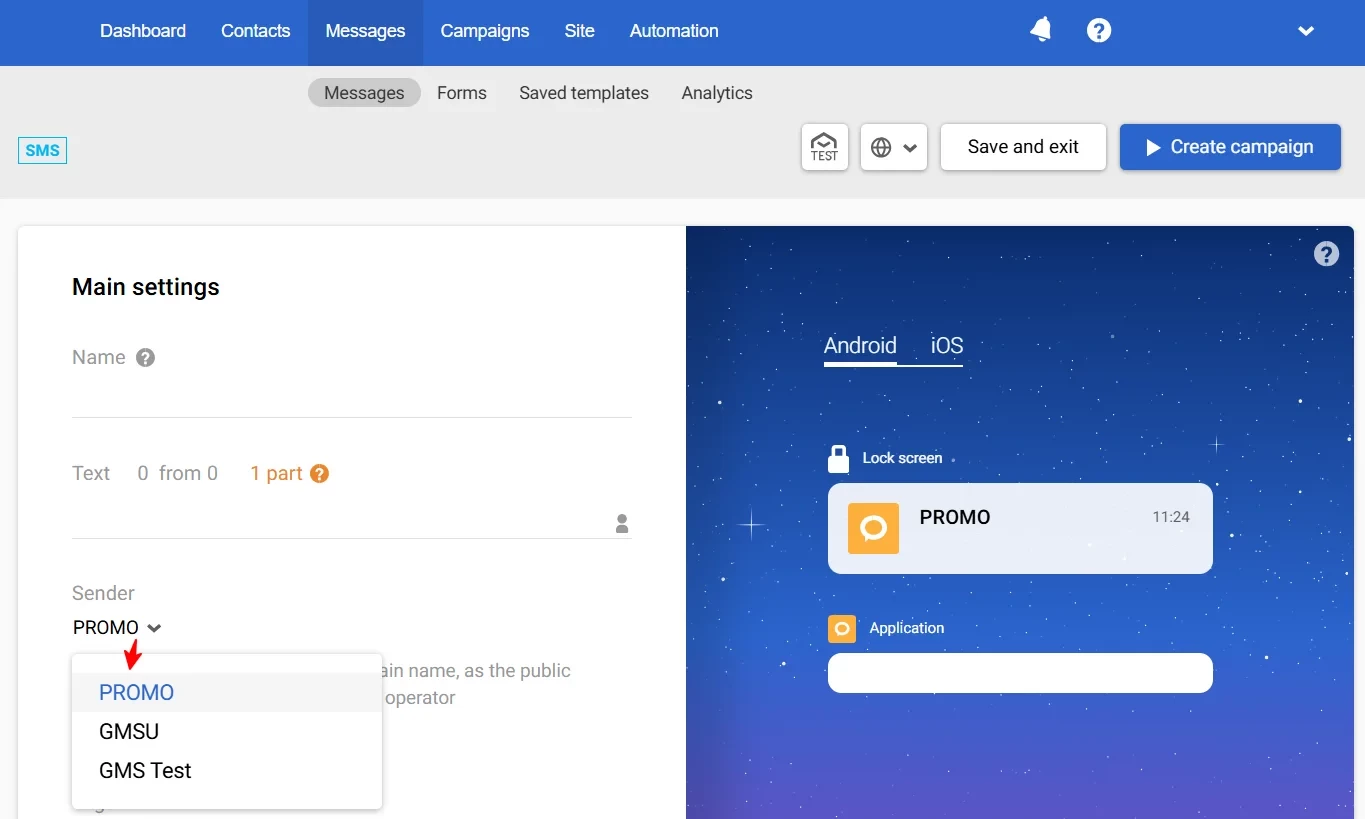
Changing an SMS Sender
To change a sender in existing SMS messages:
- Go to Messages → Messages → SMS and select an SMS.
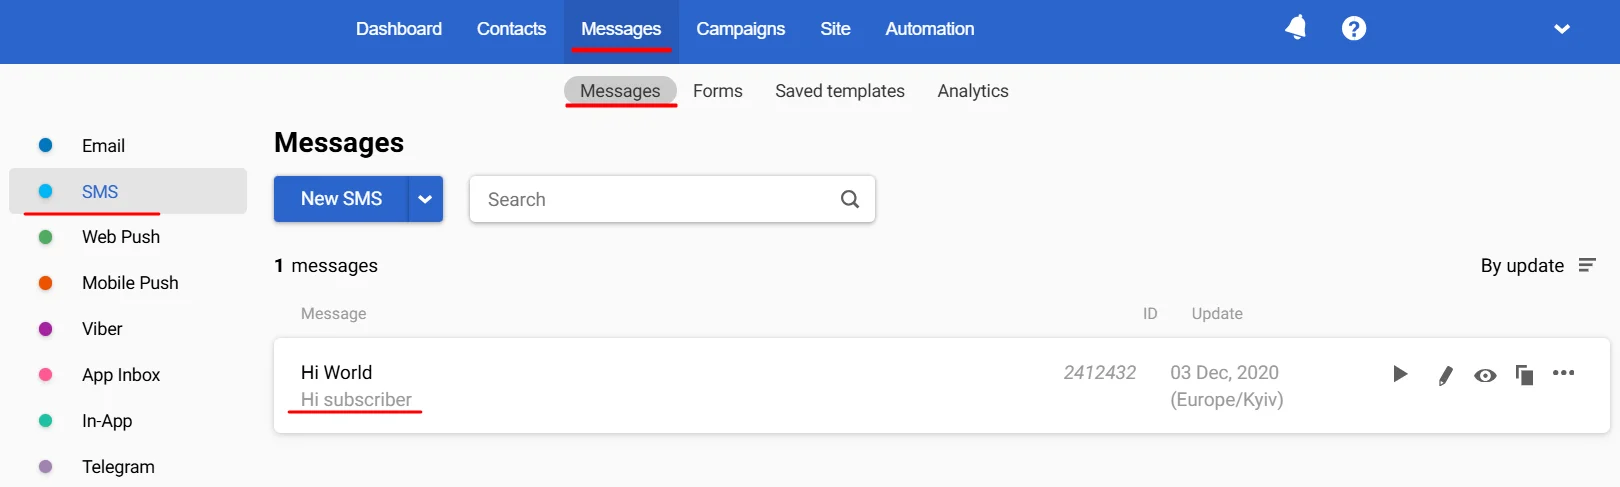
- In the Main settings section, expand the dropdown list below Sender and select another sender for this message from the list.
Updated 3 days ago