
Testing Email Subject Lines
You can conduct split testing of a campaign subject line in 2 ways:
- Set multiple subjects in your email
- Split the audience into several segments and send emails with different subjects to each segment
Experiment with Subjects in Email
Specify the email's subject and click Add subject in the email editor; enter an alternative one. You can use any number of alternative subjects.
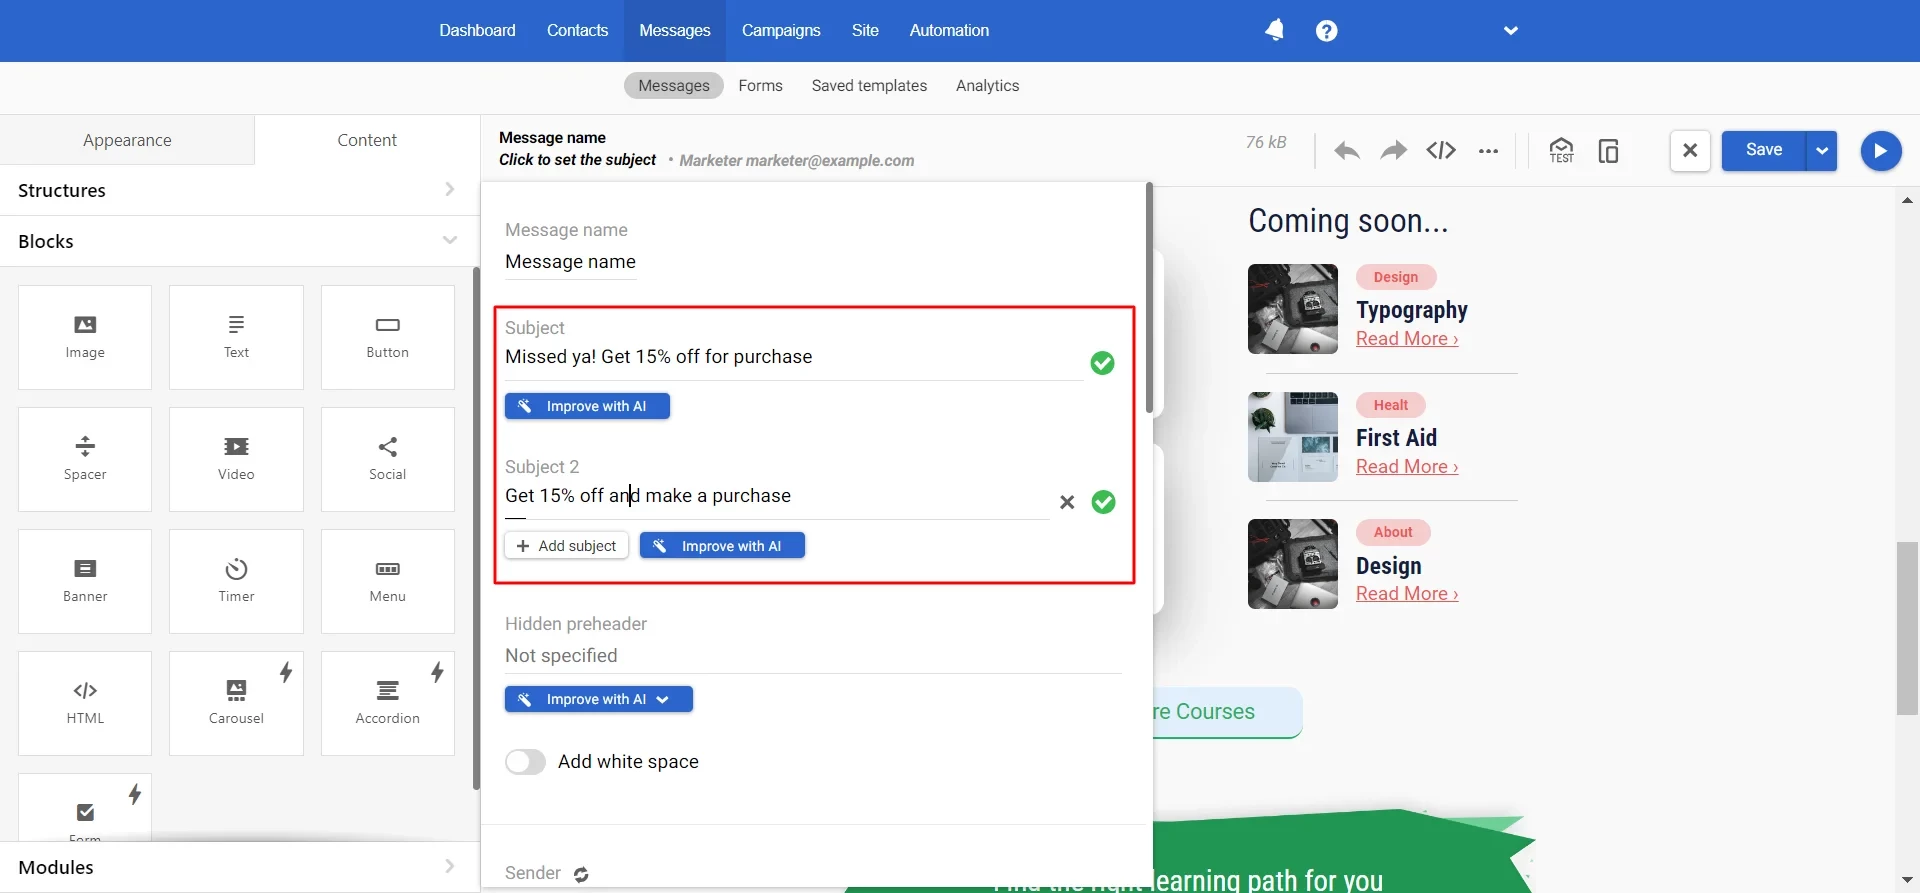
When sending, the system will divide recipients into equal parts according to the number of email subjects.
Evaluating Test Results
- In the Campaigns → Reports section, open the report on the campaign with the experiment with subjects. See subject performance metrics on the Experiments tab.
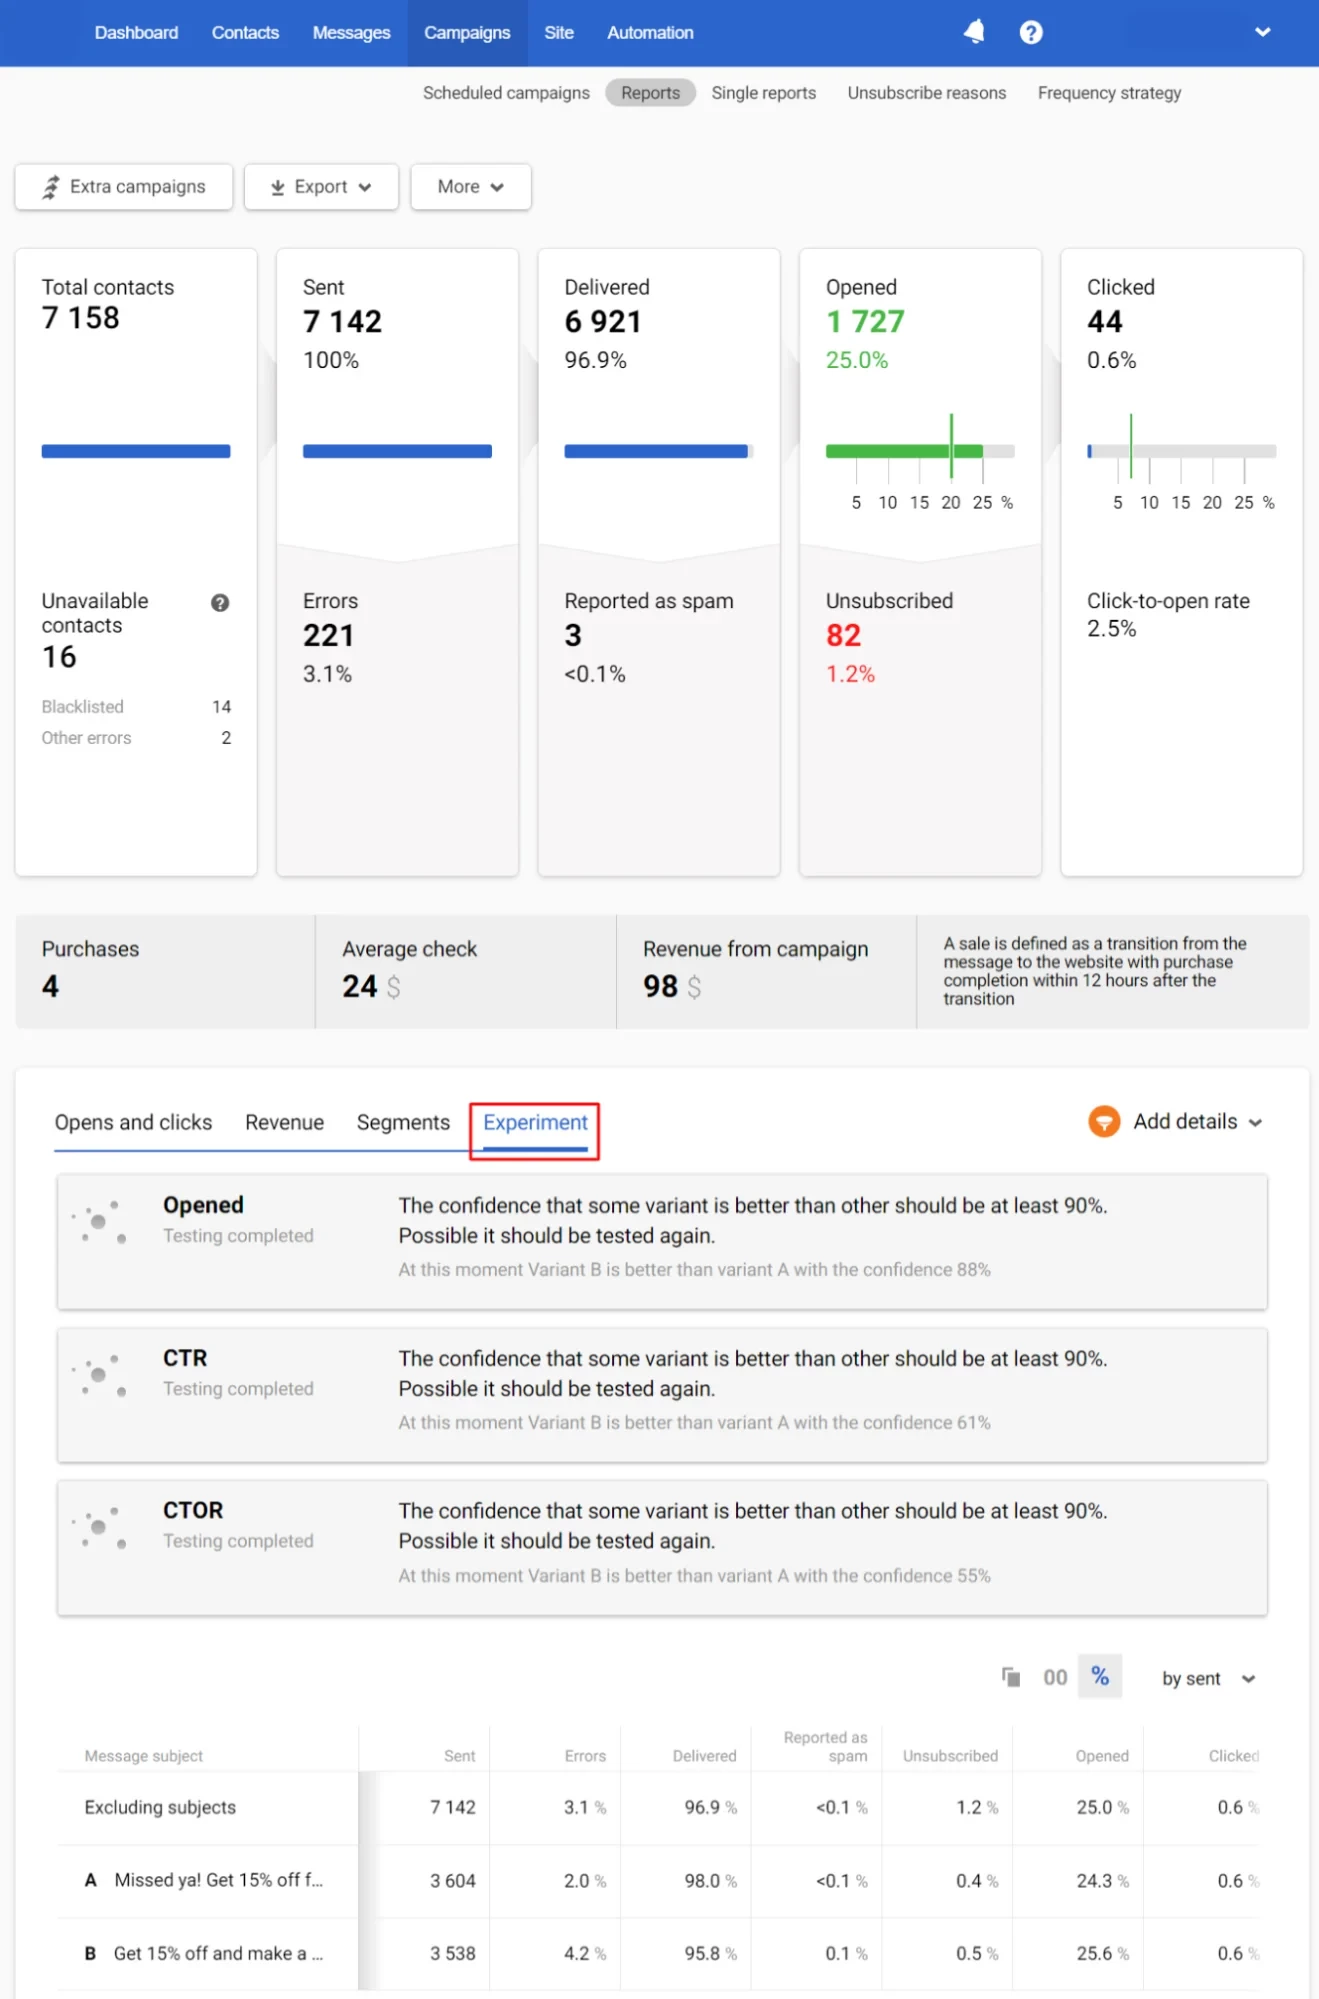
The larger the segment, the more reliable the test result.
NoteGoogle Analytics will collect statistics within one campaign without details by subjects. If you need to determine how many sales a particular subject made, use testing with a segment’s splitting.
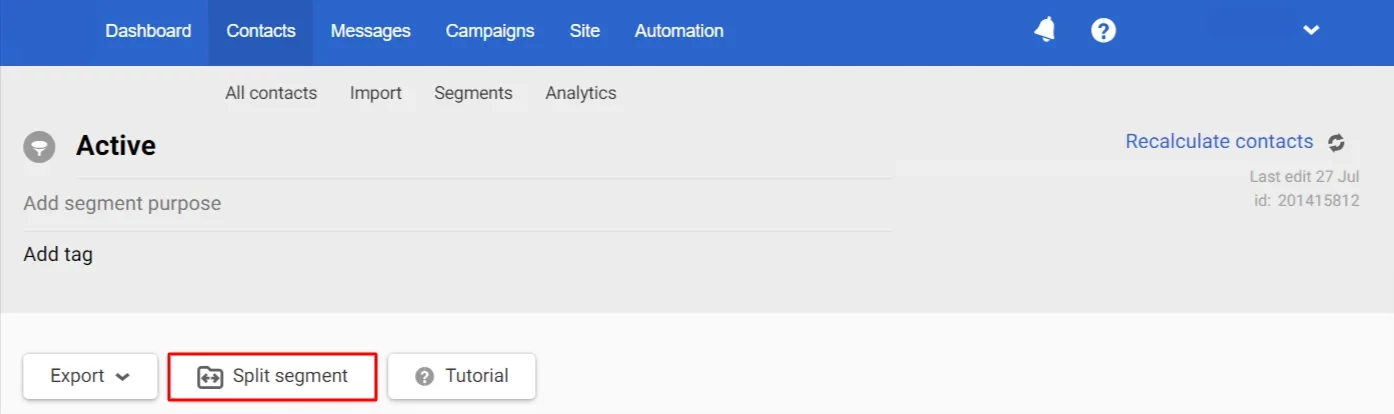
Testing Subjects with Target Segment’s Splitting
- Go to a segment to which you want to send a campaign (Contacts → Segments).
- Click Split segment.
- Set the segment parts’ number and the percentage split. The maximum number of parts is 3. Activating the Distribute evenly switch ensures that segments contain equal contact numbers.
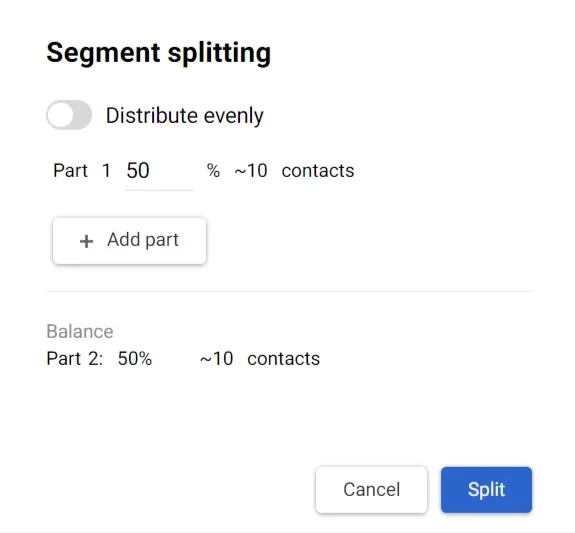
New segments will appear in the segments’ list after splitting:

- Create several emails (corresponding to the number of segment’s parts) with the same content but different subjects. Give messages different names to analyze the results of the campaign in GA.
- Send emails to prepared segments.
Updated about 2 months ago