Using A/B Tests for Widgets
A/B testing (or split testing) is a methodology for researching user experience. When running a test, you can split your audience to test different variations of your widget or launcher and determine which of them is performing better.
In Yespo, you can run an A/B test for the following types of widgets:
- Subscription forms
- Informers
- Launchers
- Age gate
A test can include different types of widgets.
NoteYou cannot delete the widgets participating in a running test.
You cannot run A/B tests for the widgets:
- Containing errors.
- Having non-saved changes.
- Used in another A/B test.
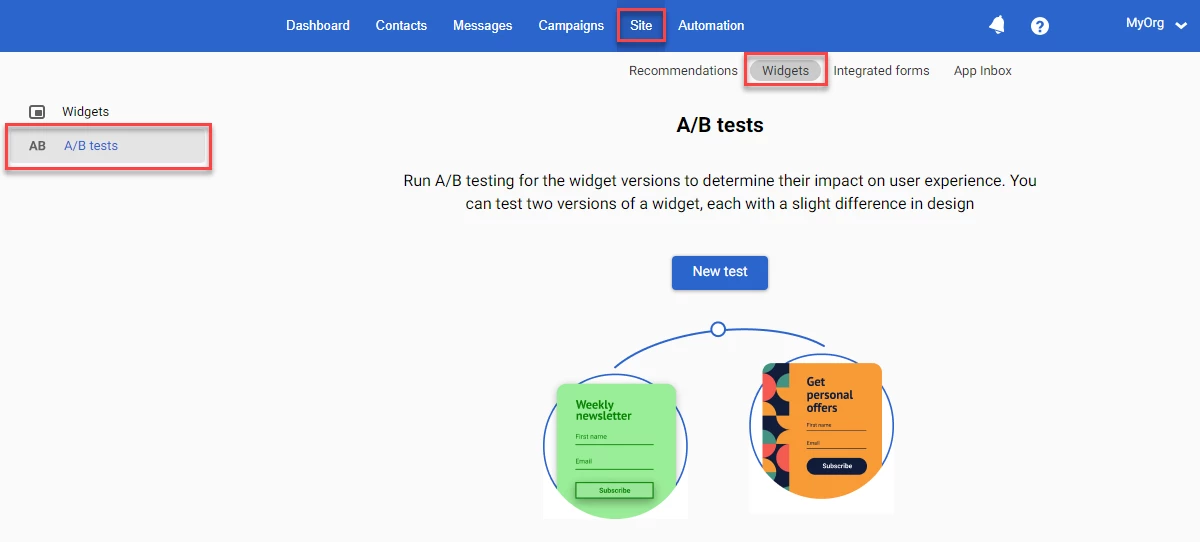
To open the A/B tests screen, go to Site → Widgets and select A/B tests in the left-hand side panel. If you do not have any tests, the A/B tests landing page displays.
Managing A/B Tests
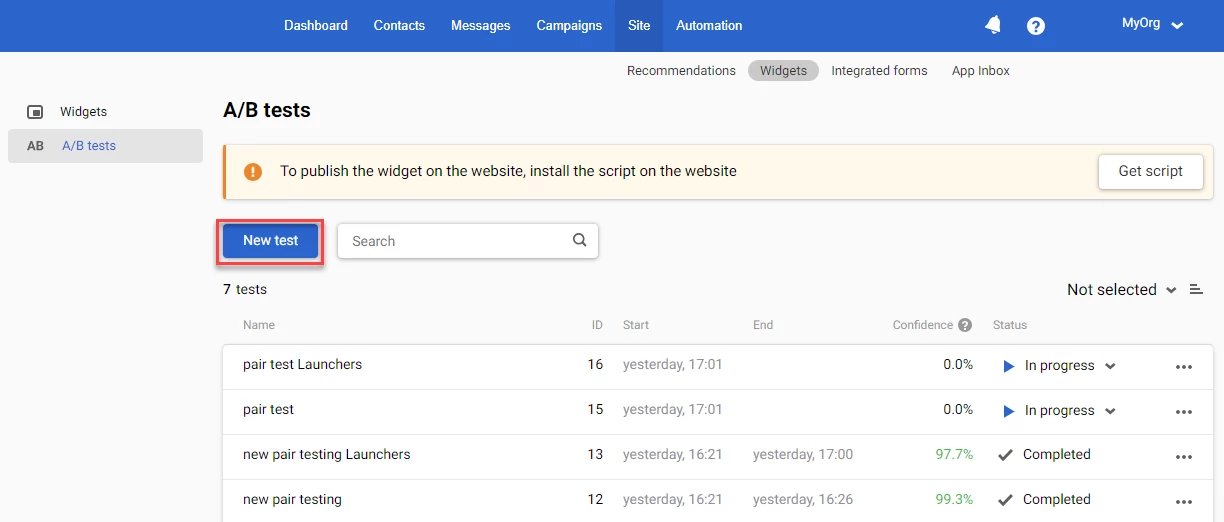
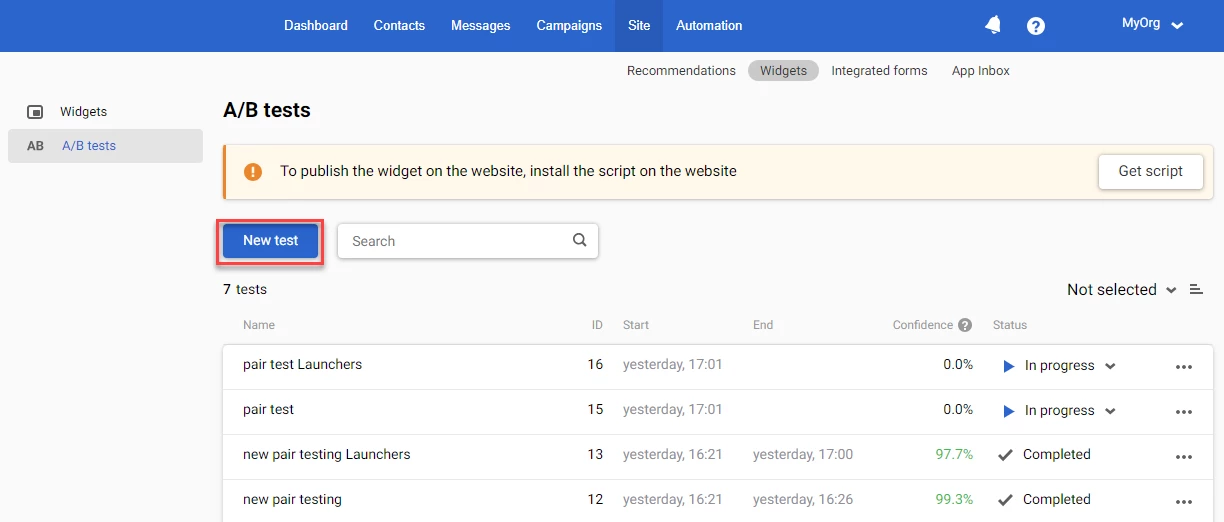
To create a new A/B test, click the New test button.
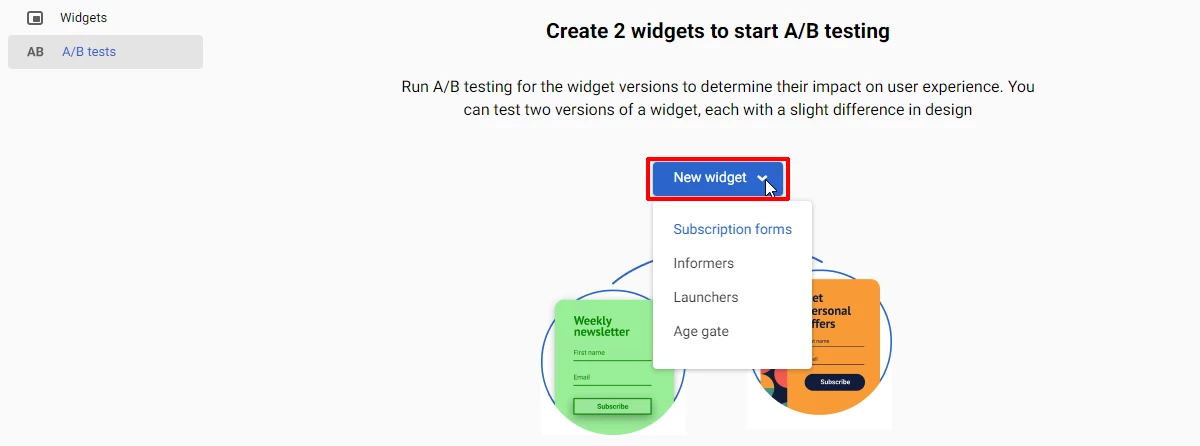
You need at least 2 widgets to create and run an A/B test. If you don’t have them, pressing the New widget button opens the dropdown menu suggesting the creation of a widget.
Select the type of widget you want to create and follow the instructions in Setting Up Widgets for Your Site.
When you have the widgets to compare, you can proceed with the creation of tests.
In Yespo, you can create and run A/B tests to compare:
- 2 widgets.
- 2 widgets when one has a connection to a launcher.
- 2 pairs of widgets and launchers.
See the following sections to learn how to create and run the different types of tests.
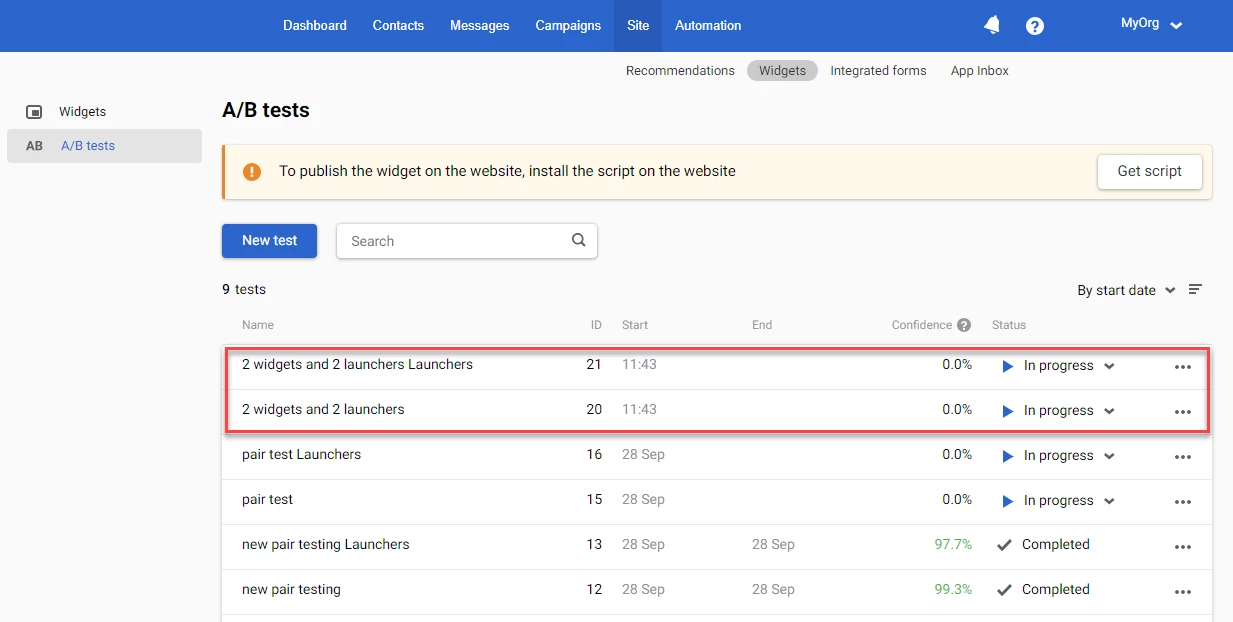
When you have the created and completed tests, the A/B tests page shows the tests in progress marked with the play icon in the Status column. The completed tests are marked with the tick icon.
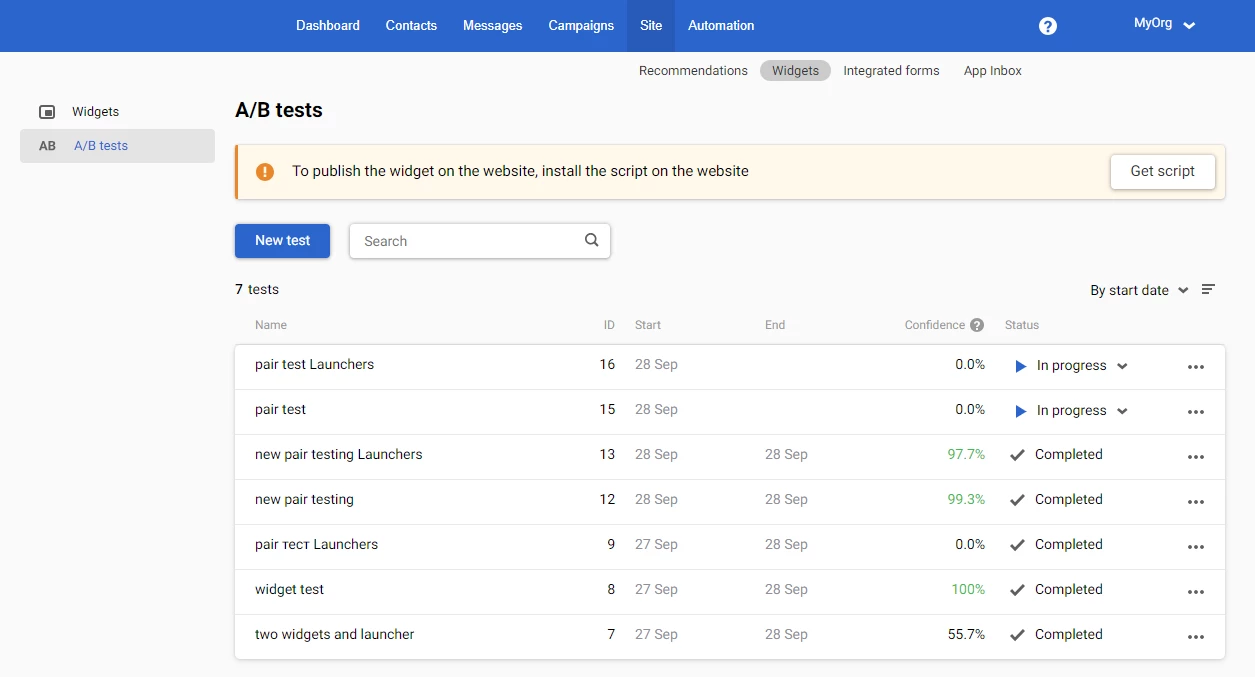
The Confidence column shows the reliability of the test results in percent. The test results are reliable when the confidence is greater than 90%. In this case, the confidence value is displayed in green.
Stopping a Test in Progress
To stop the test in progress, expand the In progress dropdown menu in the Status column and select one of the options:
- Stop: To stop the test and keep the widgets published.
- Stop and unpublish the worse: To stop the test and unpublish the widget with the worst performance when the confidence is less than 90%.
- Stop and unpublish loser: To stop the test and unpublish the widget with the worst performance when the confidence is greater than 90%.
- Stop and unpublish both: To stop the test and unpublish both widgets when the confidence is 0%.

The stopped tests change their status to Completed.
NoteWhen you stop a test in progress, you will not be able to relaunch it.
Deleting a Test
To delete a test from the list of A/B tests:
- Click the ellipses (three dots) icon on the right-hand side of the test row, and then click Delete in the dropdown menu.
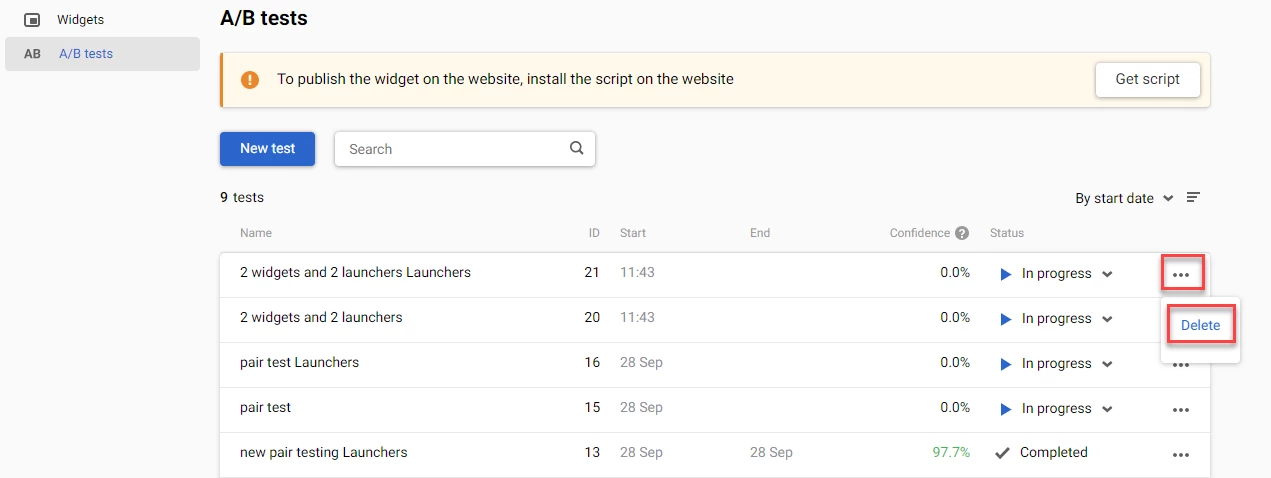
- Click Delete in the dialog box.
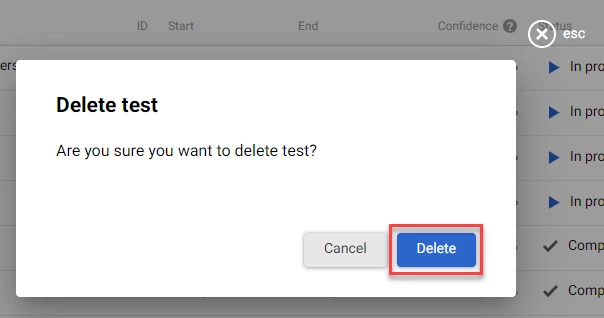
The test is permanently deleted from the list of A/B tests. The widgets that participated in the deleted test are not deleted.
Viewing the Test Statistics
To view the test statistics, click the test name in the Name column. The statistics page opens. Switch between the Desktop, Mobile, and All tabs to view the test details for the desktop, mobile, or both versions of the widgets.
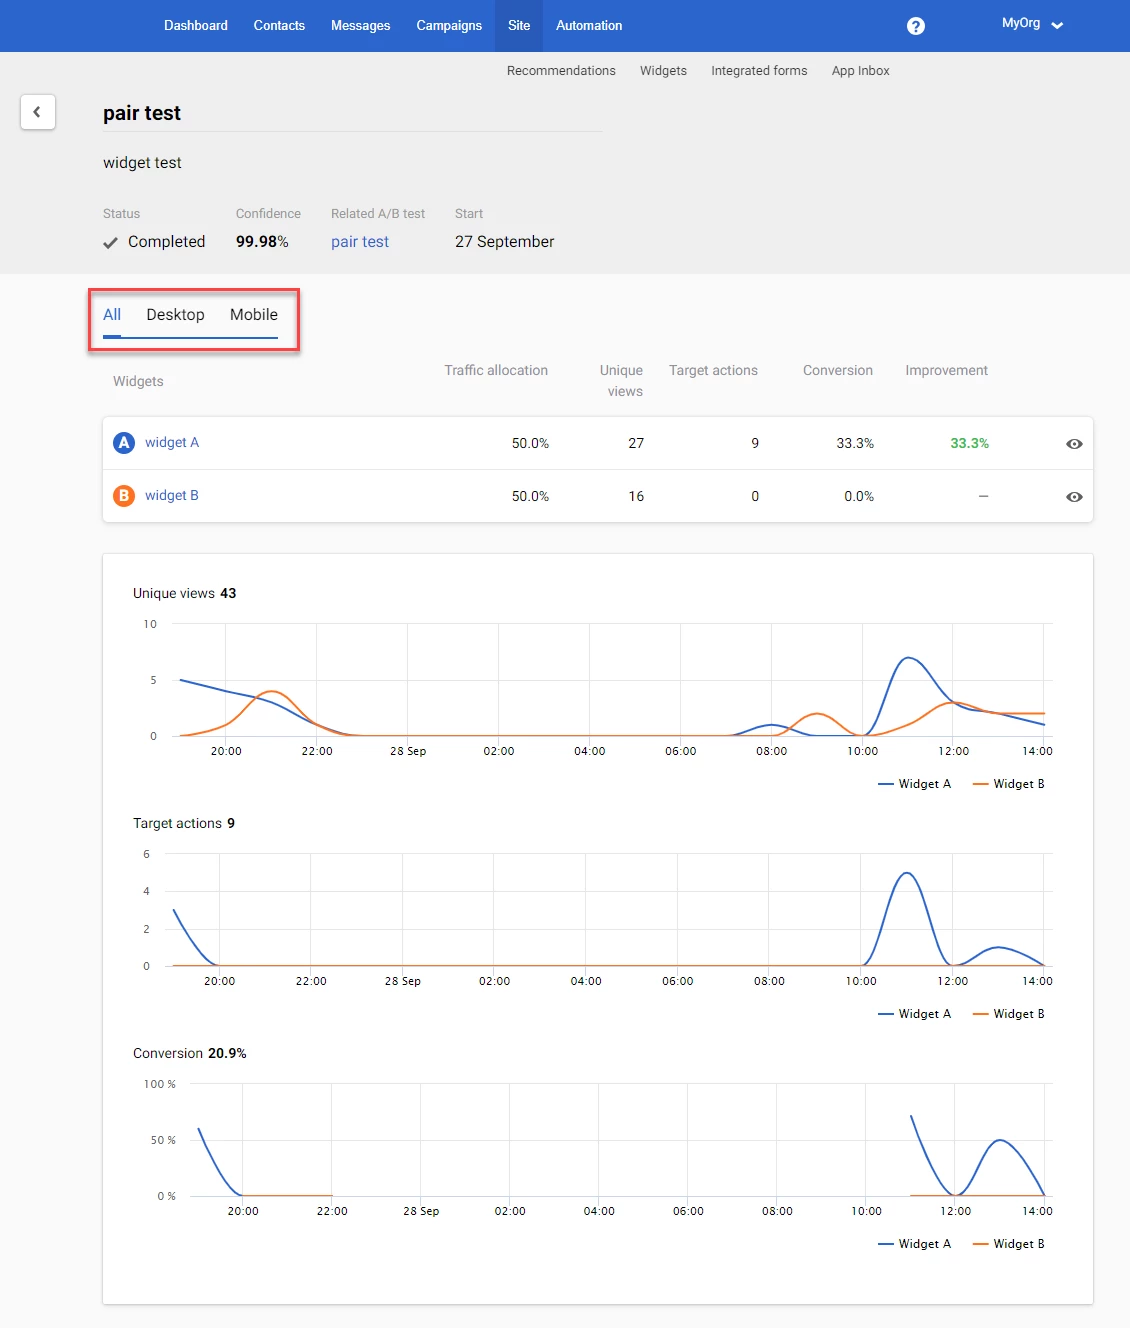
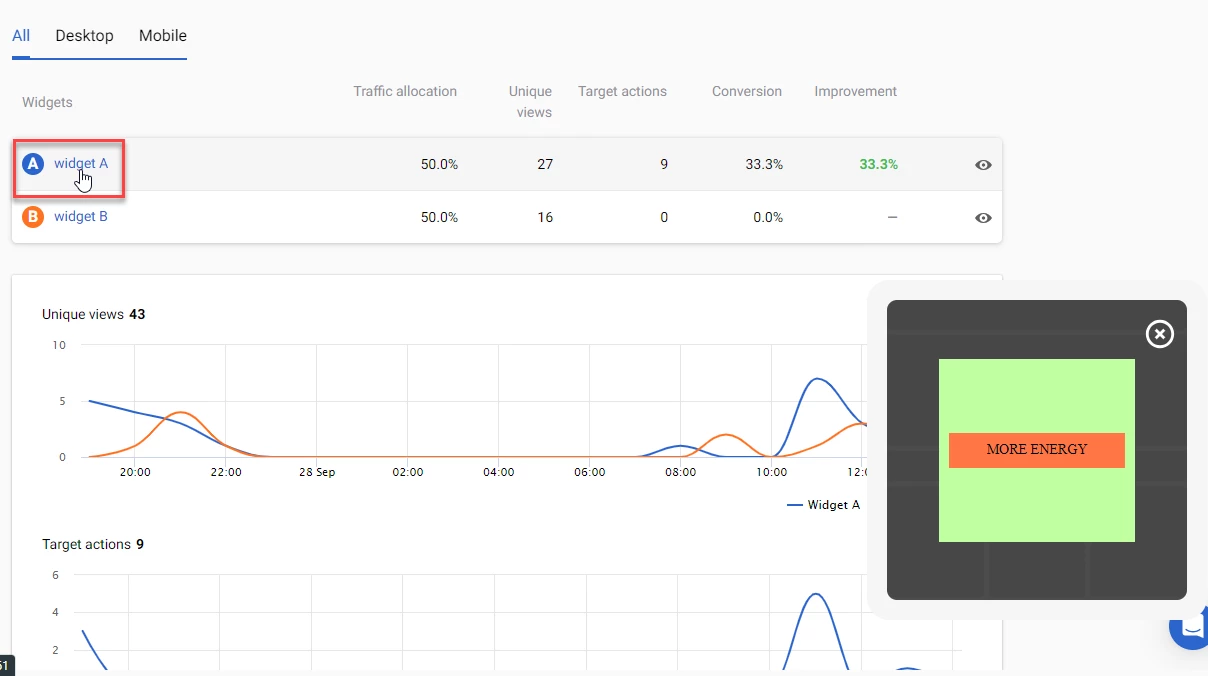
To preview the widget, point to the widget name in the Widgets column. The widget shows in the bottom right corner of the screen.
To go to the widget parameters, click the widget name.
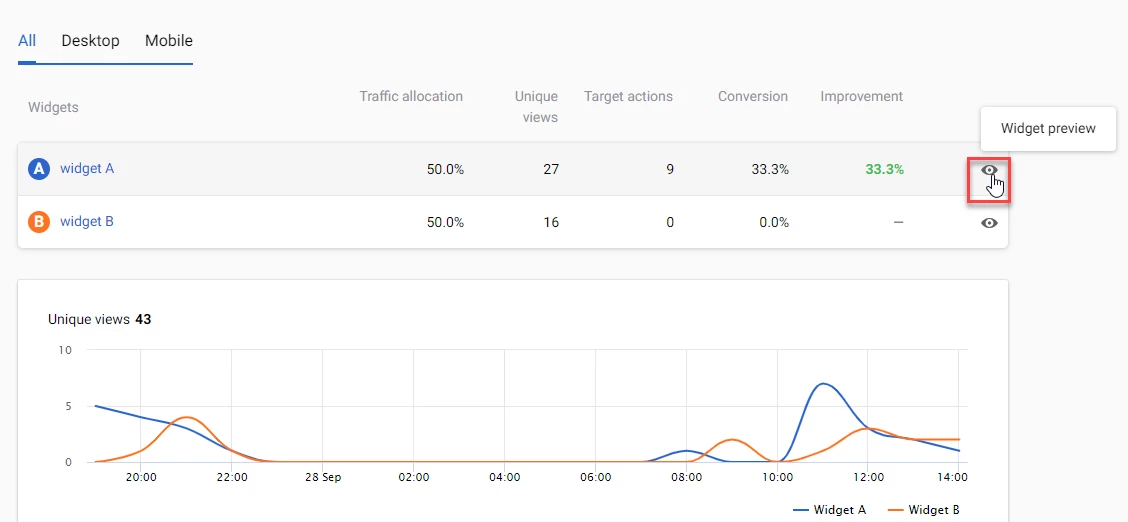
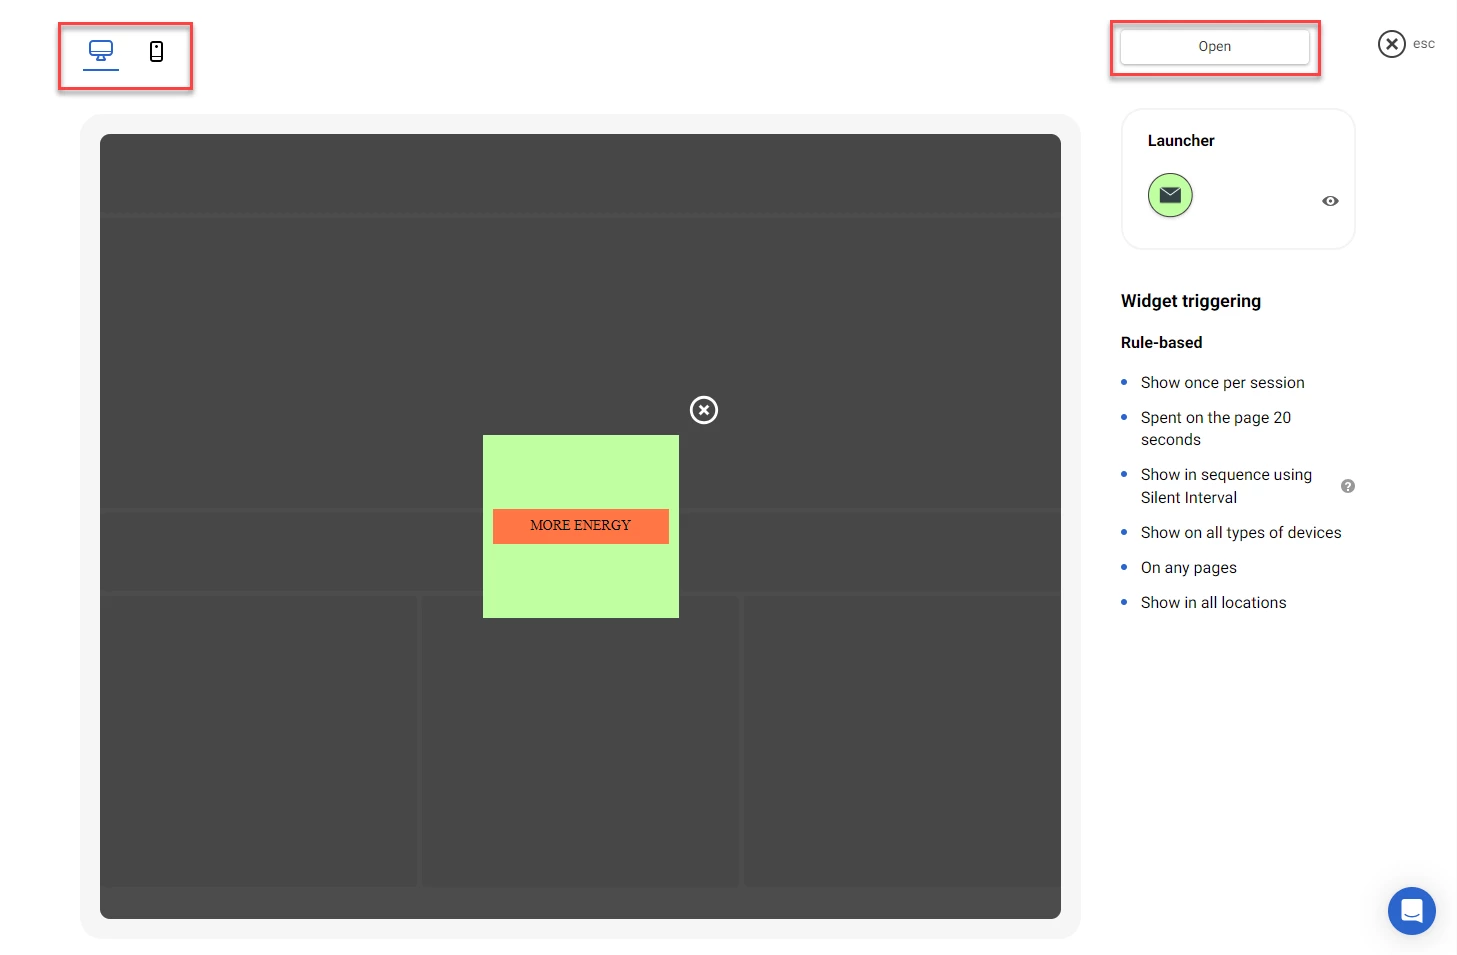
To preview the widget and its calling rules in a new window, click the Widget preview (eye) icon on the right-hand side of the row.
In the preview window, you can switch between the desktop and mobile preview by selecting the Desktop preview or the Mobile preview icons in the top left-hand side corner of the screen.
To go to the widget parameters, click the Open button.
Creating the A/B Test for 2 Variations of a Widget
You can run an A/B test to compare the performance of 2 widgets.
To create the A/B test for 2 widgets:
- In the A/B tests window, click the New test button.
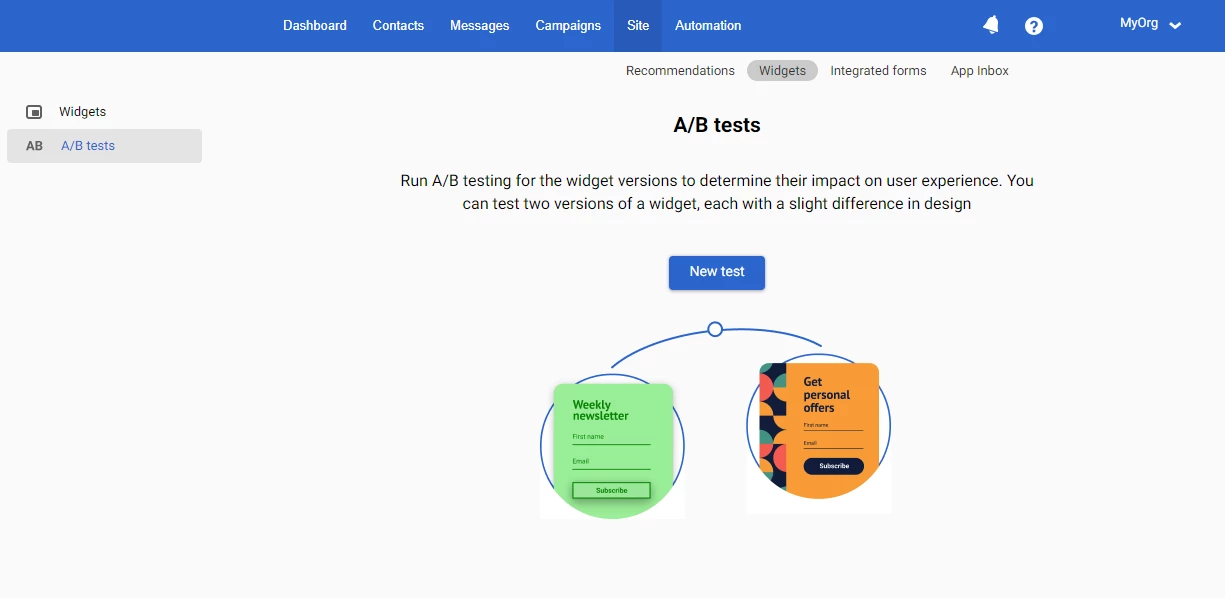
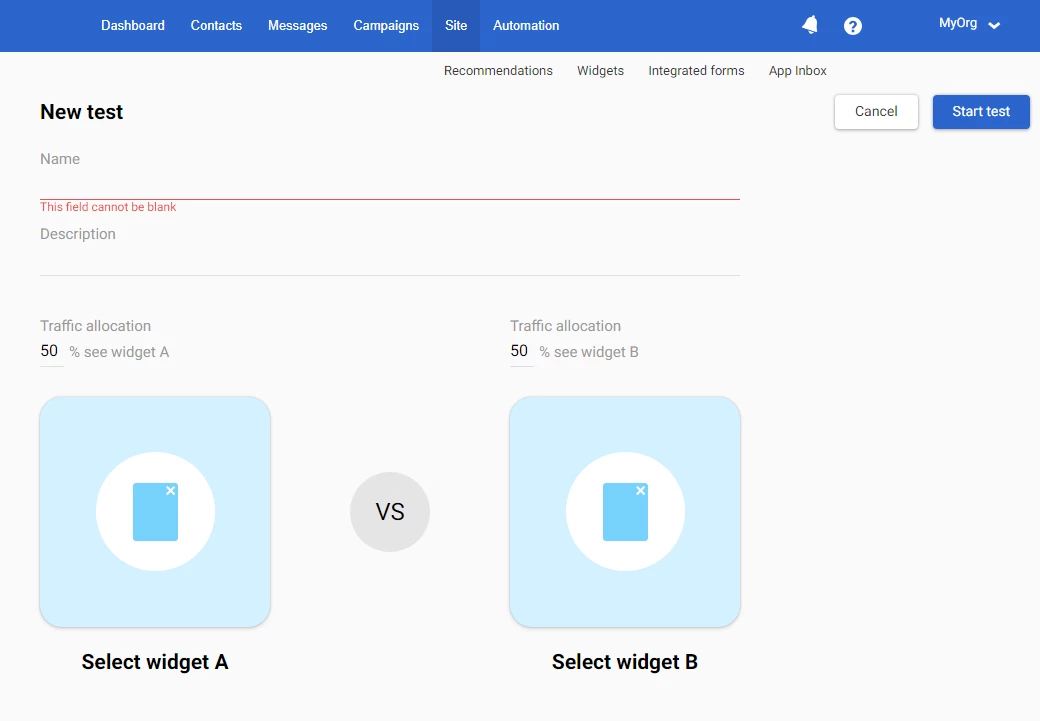
- In the New test window, enter the test name (required) and test description (optional) into the corresponding fields.
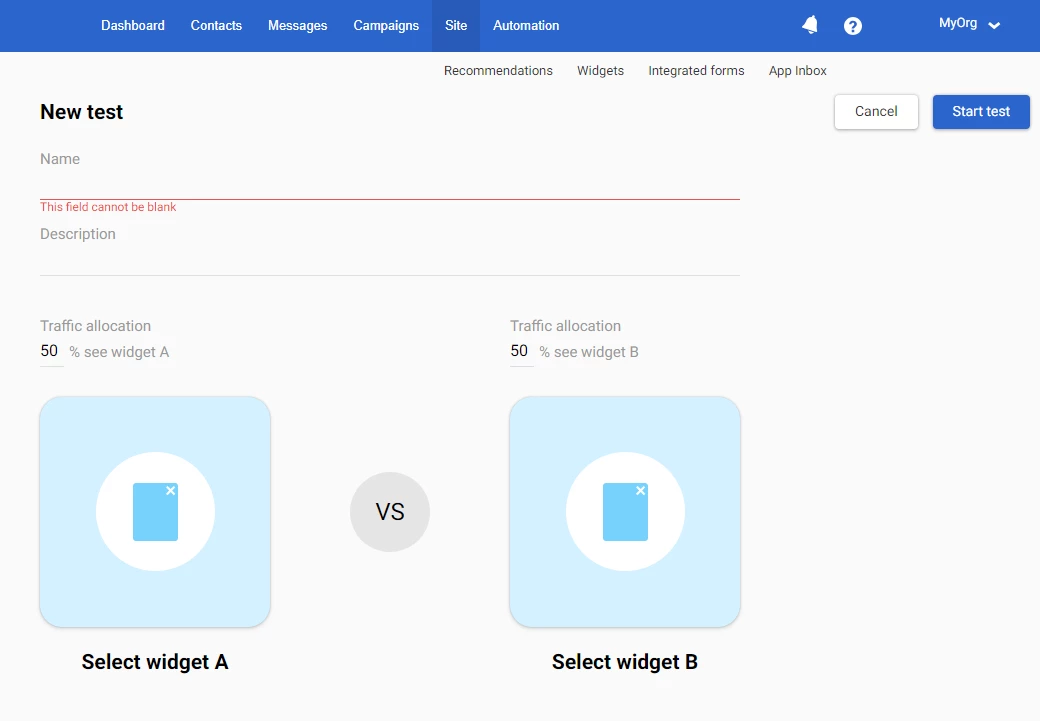
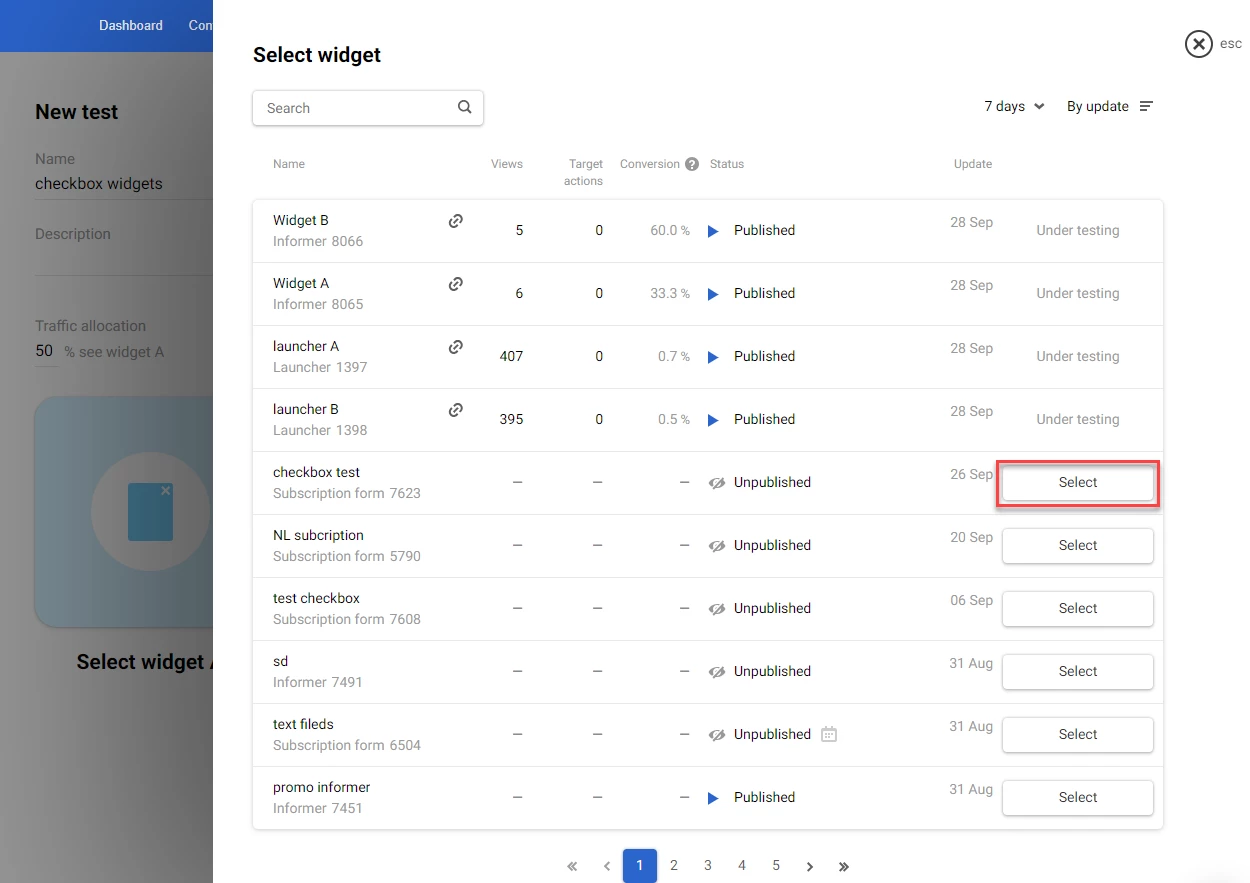
- Click Select widget A and select the widget from the list in the Select widget window.
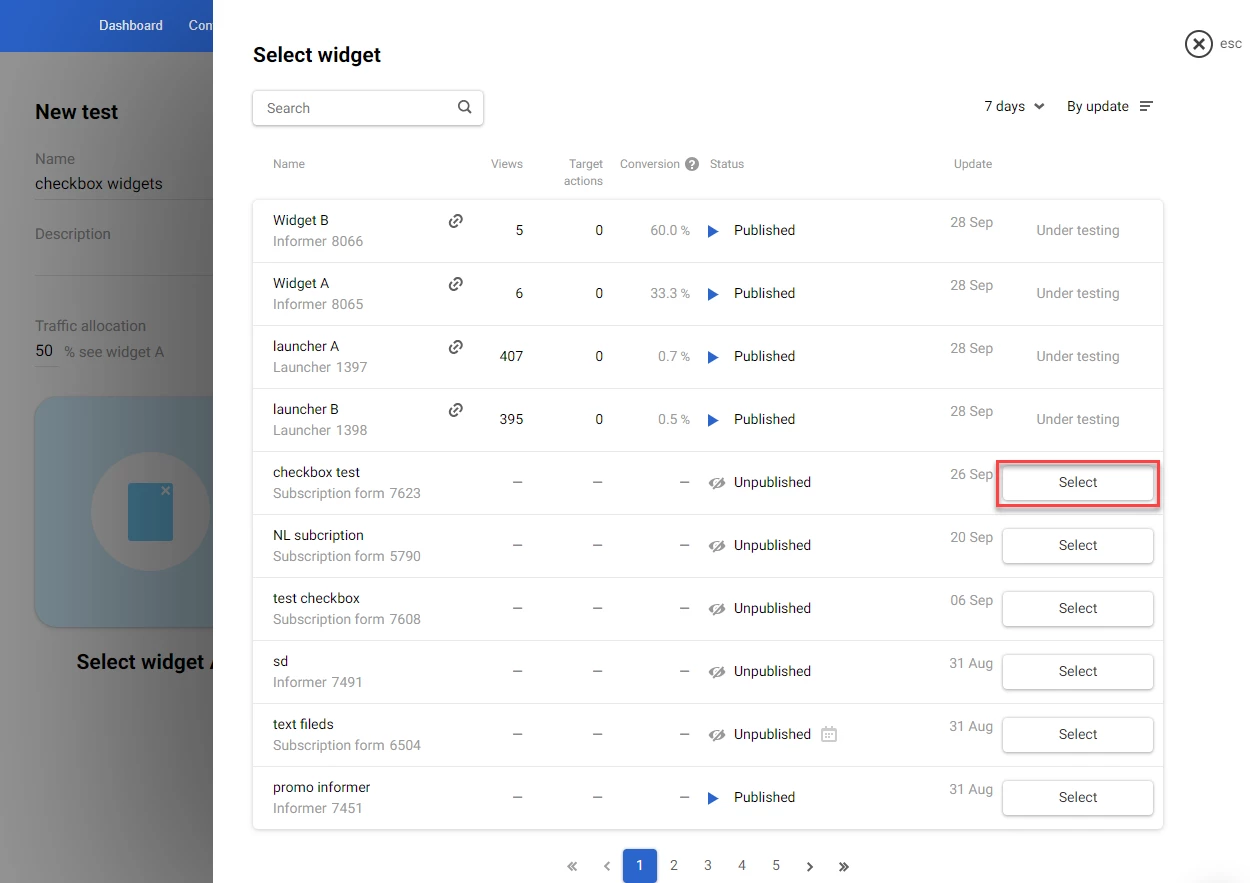
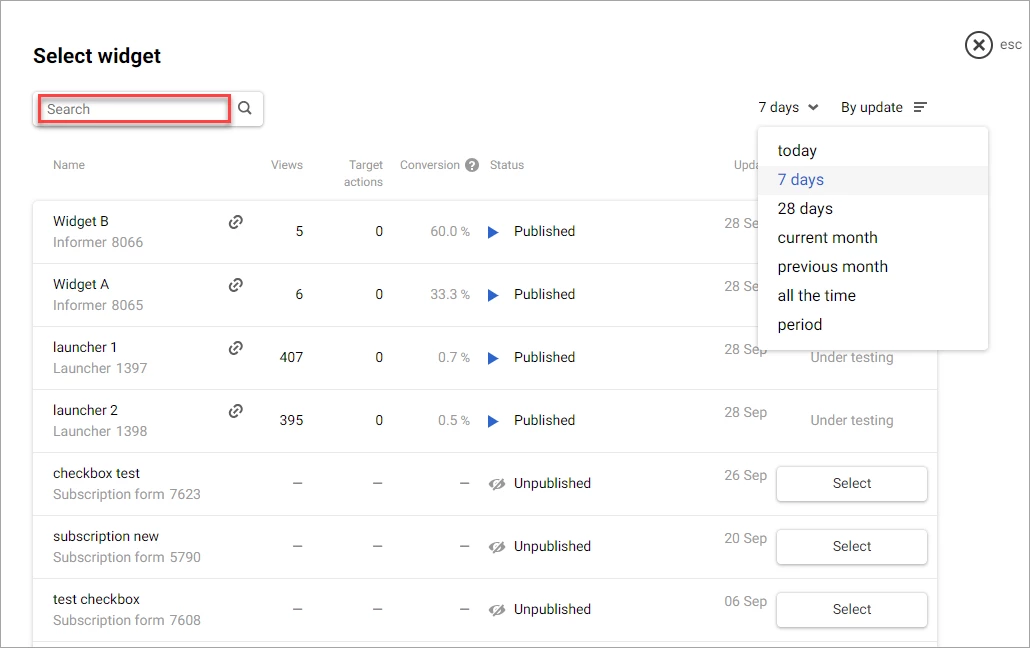
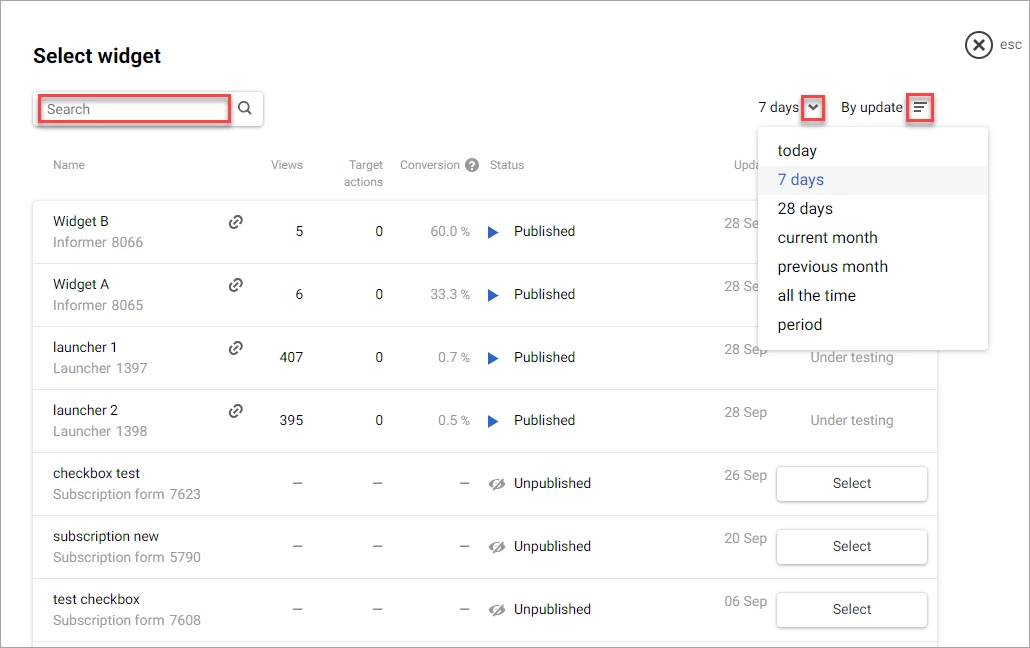
NoteYou can search for the widget using the Search box at the top of the Select widget window:
- To search by the widget name, enter the widget name or a part of the name into the Search box and click the Search (magnifying glass) icon or press Enter.
- To search by the widget ID, enter id: followed by space and the widget ID into the Search box and click the Search (magnifying glass) icon or press Enter. For example, id: 8230
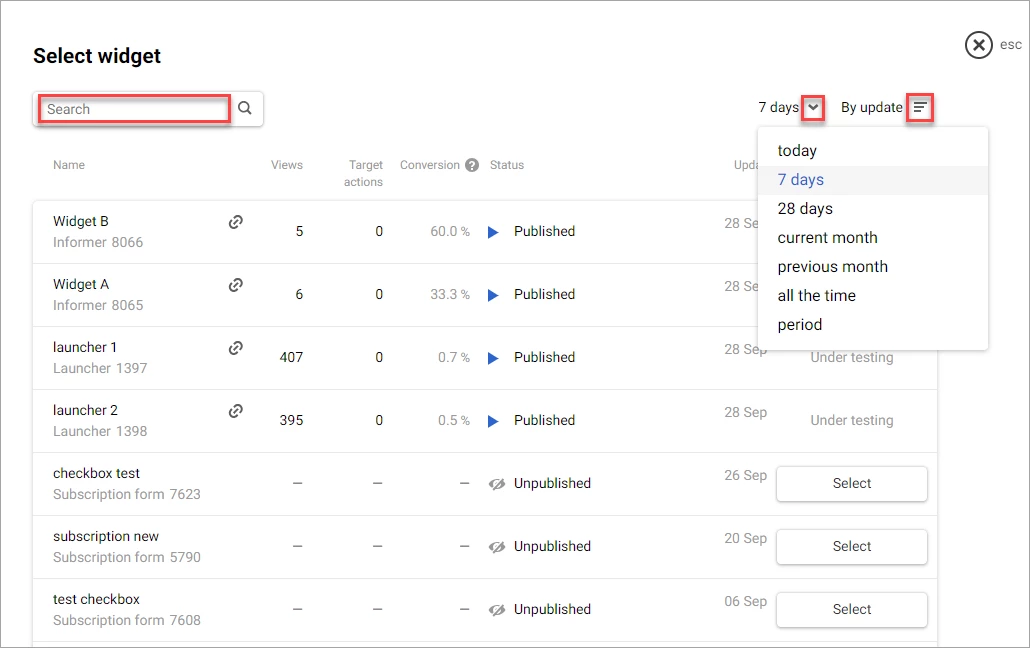
- Click Select widget B and select the widget from the list in the Select widget window.
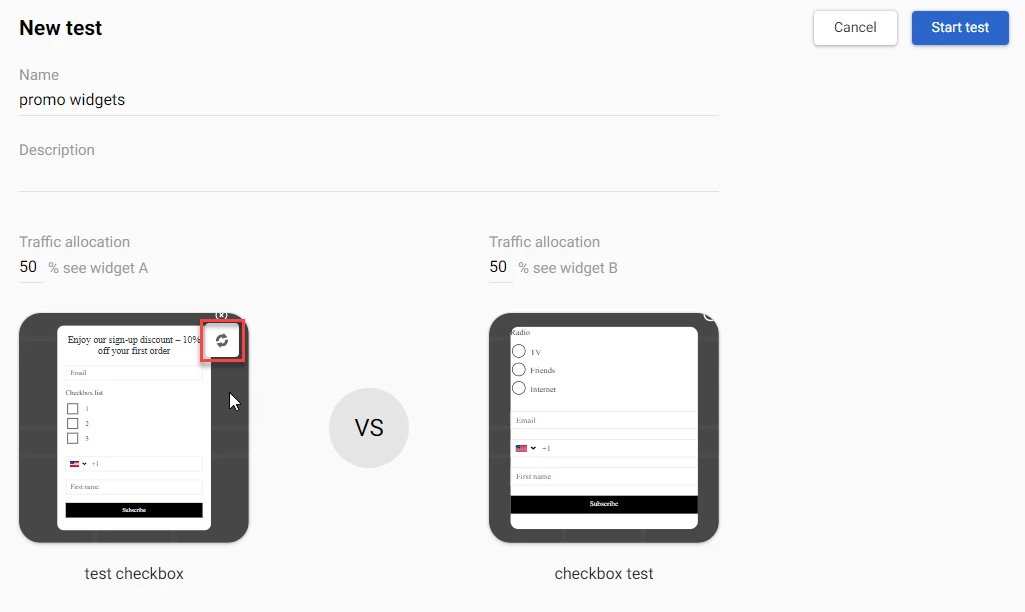
NoteTo replace the widget, point at the widget, click the Replace widget icon, and select another widget from the list in the Select widget window.
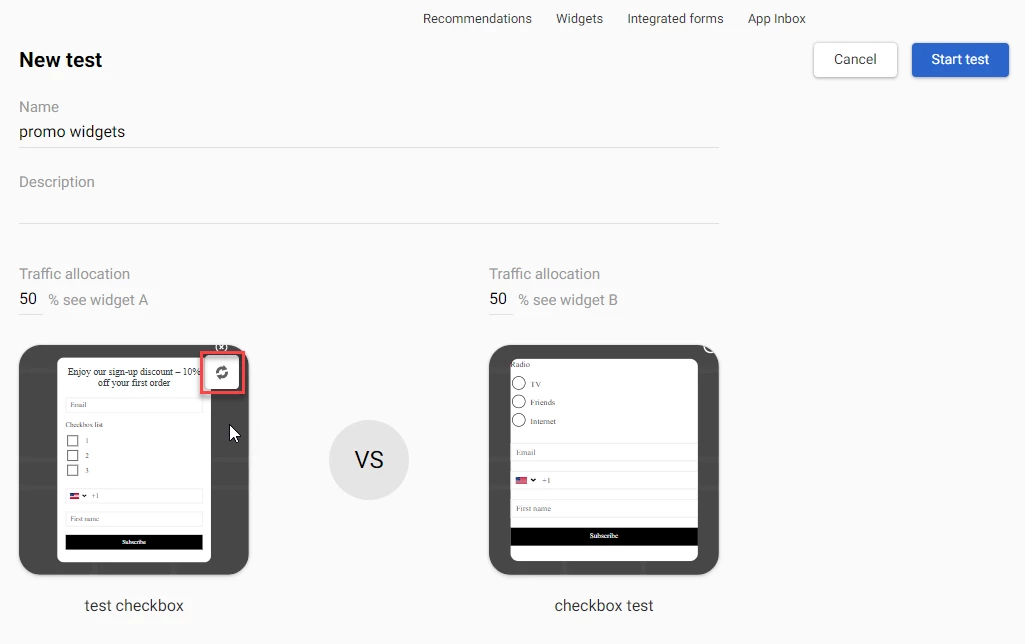
- Enter the value in the Traffic allocation field for one of the widgets.
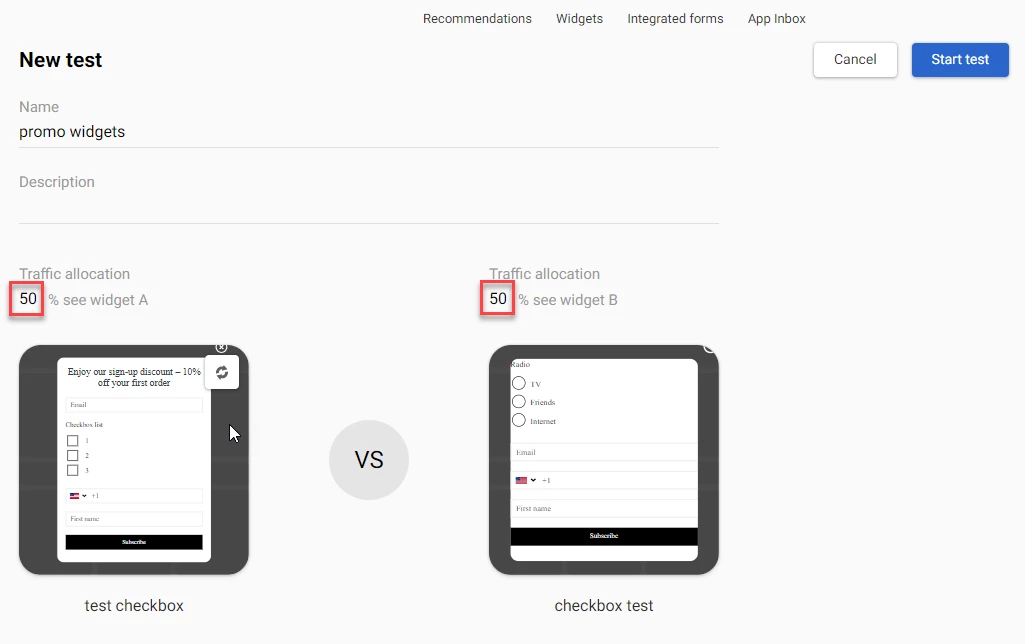
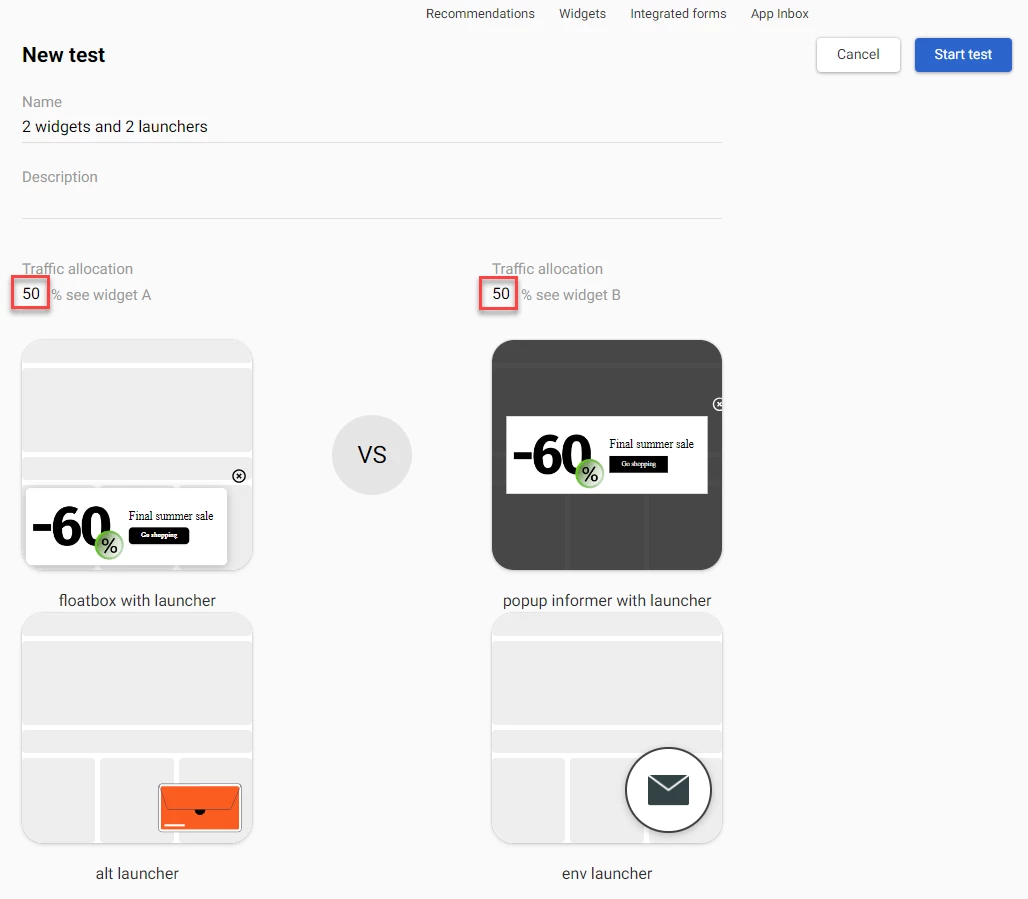
NoteThe traffic allocation value specifies the distribution of displays for widgets A and B. The default value is 50% for each widget. This means that the number of displays for both widgets is evenly distributed between all site or page visitors. The minimum value is 1, the maximum value is 99.
- Click Start test.
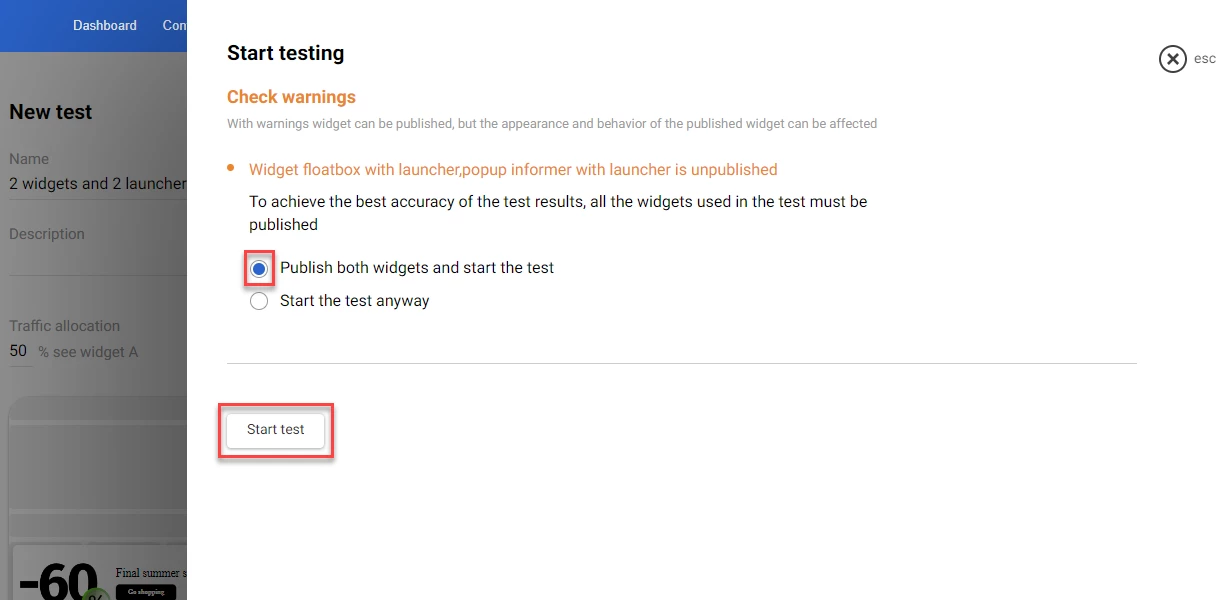
If your widgets are not published, the Start testing dialog window opens. Select Publish both widgets and start the test and click Start test in the Start testing window.
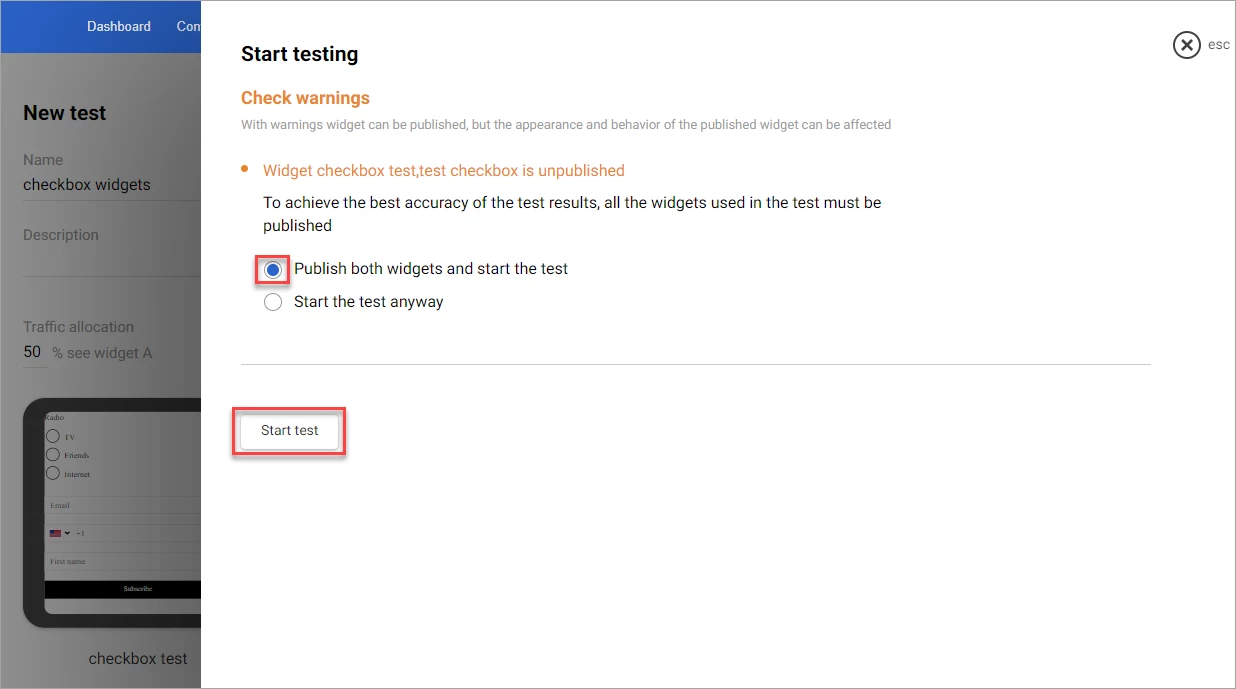
The test shows in the A/B test window with the In progress status.
Running the A/B Test for 2 Widgets with One Attached to the Launcher
If one of your widgets has the By click on launcher option enabled in the Widget calling settings, you can run an A/B test for 2 widgets attached to that launcher.
When the page visitor clicks the launcher during the test, it will show either widget A or widget B, depending on the traffic allocation values applied.
NoteFor this type of test, only one widget must have the By click on launcher option enabled.
To run an A/B test for 2 widgets attached to the same launcher:
- In the left-hand side panel, select A/B Tests and click the New test button.
- In the New test window, enter the test name (required) and test description (optional) into the corresponding fields.
- Click Select widget A and select the widget from the list in the Select widget window. This widget must have the By click on launcher option enabled.
NoteYou can search for the widget using the Search box at the top of the Select widget window:
- To search by the widget name, enter the widget name or a part of the name into the Search box and click the Search (magnifying glass) icon or press Enter.
- To search by the widget ID, enter id: followed by space and the widget ID into the Search box and click the Search (magnifying glass) icon or press Enter. For example, id: 8230
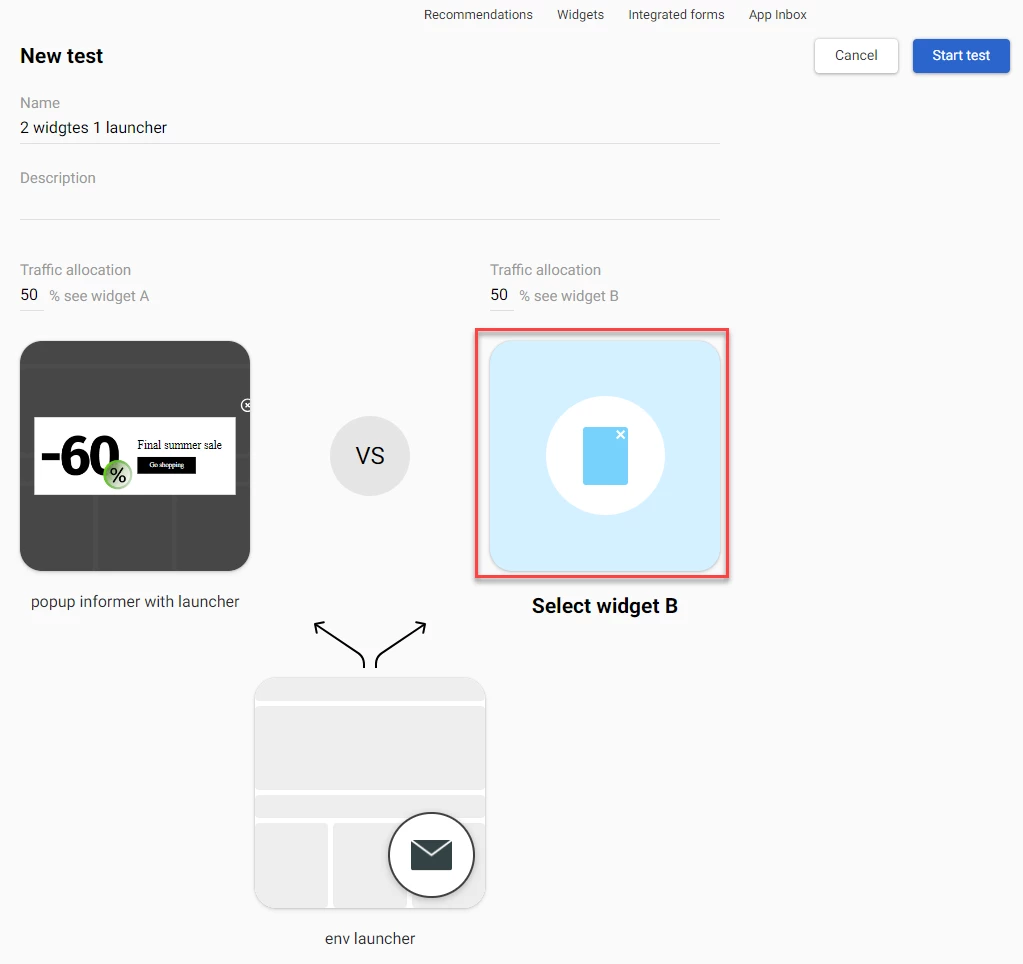
- Click Select widget B and select the widget from the list in the Select widget window. This widget must not have the By click on launcher option enabled.
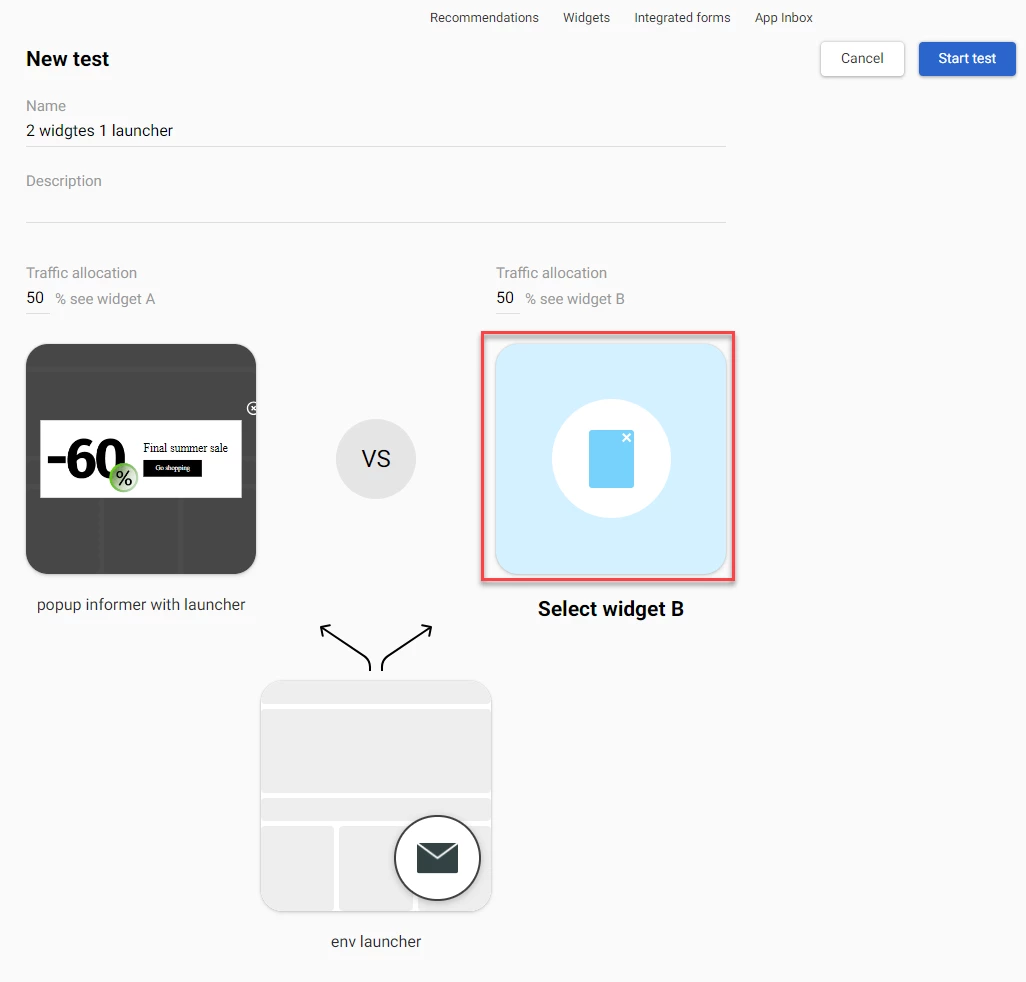
NoteTo replace the widget, point at the widget, click the Replace widget icon, and select another widget from the list in the Select widget window.
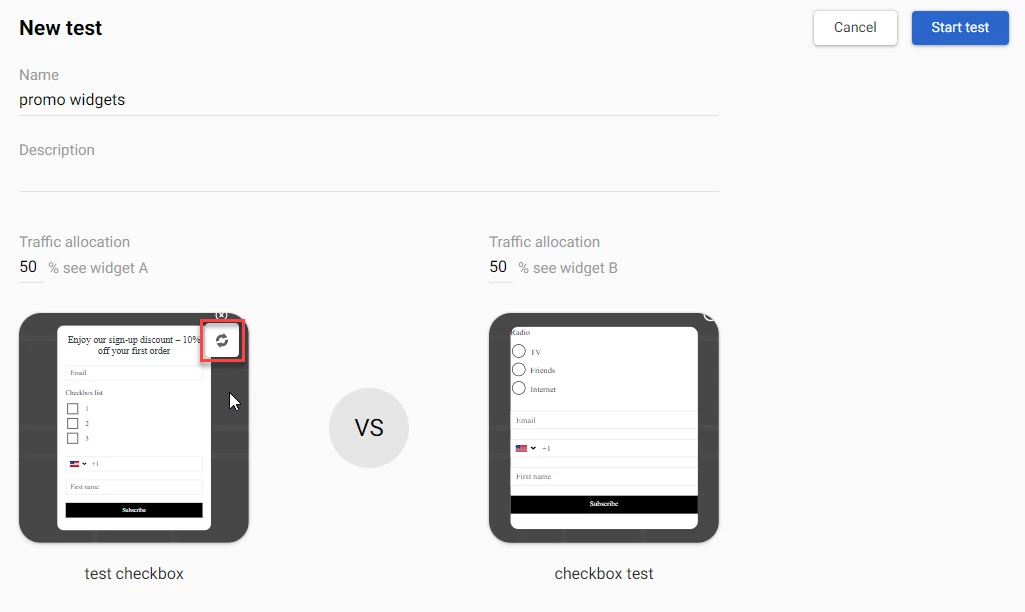
- Enter the value in the Traffic allocation field for one of the widgets.
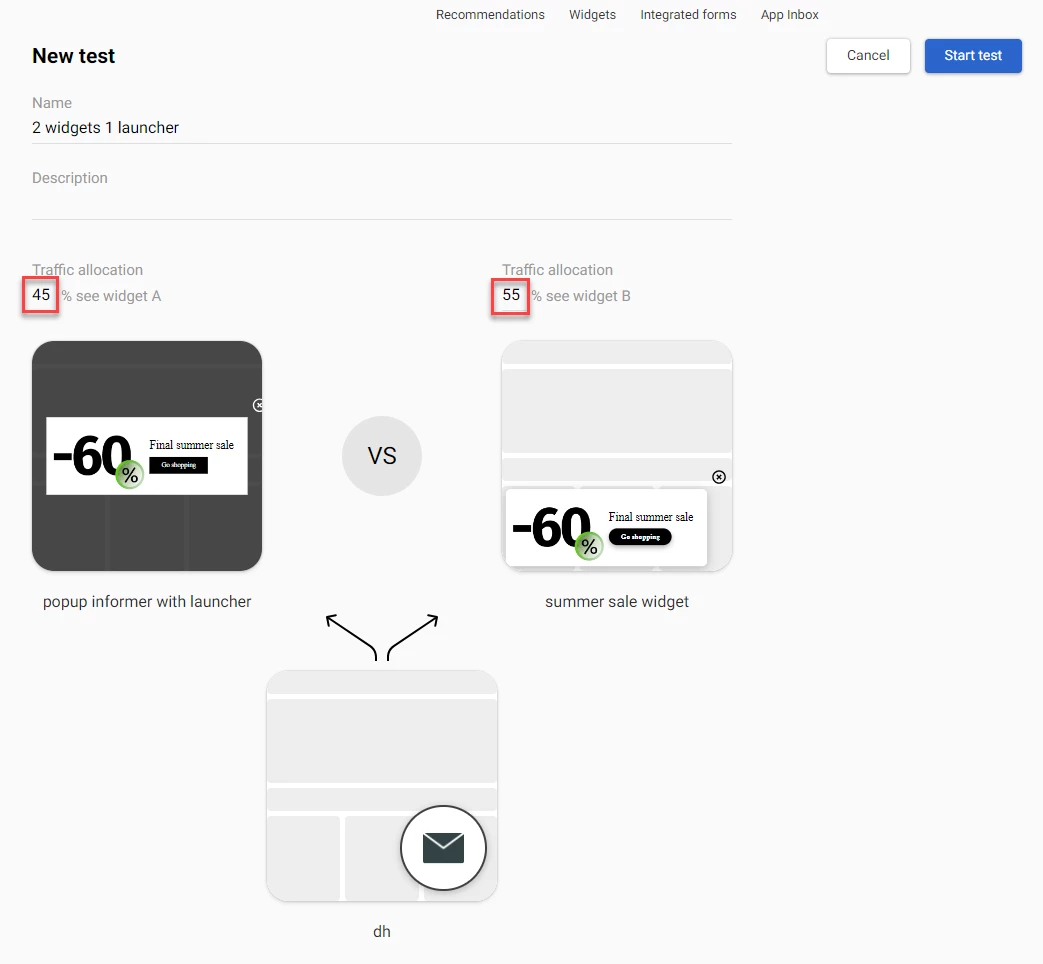
- Click Start test.
If your widgets are not published, the Start testing dialog window opens. Select Publish both widgets and start the test and click Start test in the Start testing window.
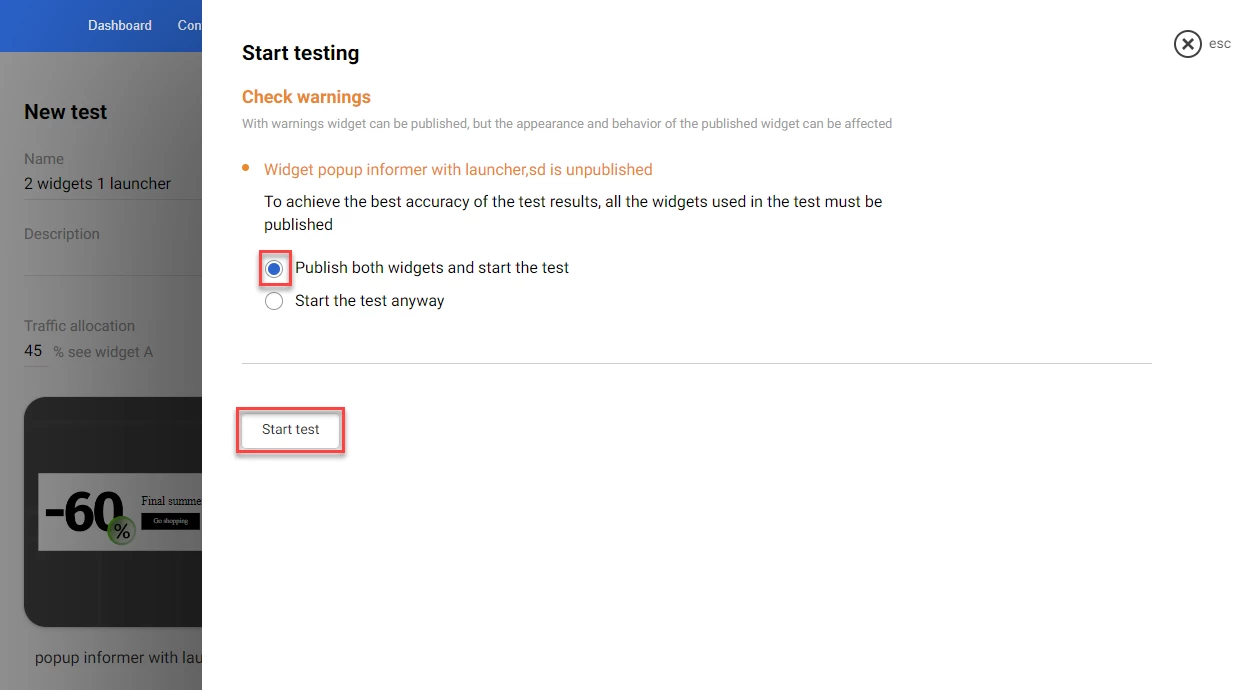
Running the A/B Test for 2 Variations of a Widget Attached to 2 Variations of a Launcher
If both your widgets have the By click on launcher option enabled in the Widget calling settings, you can run an A/B test for 2 widgets attached to 2 different launchers.
The page visitor will see either of the launchers and their associated widgets depending on the traffic allocation values applied.
In this case, 2 different tests are run automatically:
- Test for launchers.
- Test for widgets.
The statistics data are collected independently for each test.
To run an A/B test for 2 variations of a widget attached to 2 variations of a launcher:
- In the left-hand side panel, select A/B tests and click the New test button.
- In the New test window, enter the test title and test description into the corresponding fields.
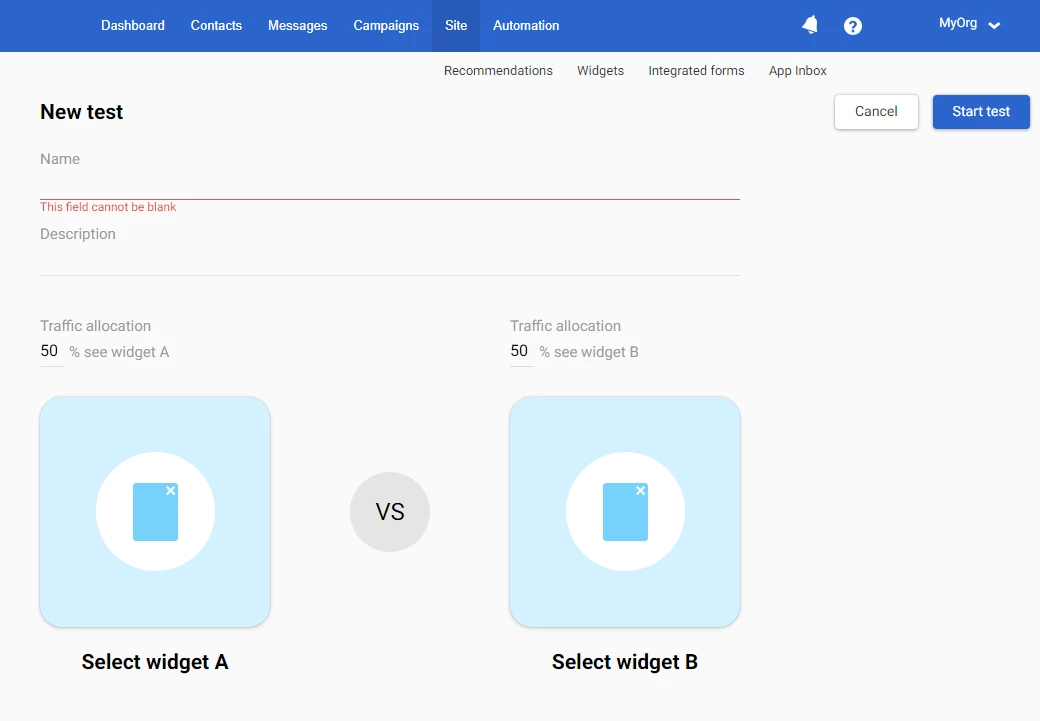
- Click Select widget A and select the widget from the list in the Select widget window.
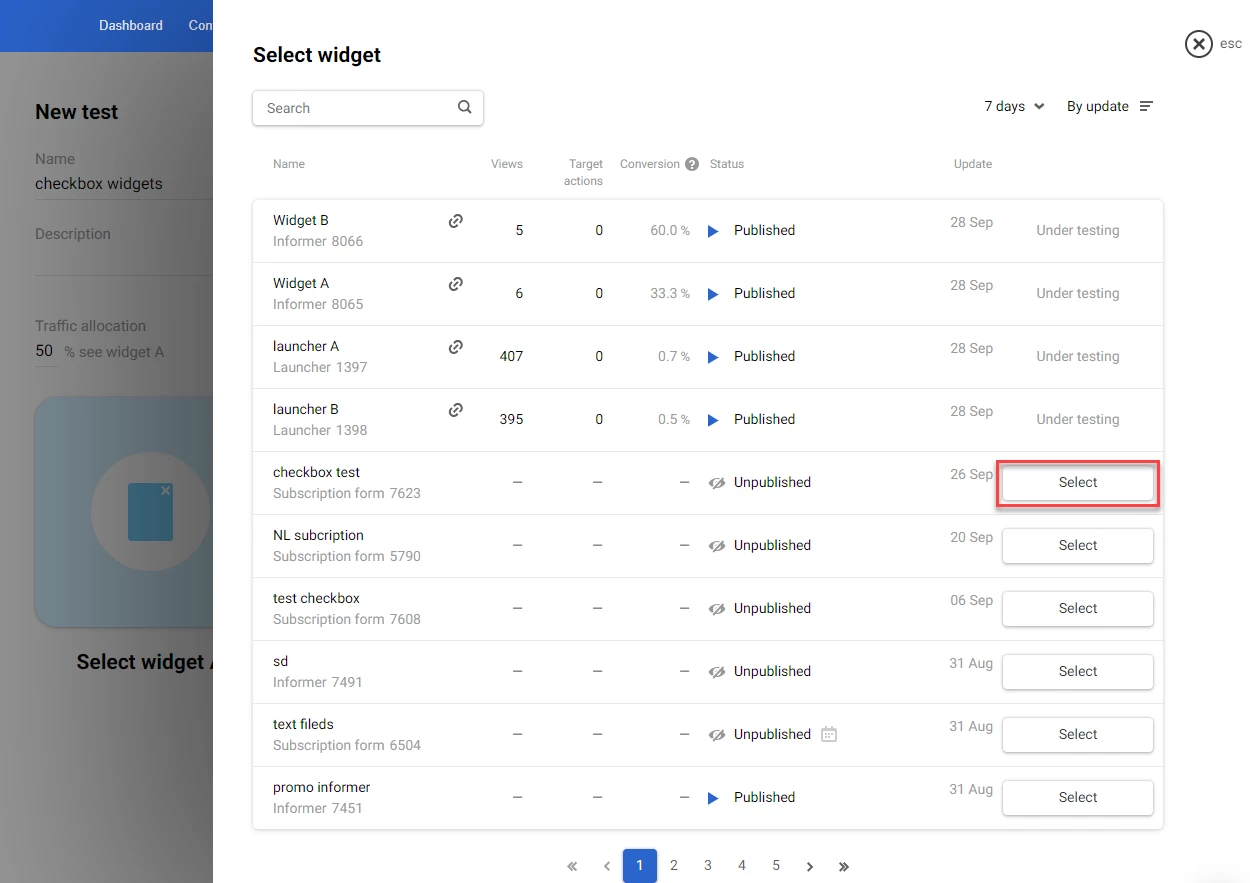
This widget must have the By click on launcher option enabled.
NoteYou can search for the widget using the Search box at the top of the Select widget window. Or, you can use the period dropdown menu or the By update switch to filter the widgets shown in the list.
- Click Select widget B and select the widget from the list in the Select widget window. This widget must have the By click on launcher option enabled.
NoteTo replace the widget, point at the widget, click the Replace widget icon, and select another widget from the list in the Select widget window.
- Enter the value in the Traffic allocation field for one of the widgets.
- Click Start test.
If your widgets are not published, the Start testing dialog window opens. Select Publish both widgets and start the test and click Start test in the Start testing window.
Two tests – one for the widgets and one for the launchers – appear in the list of tests in the A/B tests screen.
Updated 2 months ago
