First steps
User Data
- Responsive Email Editor Review
- Designing your email
- Creating Synchronized Modules
- Setting Up Responsive Email Design
- Setting Up Smart Containers
- Creating a Gmail Promotions Annotation
- Adding The Rollover Effect
- Adding Anchor Links
- Module Library
- Adding a Table to an Email
- Adding Custom Fonts
- Creating CTA Button
- Working with Images
- Creating Timer
- Using AI in the Email Editor
- Messenger Protocol Support in Email Clients and Platforms
Omnichannel
- SDK for Mobile Apps
- Managing Mobile SDK Access Keys
- Connecting Mobile App
- Creating and Uploading a Firebase Key
- Creating Mobile Push Messages
- Setting Up Delivery and Clicks Analytics
- Deep Link Types
- Scheduled Mobile Push Message
- Sending Test Messages from the Event Debug View
- Error Codes for Mob Push Notifications
- Setting Up Widgets for Your Site
- Widgets Gamification
- Widget Calling
- Setting Up Locations for the Widget Calling Rules
- Storing data from widgets to contact fields
- Using Annoyance Safeguard
- Actions After Subscription
- Replacing Double Opt-In System Workflow
- Creating Pop-ups via Google Tag Manager or WordPress
- Sending Yespo Widget Events to Google Analytics
- Using A/B Tests for Widgets
- Collecting Contact Information Using Request Forms
Automation
- Building and Editing Workflows
- Configuring Workflow Start/Stop Conditions
- Start Block
- Popular Blocks
- Message Blocks
- Using One from Many Message Block
- Contact Blocks
- Conditions Blocks
- Other Blocks
- Message to Segment Blocks
- Time Blocks
- Advanced Workflow Block Parameters
- Setting Up Allowed Send Time
- Using Workflow Launch History
- Webhook Workflows
- Workflow Troubleshooting
- Double Opt-In
- Welcome Сampaign
- Welcome Series Segmented by Category
- Launching a Workflow After a Contact Import
- Regular Workflow for a Segment
- Birthday Campaign
- Linking Workflow to the Button
- Using Variables from Order in Workflow
- Collecting Order Feedback
- Customer Reactivation
- Using A/B Tests In Workflows
- Sending Extra Campaigns
- Sending Reminders at the Time Specified by the User
- Sending Campaign to Those Who Did Not Open the Previous One
Personalization
Analytics
- Email Campaign Report
- Web Push Campaign Report
- Viber Campaign Report
- Mobile Push Campaign Report
- App Inbox Campaign Report
- Telegram Campaign Report
- In-App Report
- Widget Report
- Triggered Campaign Report
- AMP Campaign Report
- SMS Campaign Report
- Multilingual Campaign Report
- Setting up UTM Tags
- Revenue from Campaigns
- Tracking Campaign Performance in Google Analytics 4
- Message Analytics
Multilanguage Campaigns
Events and Behaviour Tracking
Recommendations
API
Security and Compliance
How to Sign Up
To sign up for a free account, proceed as follows:
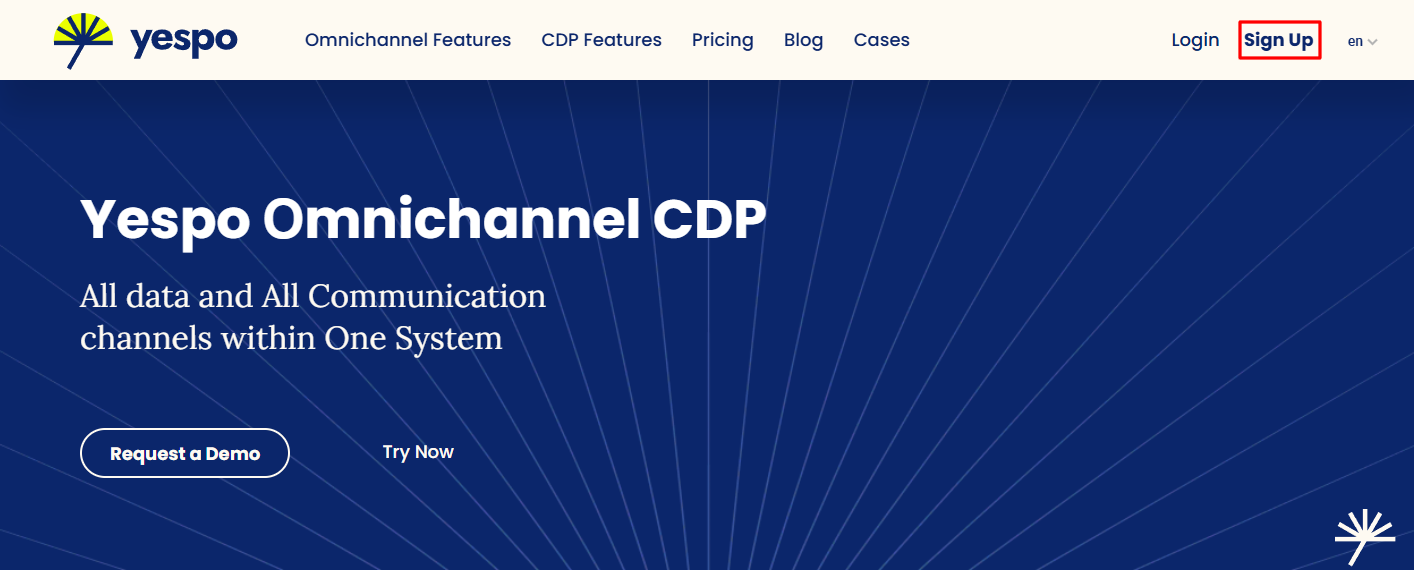
1. Click the Sign Up button on the right of the top panel of the our site.
2. In the Get Started for Free dialog window:
- Fill in the following fields:
- First name
- Email address.
- Phone number.
- Tick the checkboxes to accept
- Terms of Use.
- Privacy Policy.
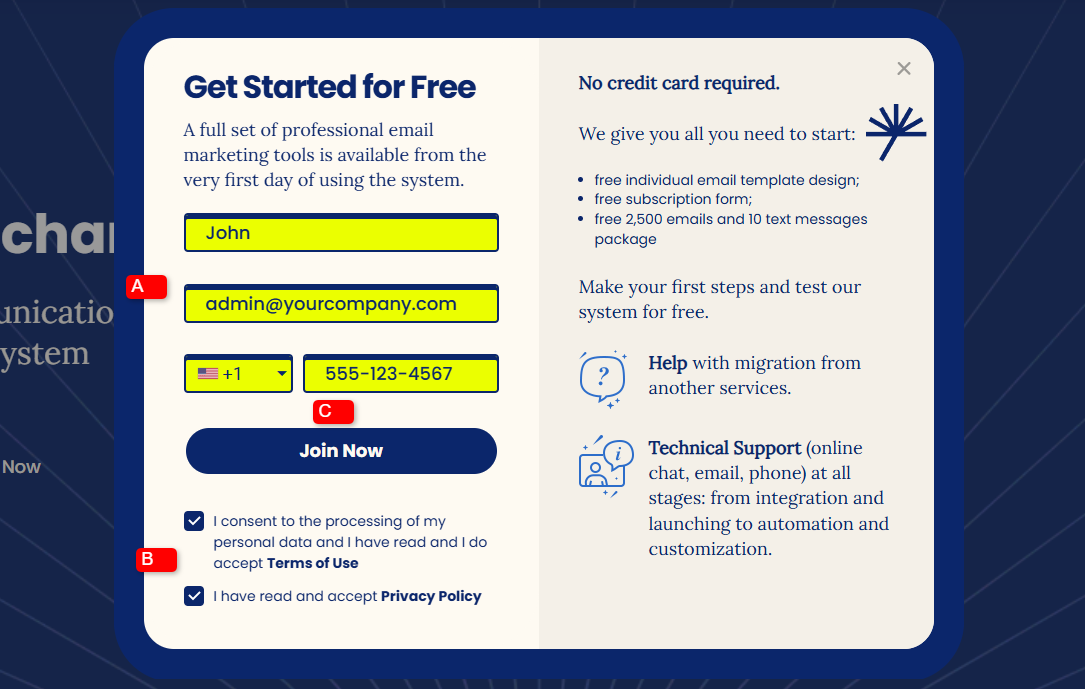
You have to accept the Terms of Use and Privacy Policy to proceed.
Note
Please read our Terms of Use and Privacy Policy carefully before accepting them.
C. Click the Join Now button.
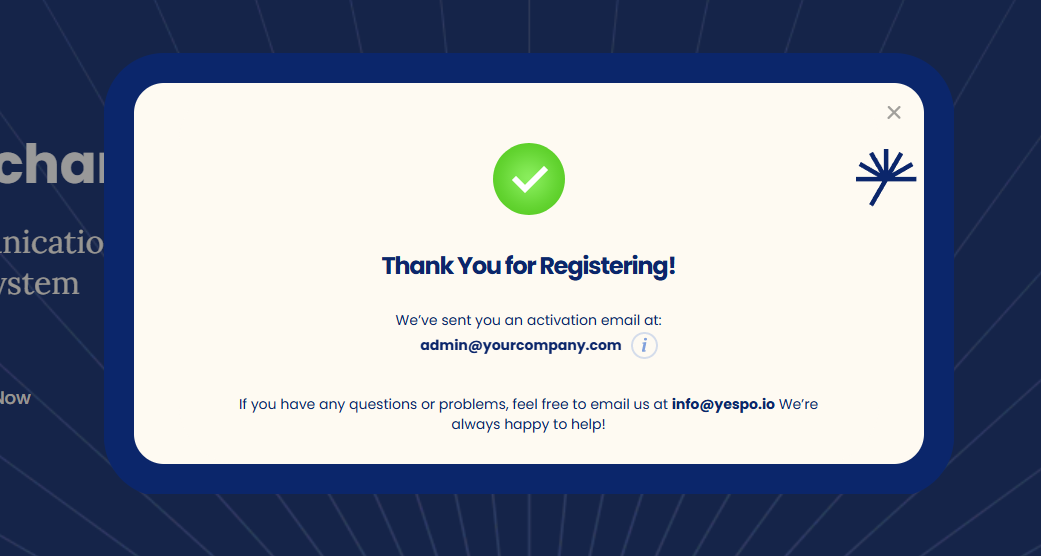
After that, an email with the activation button will be sent to the specified email address.
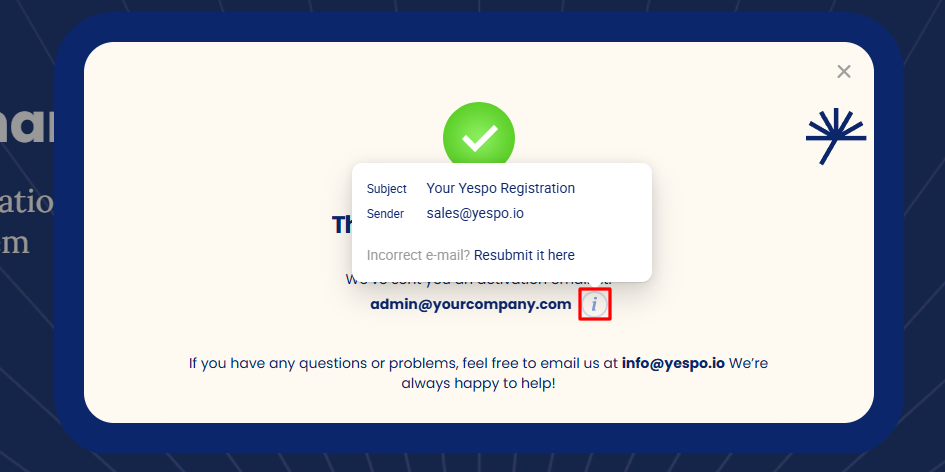
In case you have made a mistake when typing your email address, сlick the icon with the letter “i” next to the email address, and then click Resubmit it here to return to Step 2 where you can enter the correct email address.
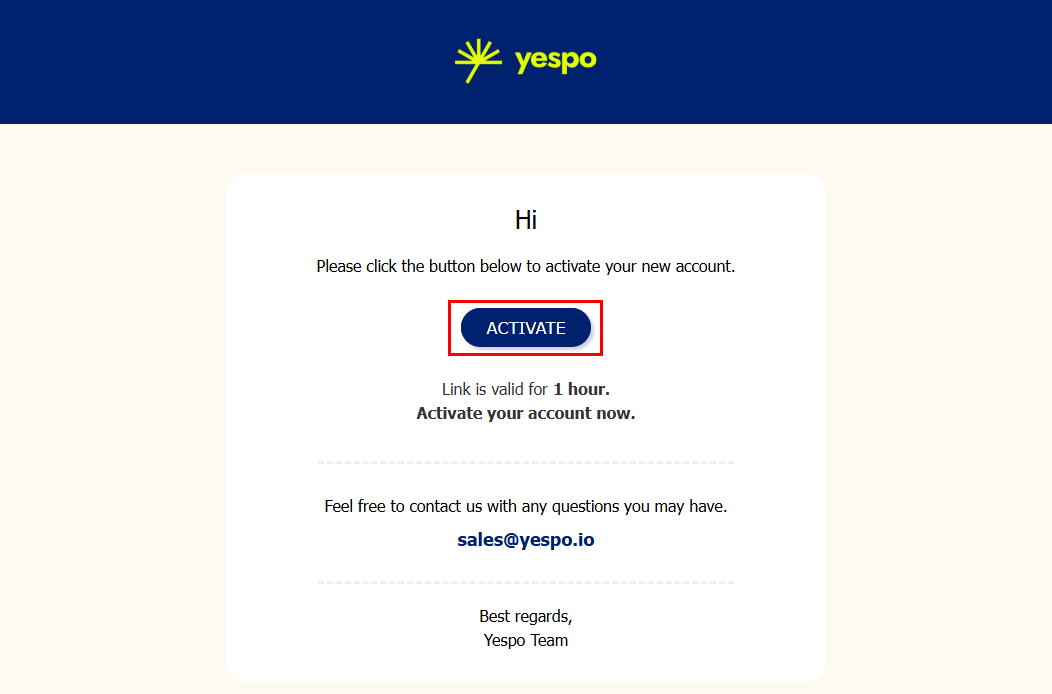
Account Activation
1. Open the message with Activate Your account subject.
2. Click the ACTIVATE button.
Note
- The activation link is valid for 1 hour.
- If you don’t find the message in the Inbox, check the Spam.
You will be directed to the Account Activation page to complete the process.
Login data
Enter your password into the Password and Password Again fields, and click Next.
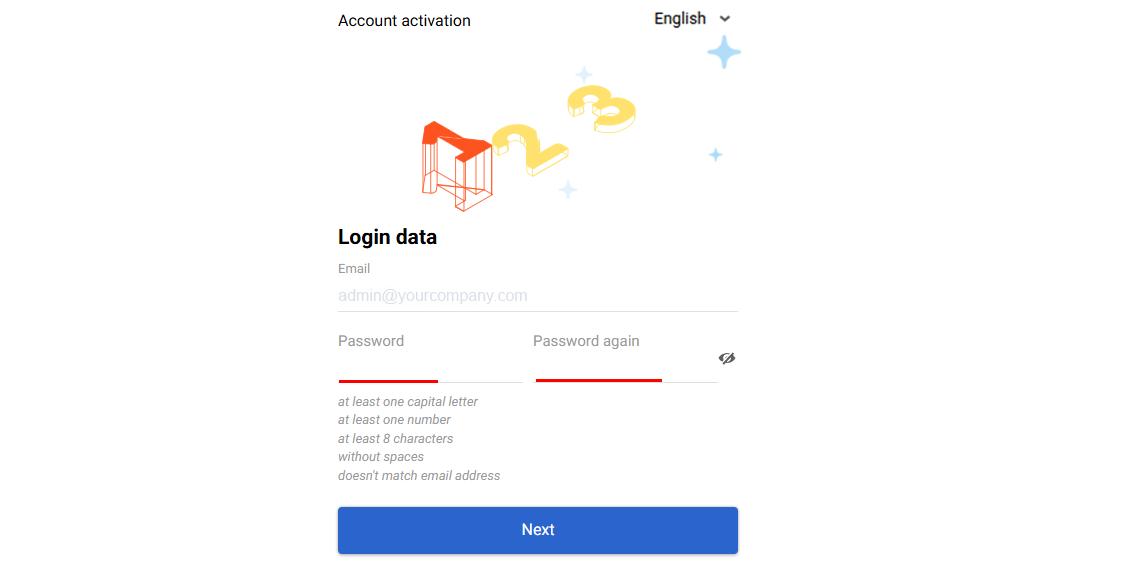
Your password has to comply with the conditions listed below the fields.
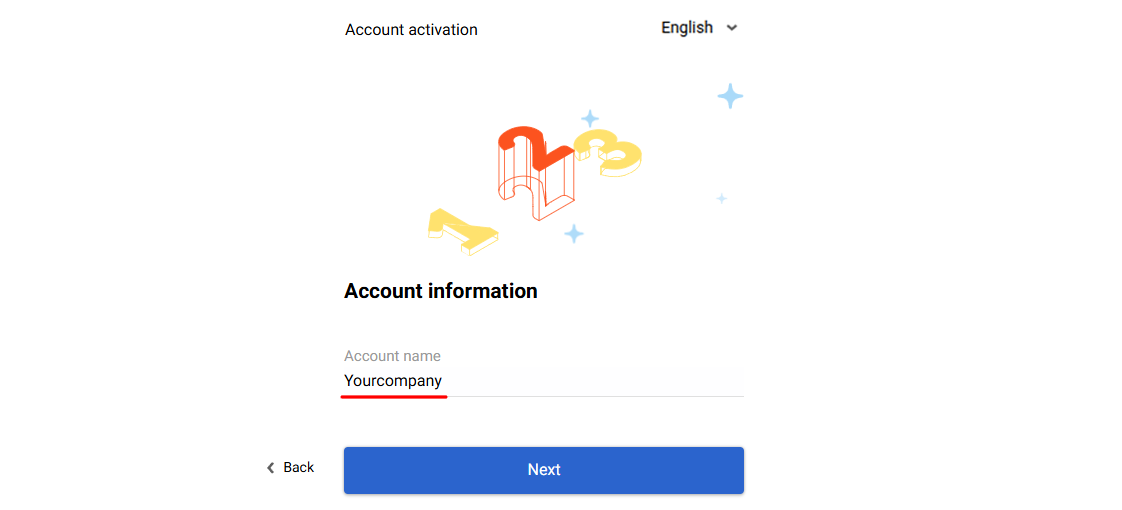
Account information
Enter the preferred name for your account and click the Next button.
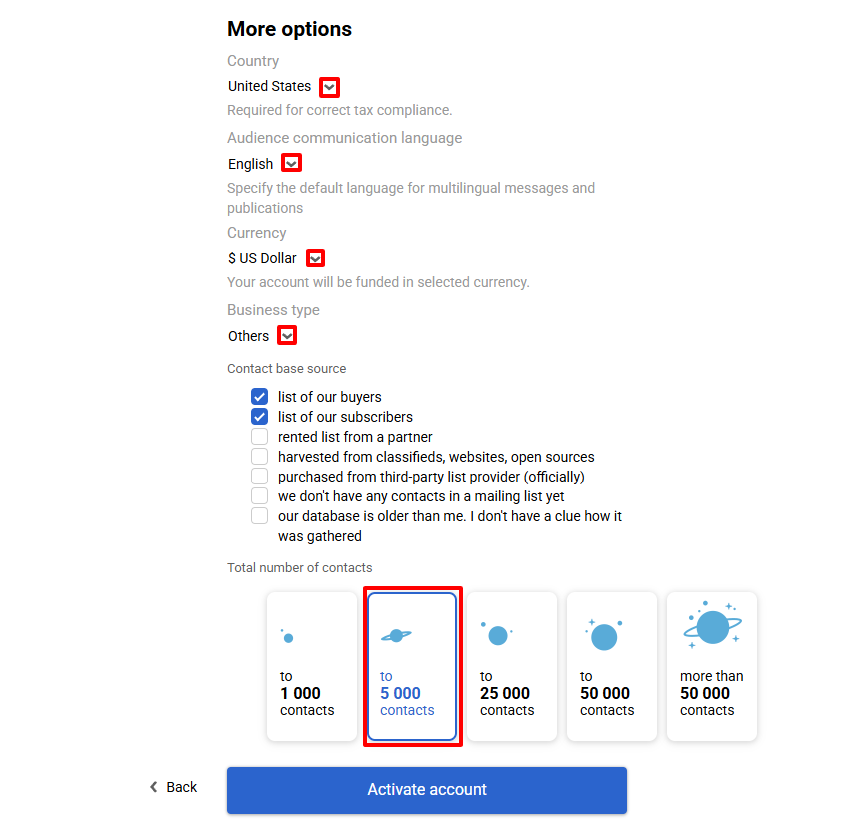
More options
1. From the dropdown list, select:
- Country
- Currency
- Business type
2. Activate the checkboxes next to the Contact base source.
3. Select the Total number of contacts in your base.
4. Click the Activate account.
After activating your account, you can access all the features of the Yespo system.
If you have any additional questions, please contact us at support@yespo.io.