
What Is Yespo?
Yespo is an Omnichannel Customer Data Platform (CDP) made to embody the toughest ideas of enterprise-level solutions in a very clear and efficient way.
With advanced tools for analytics, segmentation, automation, and omnichannel communication, Yespo is an essential solution for e-commerce success. Our CDP ensures that your customer data remains up-to-date, structured, and actionable, empowering you to make data-driven decisions that maximize engagement and revenue.
By leveraging the core Yespo concepts described below, you can enhance your marketing efforts and drive business growth.
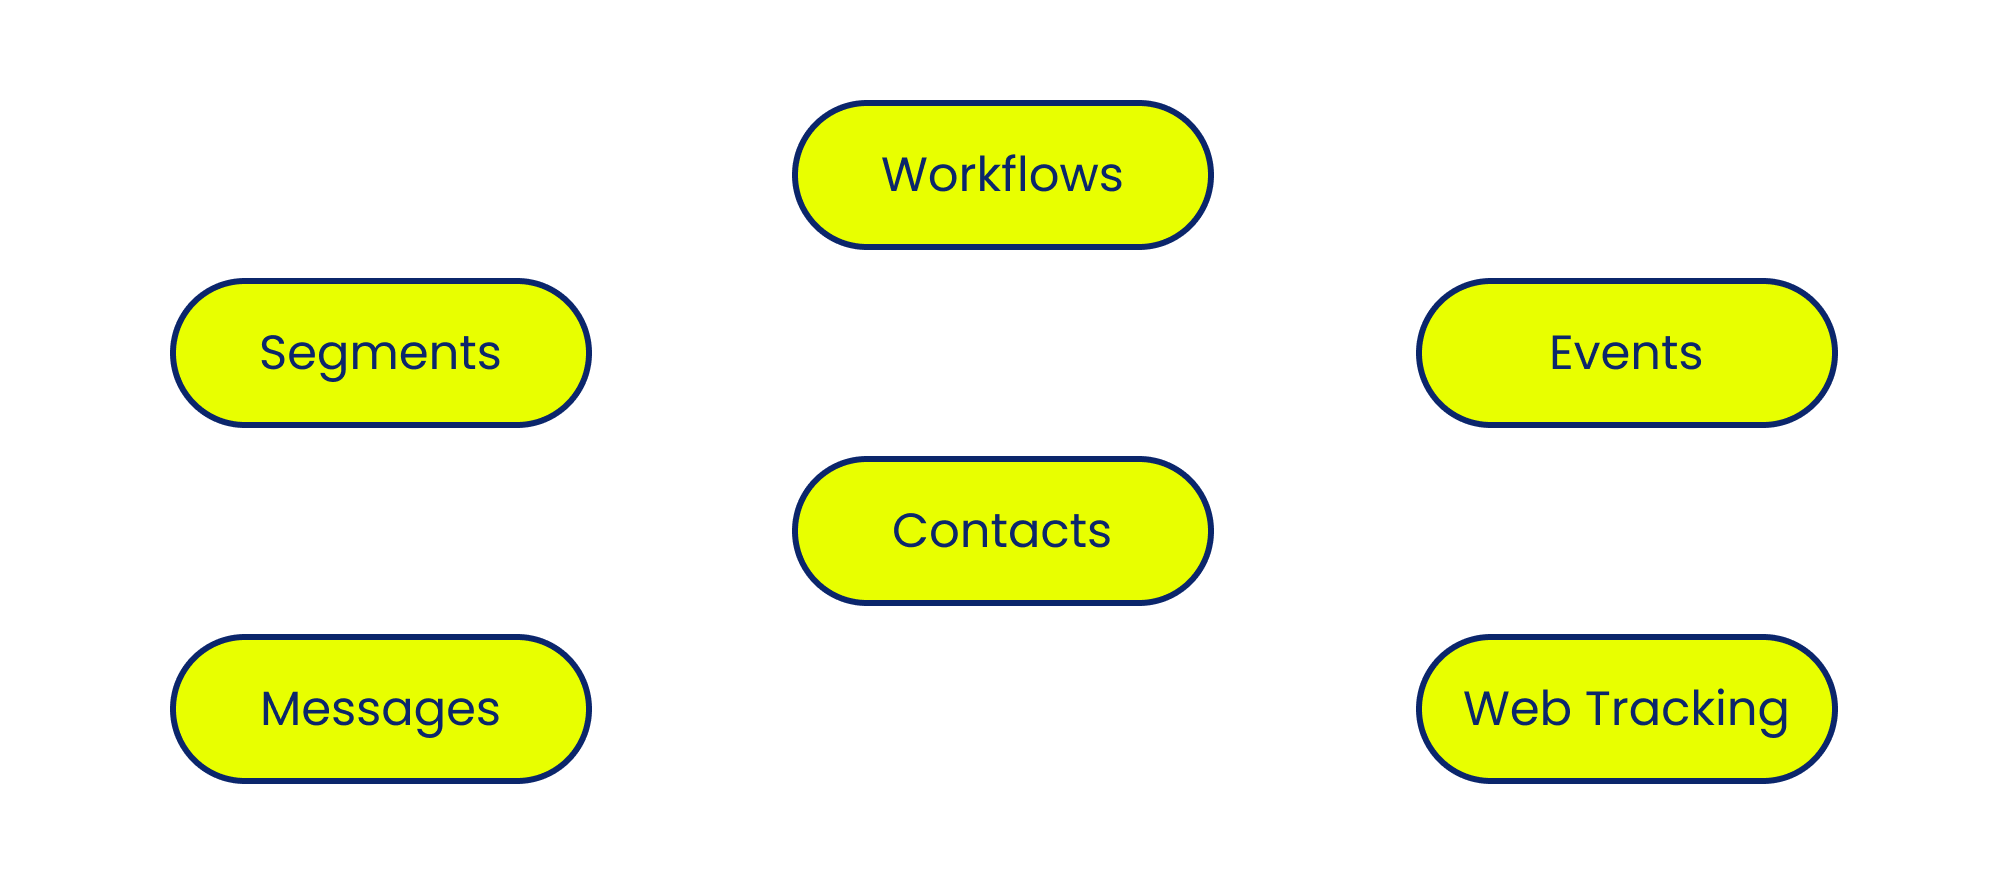
Contacts
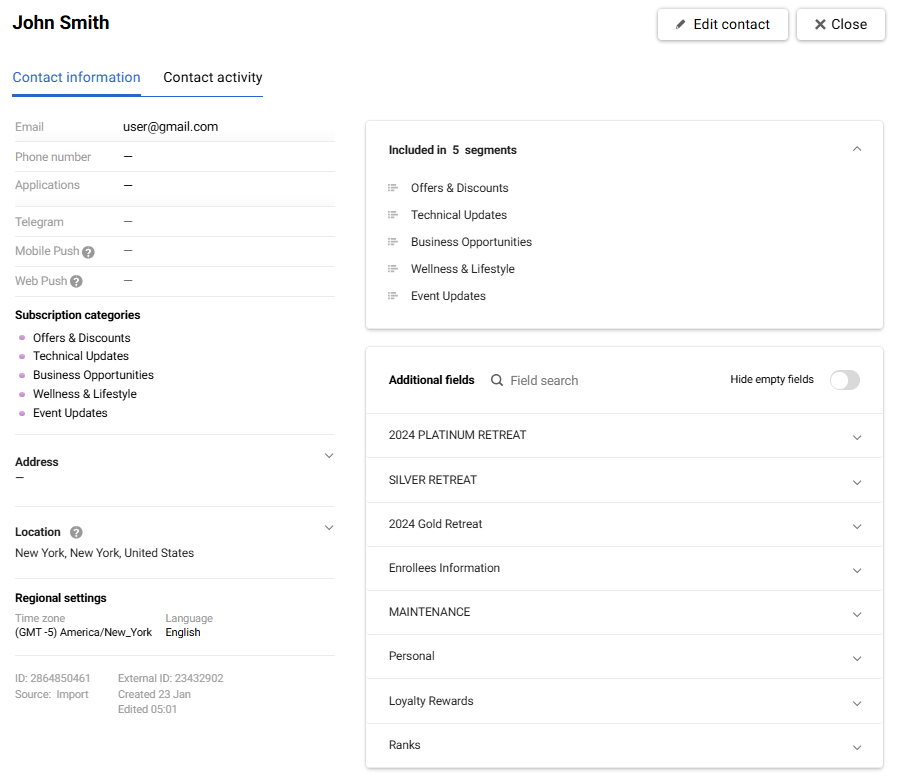
A Contact represents an individual interacting with your business via your website, app, or offline store.
All customer data is stored in Contact Cards (profiles), which include:
- Customer Identifiers — external ID, email, phone number, mobile, and push tokens.
- System Fields — time zone, location, language.
- Additional Fields — business-specific data such as purchase history, loyalty points, or product preferences.
With a 360-degree customer view, you can track cross-channel interactions and optimize engagement strategies.
Closely related to Contact are three essential concepts:
- External ID
- Additional Fields
- Contact Activity
External ID
The External ID is a unique identifier that consolidates all customer data (email, tokens, personal details, etc.). It serves as your internal user ID, ensuring that contact profiles remain consistent and free from duplication throughout the customer lifecycle.
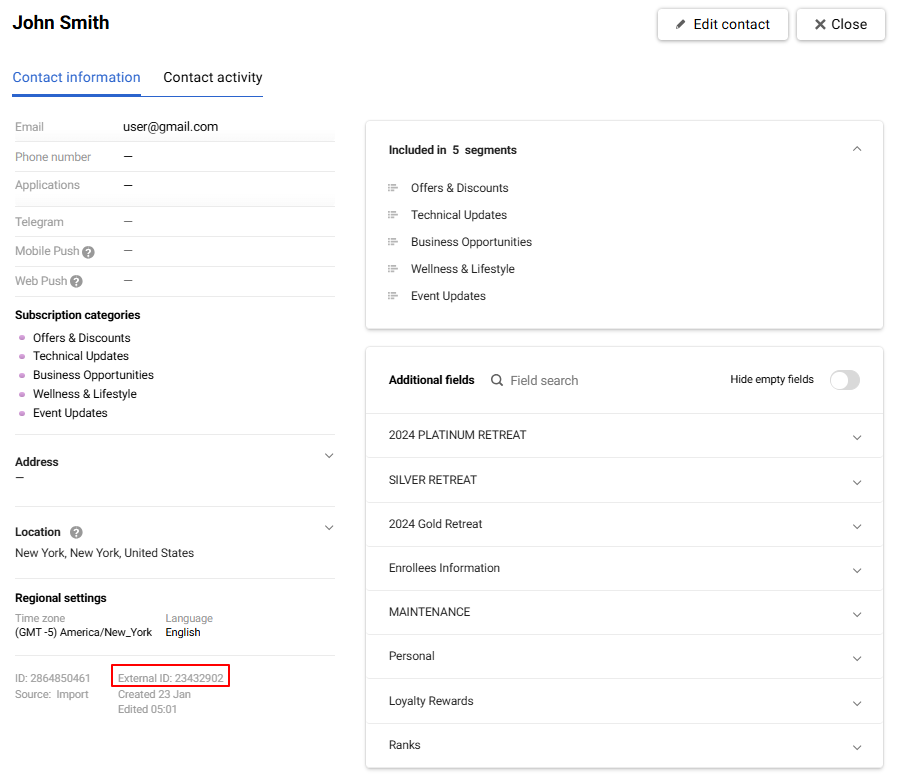
The External ID must remain unchanged for each customer, ensuring reliable data structuring across all interactions.
Note
Properly structured customer identification is crucial for your marketing strategy. To optimize your approach, we recommend exploring more about customer identifiers and data matching in Yespo.
Additional Fields
Additional fields are designed to store specific contact data, including:
- Static or rarely changed details: clothing size, age, gender, etc.
- Transactional data (e.g., total spent, last purchase date).
- Behavioral metrics (e.g., abandoned cart count, lifetime value, preferred brands).
More on creating additional fields >
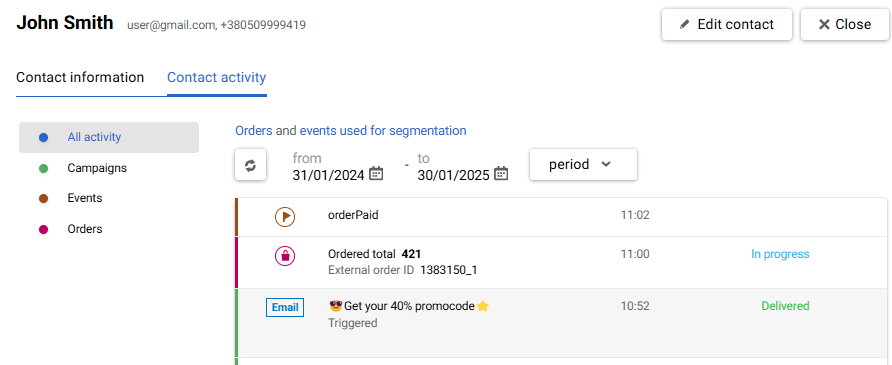
Contact Activity
The Contact activity tab logs all customer interactions, including:
- Order history
- Marketing engagement (email opens, push notification clicks, etc.)
- Events used for segmentation
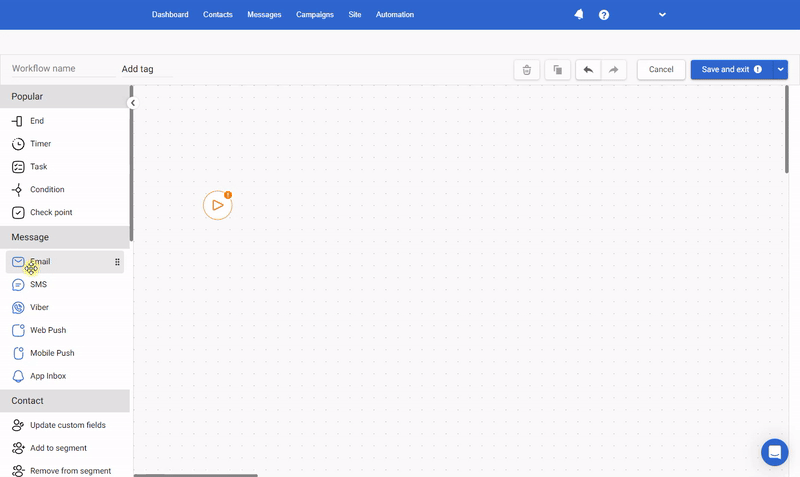
Workflows
A workflow (also known as a Customer Journey) is an automated sequence of actions triggered by predefined events or conditions with a particular marketing purpose. Workflows allow businesses to:
- Automate welcome series and abandoned cart reminders.
- Personalize post-purchase follow-ups and loyalty campaigns.
- Implement cross-sell and upsell strategies based on user behavior.
Yespo’s drag-and-drop editor makes workflow creation intuitive, ensuring seamless automation of marketing campaigns.
Events
Events represent user actions within your website, app, or messages, such as viewing products, placing orders, and opening emails. You can use system events and configure sending custom events. For instance, you can transmit the ReviewAnswered event every time a customer provides a product review. This event can include details, also known as parameters, such as the review ID, rating, response content, and response time. By tracking this data, you can personalize follow-up messages, encourage further engagement, and measure customer satisfaction effectively.
You can send event data to Yespo via:
- API resource (for websites and backend services).
- SDK (for mobile apps).
Event data is crucial for:
- Launching and stopping workflows,
- Building segments,
- Personalizing messages,
- Filtering product recommendations.
Segments
Segments group customers based on shared characteristics or behaviors, such as:
- Demographics (age, gender, location).
- Engagement data (email opens, push clicks).
- Purchase behavior (order history, spending patterns).
Yespo provides two segment types:
- Lists
- Dynamic Segments
Lists
The List is a static segment that could be created and updated manually, via workflows, or by transferring data via API. For example, you can make a list of contacts who clicked a specific link in the email.
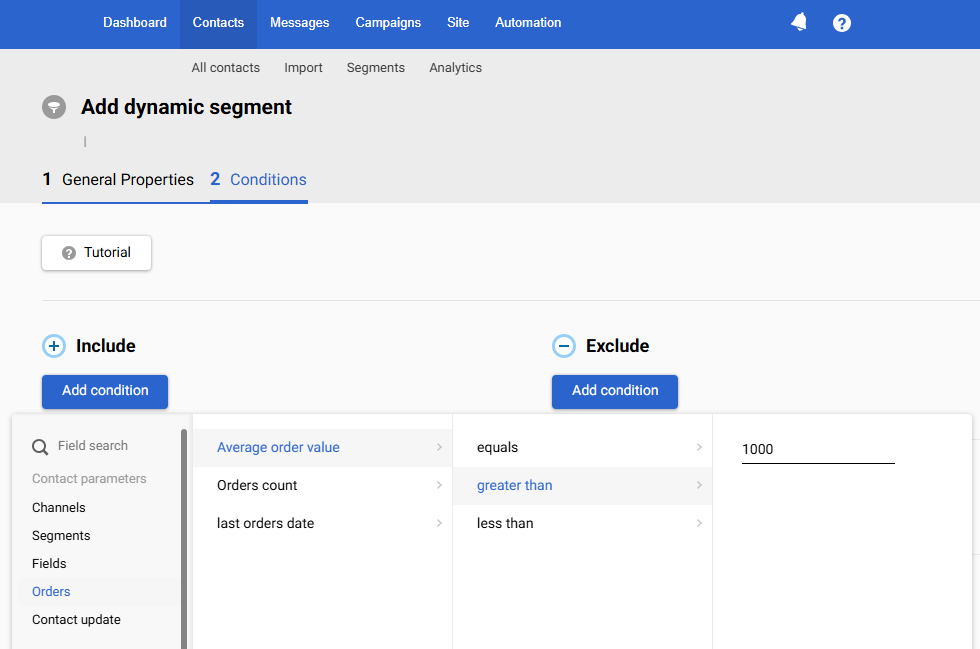
Dynamic Segments
Dynamic segments are a flexible tool for defining the target audience for your campaigns. Such segments automatically include contacts that match the rules specified in the segment settings. For example, you can select all customers with average order value for over 1000 $. The most valuable data for dynamic segment creation is information from events and their parameters.
With Yespo’s segmentation tools, you can refine audiences, apply complex filters, and integrate segments seamlessly into automated workflows.
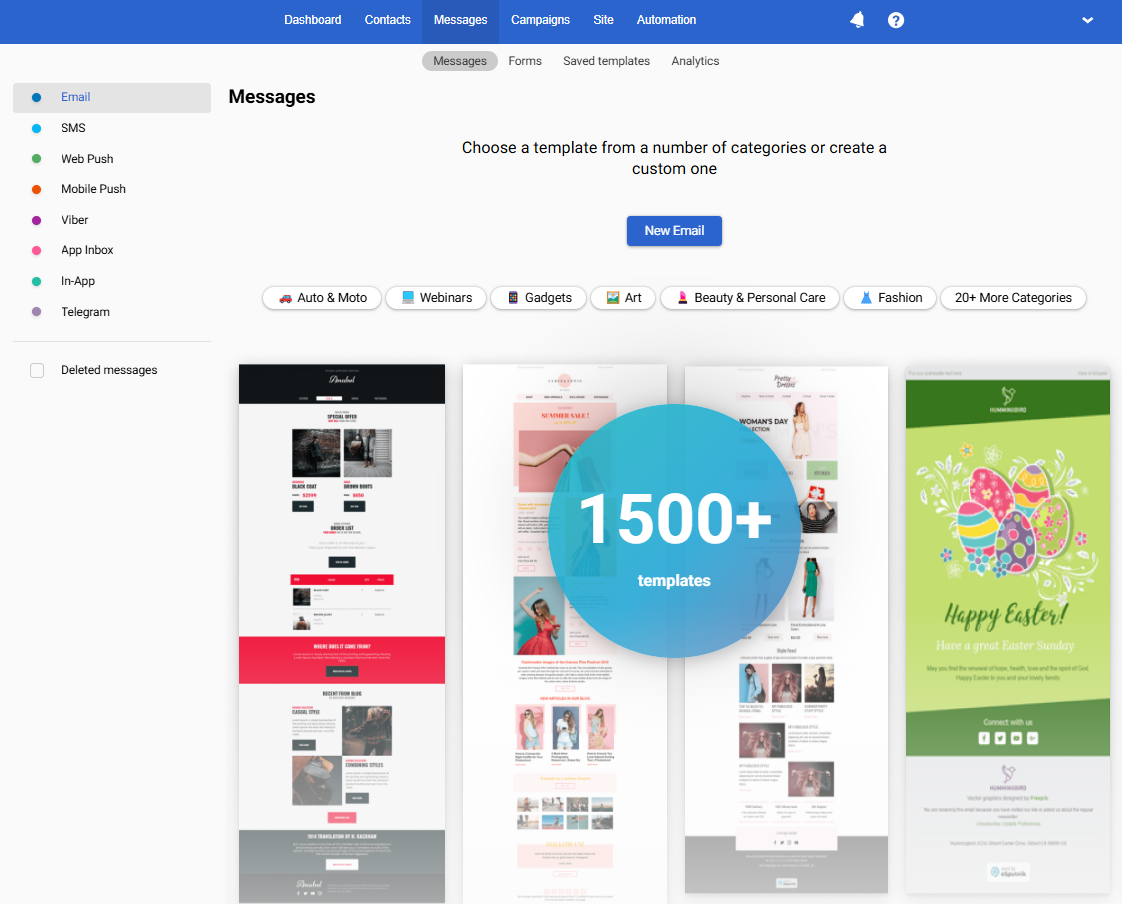
Messages
Effective omnichannel communication is key to increasing revenue. Yespo supports a variety of messaging channels, including:
- Mobile Push Notifications
- App Inbox
- In-App Messages
- Web Push Notifications
- Viber
- SMS
- Widgets
- Telegram
Manage these channels within a single platform and choose the most suitable tool for each situation. The more relevant channels you use in your omnichannel strategy, the more effective each channel will perform.
Yespo’s advanced message editors help create personalized, multilingual campaigns with reusable templates.
Web Tracking
Yespo's Web Tracking technology is a powerful tool that enables businesses to collect, analyze, and act on user behavior in real time. By tracking website interactions, you can:
- Deliver Personalized Product Recommendations based on browsing history and interactions.
- Trigger Behavior-Based Campaigns based on customer actions like abandoned carts and regular demand.
Implementing Web Tracking requires two simple steps:
Once configured, Web Tracking seamlessly integrates with your marketing automation strategy to boost engagement and conversions.
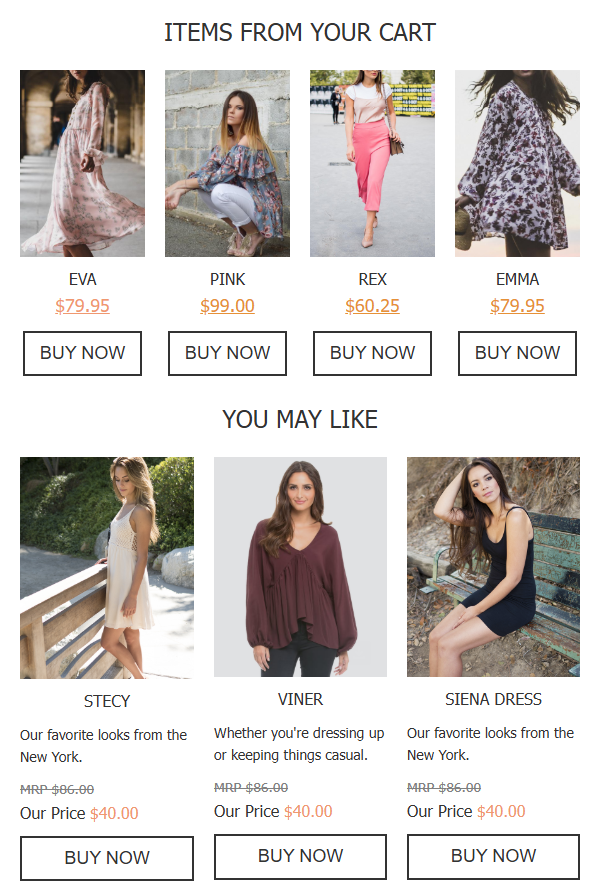
Recommendations
Yespo’s AI-driven Product Recommendations increase customer engagement by automatically suggesting relevant products based on user behavior. Recommendations can be displayed on:
Behavior Triggers
Behavioral Triggers are automated campaigns activated by specific customer actions, such as:
- Abandoned carts
- Product views
- Purchases of frequently reordered items
Messages can include up to six relevant products and six additional recommended products.
By upgrading to the Professional Plan, our team will set up these automated campaigns for you, ensuring they are fully functional and ready to drive conversions. You can then customize them further to match your business needs.
You can find a complete list and detailed descriptions of behavioral triggers at the following link.
Tags
Tags help organize messages, segments, reports, and workflows under common marketing objectives. Tagging makes it easier to filter and search different objects in your account. Tags are also used in the One from many workflow block, which automates A/B testing, diversifies triggered communication, and defines the most effective message from the pool of options.
Get Started Today!
Take the next step in optimizing your marketing strategy with Yespo.
Updated 3 months ago